In this guide, we shall see what is external interrupt and develop a driver to detect the interrupt from external push-button using HAL API on STM32G070.
In this guide, we shall cover the following:
- What is external interrupt.
- Developing external interrupt driver.
- Connection
- Results.
1. What is External Interrupt:
External Interrupts :
External interrupts come from input-output I/O devices.
Some examples that cause external interrupts:
- I/O devices requesting transfer of data
- I/O devices finished the transfer of data. When a program executes in an endless loop and thus exceeds its time limit, an external interrupt occurs which is Timeout Interrupt.
- While transferring the CPU’s complete state to a non-destructive memory in a few milliseconds before power ceases, then an external interrupt occurs.
Advantages of External Interrupts
- Increased Flexibility: External interrupts allow a system to respond to external events, such as a user input or an external sensor, in real-time. This can greatly improve the system’s flexibility, as it is not limited to a fixed operating cycle.
- Ability to Respond to External Events: External interrupts provide a mechanism for the system to respond to external events that may occur at any time. This allows the system to perform tasks in response to changes in the environment, such as user input or incoming data, without the need for continuous monitoring.
- Improved Performance and Efficiency: By allowing the system to respond to external events in real-time, external interrupts can greatly improve the system’s performance and efficiency, as it is not bogged down by continuous monitoring for changes.
Applications of External Interrupts
- Input Devices: External interrupts are commonly used in input devices, such as keyboards, mice, and touchpads, to respond to user input in real-time.
- Data Acquisition Systems: External interrupts can be used in data acquisition systems to respond to incoming data and process it in real-time.
- Robotics: External interrupts can be used in robotics systems to respond to external events, such as sensor inputs or user commands.
- Real-time Systems: External interrupts are commonly used in real-time systems, such as process control systems and medical equipment, to provide a mechanism for responding to external events in real-time.
2. Developing external interrupt driver:
We start off by creating a new project with name of external_interrupt, for how to create new project on STM32G070, please refer to this guide here.
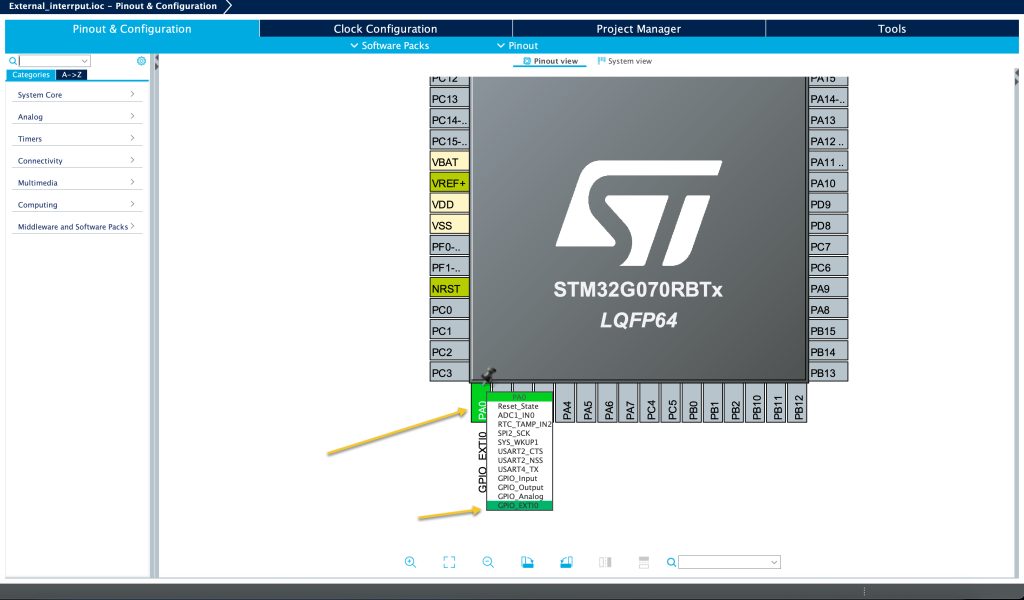
Then select pin PA0 as external interrupt as following:
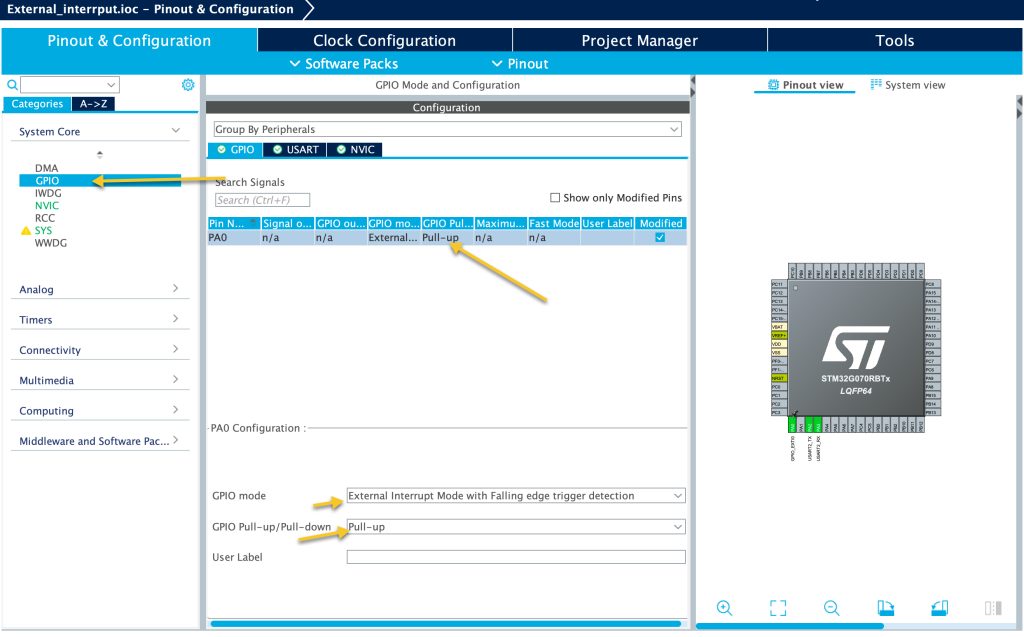
Then from System Core then GPIO, set the following:
- GPIO mode to External Interrupt Mode with falling edge trigger detection (you could use rising edge since it depends on your application).
- Enable the Pull-up.
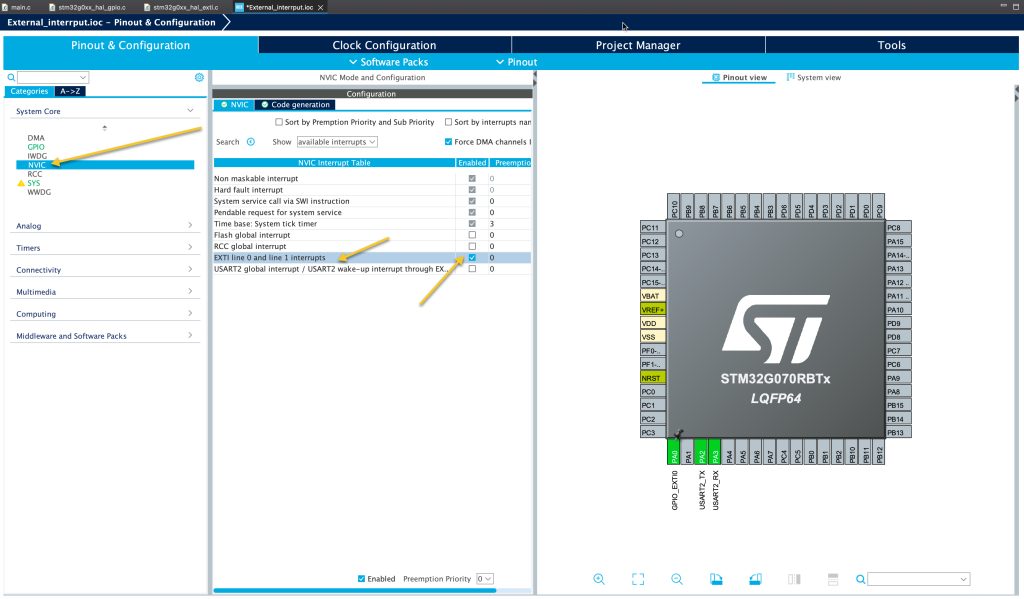
Then from NVIC, enable EXTI0_1 as following:
Also, enable the uart2, you can check this guide for how to enable the UART from here.
That all for the configuration. Save the project and this shall generate the code.
In main.c file:
In User begin include, include the stdio header file as following:
/* USER CODE BEGIN Includes */
#include "stdio.h"
/* USER CODE END Includes */
Within user begin PV, declare the following:
/* USER CODE BEGIN PV */
volatile uint8_t interrupted=0;
uint8_t uart_buffer[50];
/* USER CODE END PV */
The volatile will force the compiler to not optimized the variable and it it could be updated at any time.
second one is just buffer to hold the data to be transmitted.
In while 1 loop, user code begin 3:
	  if(interrupted==1)
	  {
		  uint16_t len;
		  len = sprintf(uart_buffer, "Interrupt detected\r\n");
		  HAL_UART_Transmit(&huart2, uart_buffer, len, 100);
		  interrupted=0;

	  }
If there is a pending interrupt, print an interrupt detected and reset the variable back to zero.
In STm32G0xx_it.c file:
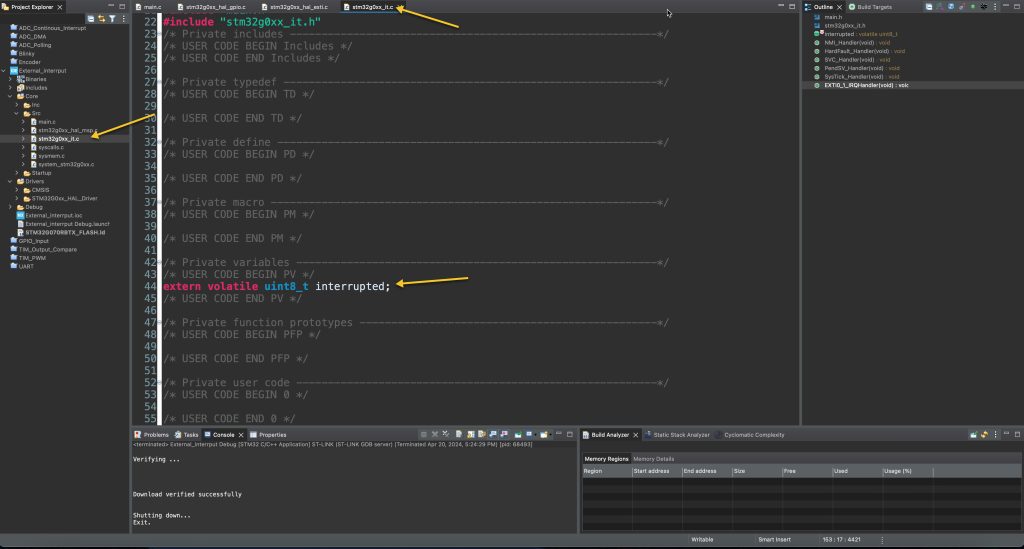
In user code begin PV, declare the volatile as extern as following:
extern volatile uint8_t interrupted;
In EXTI_0_1 interrupt handler function, in user code begin 1 of the function, set the variable to 1 as following:
interrupted=1;
Thats all, save the project, build and run it on your MCU.
3. Connection:
The connection as following:

4. Results:
Press the push-button and you should get the following:

Happy coding 😉
Add Comment