In this guide series, we’ll explore how to build interactive graphical interfaces using Riverdi displays, starting with a simple yet powerful example. In this first part, you’ll learn how to create a basic UI that links a slider to a gauge, allowing real-time visual control and feedback.
In this guide, we shall cover the following:
- Introduction.
- Hardware setup.
- UI creation.
- Control UI element.
- Results.
1. Introduction:
In this first part of the Riverdi display guide series, we’ll take a hands-on approach to building a simple yet engaging graphical user interface using TouchGFX. This tutorial is designed to help you get familiar with the fundamental steps of UI development on Riverdi displays — from setting up the project to designing interactive elements that respond smoothly to user input. We’ll create a clean and intuitive screen layout that includes a slider and a gauge, two essential components commonly used in control panels and instrumentation displays.
You’ll learn how to configure the slider to dynamically control the gauge’s needle position, providing immediate and visual feedback to touch input. Along the way, we’ll discuss key TouchGFX concepts such as widgets, signal connections, and screen updates to give you a solid foundation for more complex applications in future parts of this series. By the end of this guide, you’ll have a fully working example that demonstrates the seamless integration of touch interaction and real-time graphics on a Riverdi display — an excellent starting point for building your own professional-grade embedded GUI.
2. Hardware Setup:
The setup as follows:
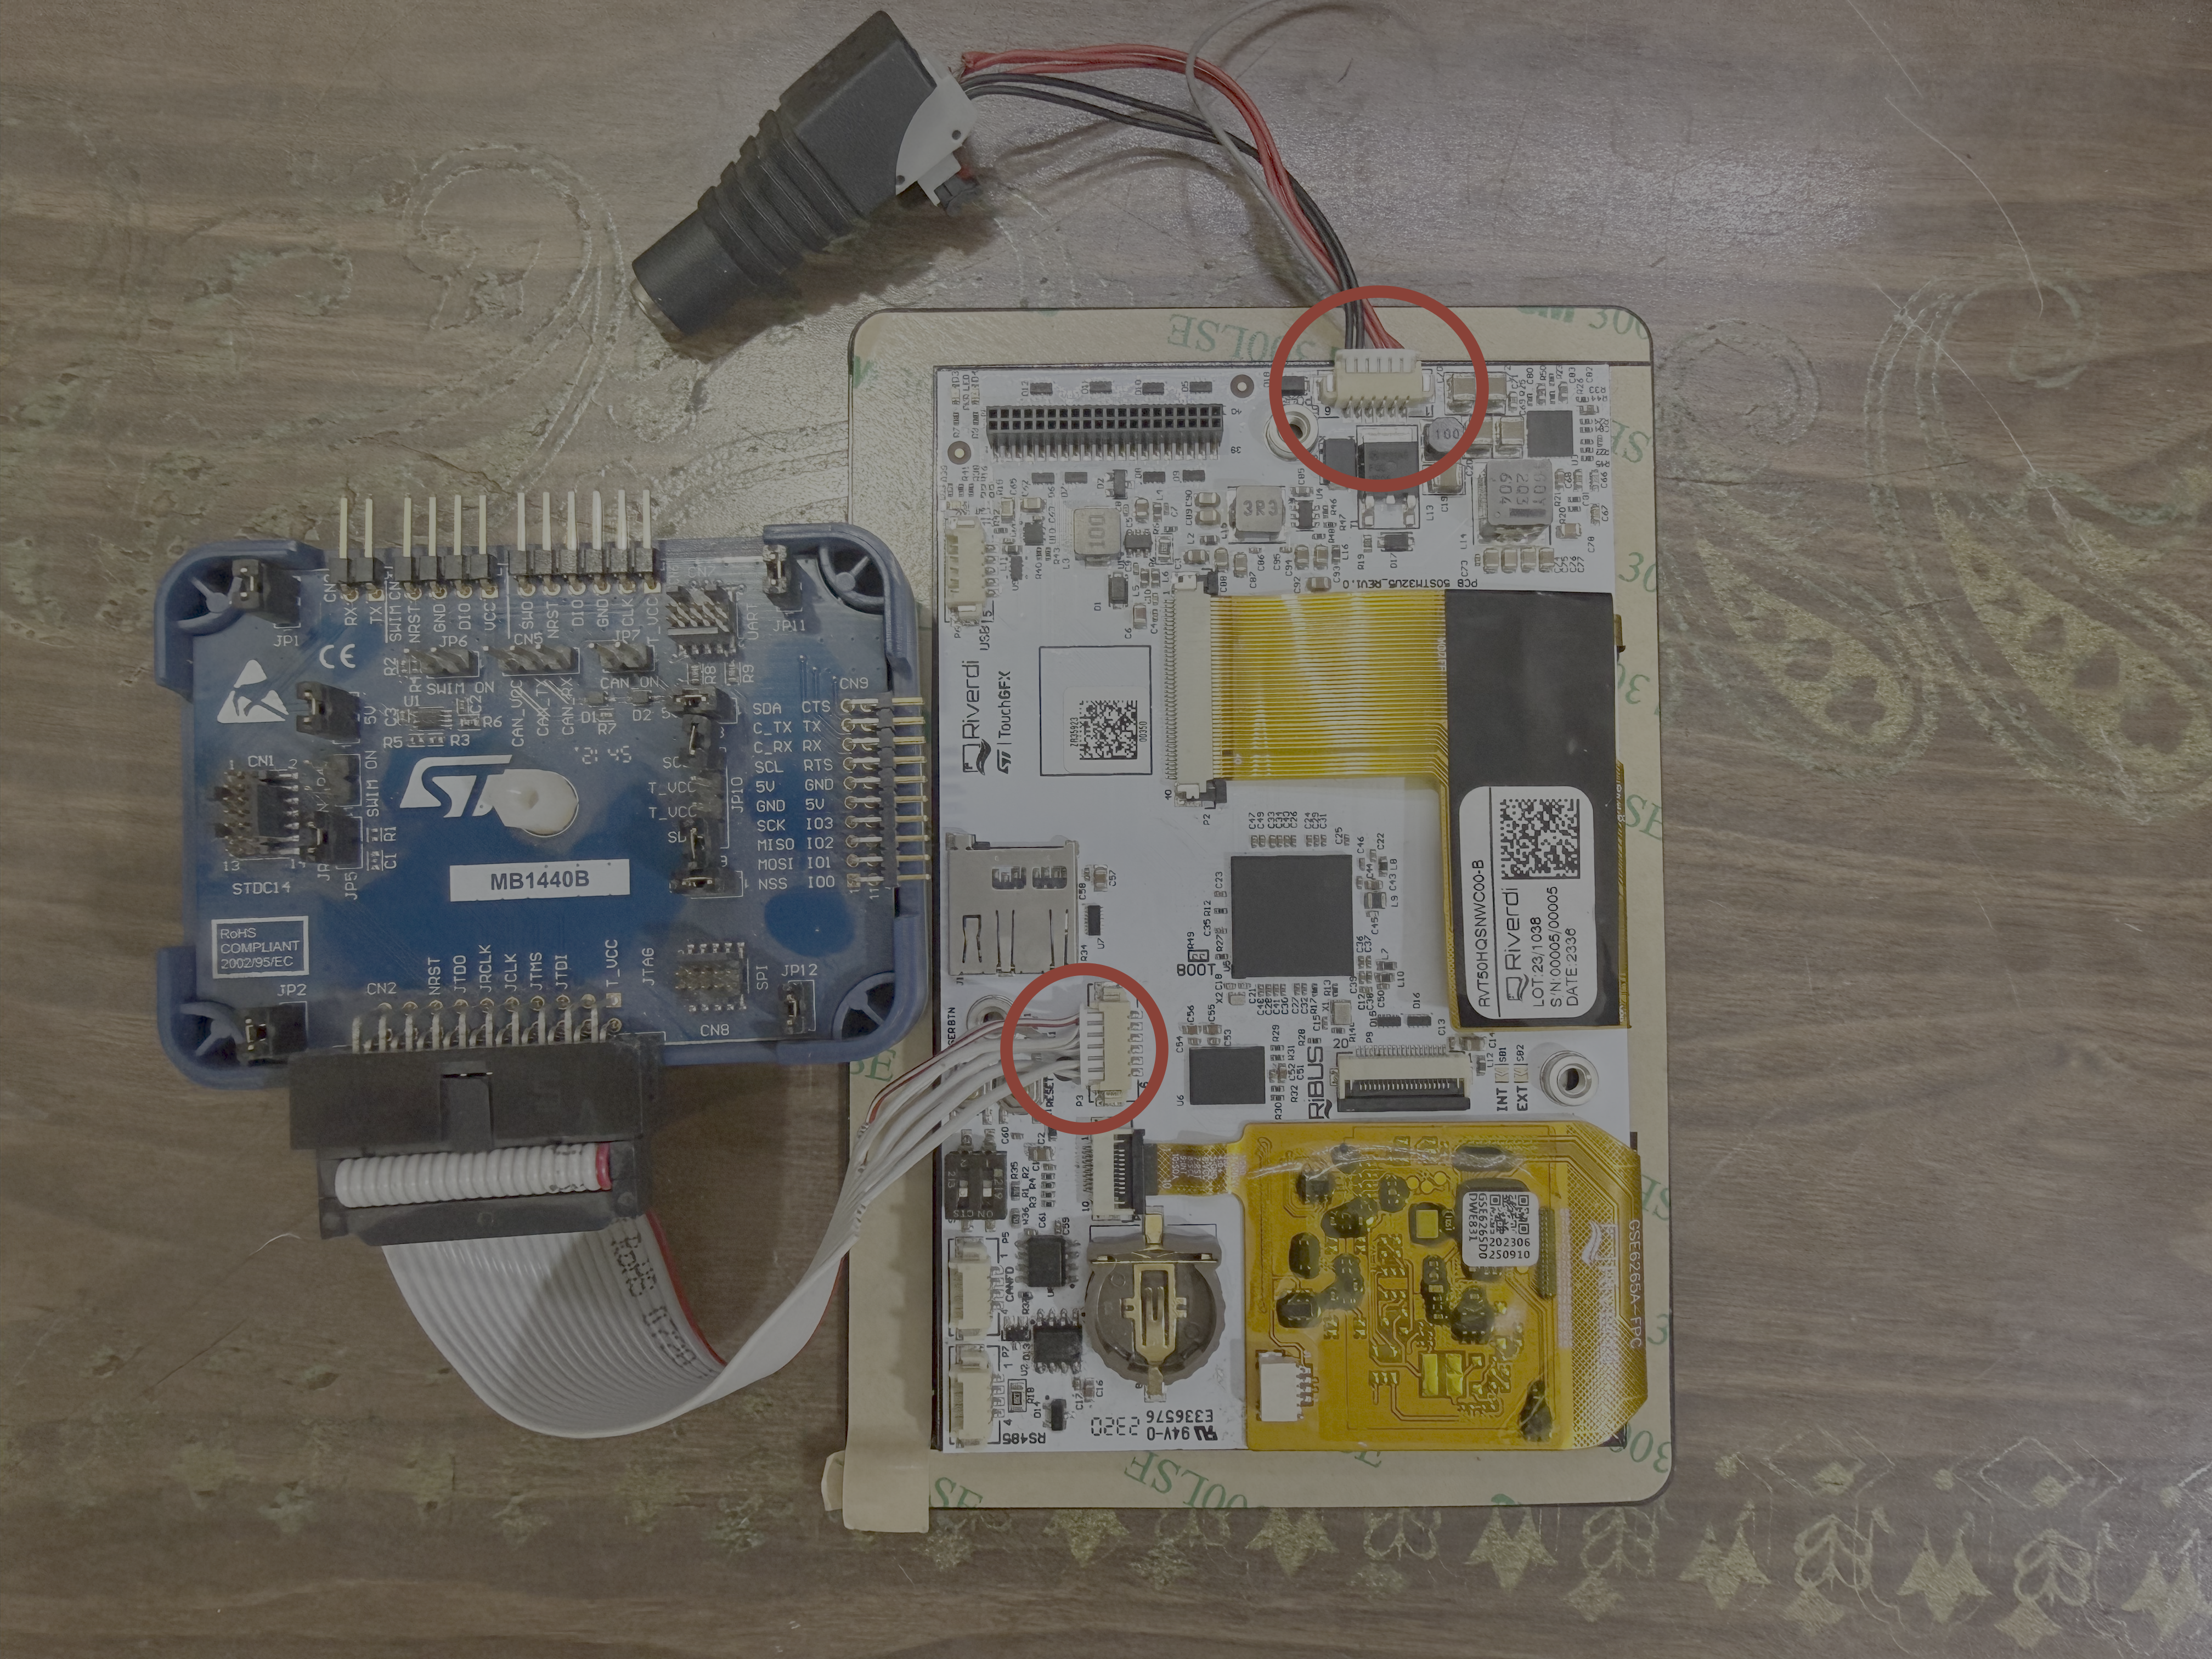
Connector P3 is the SWD connector, you need to use RVA-SWD-06M-C100 V2 connector to connect ST-Link. ST-Link V3 Set is shown in the picture.
Connector P10 is the power connector, you need to use RVA-0106M-1.25FF-1 and provide power to the display. A 12V power supply is used to provide the power.
3. UI Creation:
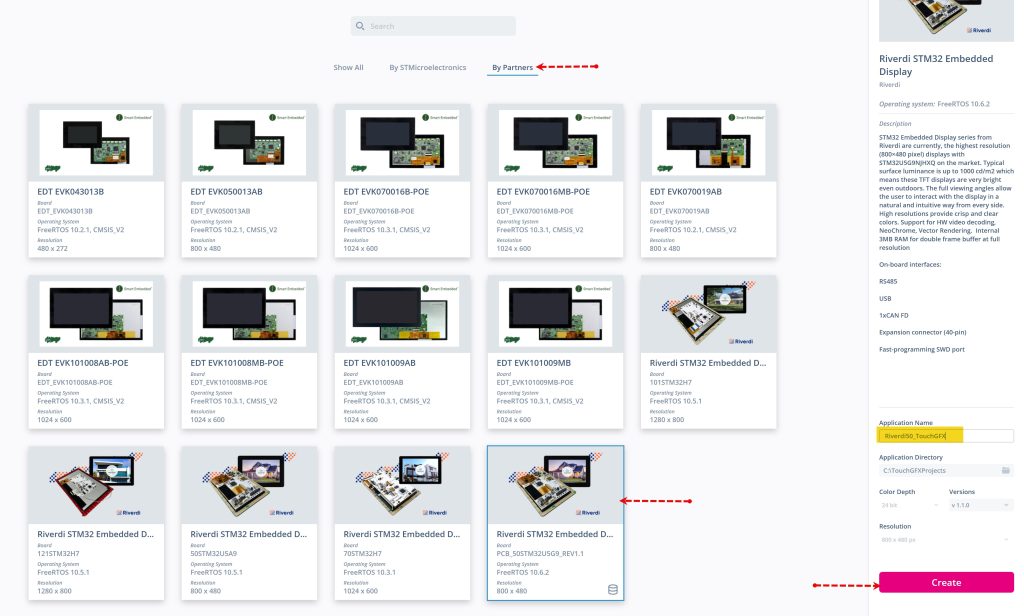
Open TouchGFX. Once TouchGFX has been launched, click on Create as follows:

Click on By Partners.
- Select Riverdi STM32 with PCB_50STM32U5G9.
- Give the project a name (Riverdi50_TouchGFX for example).
- Click on Create.
Once the project is create.
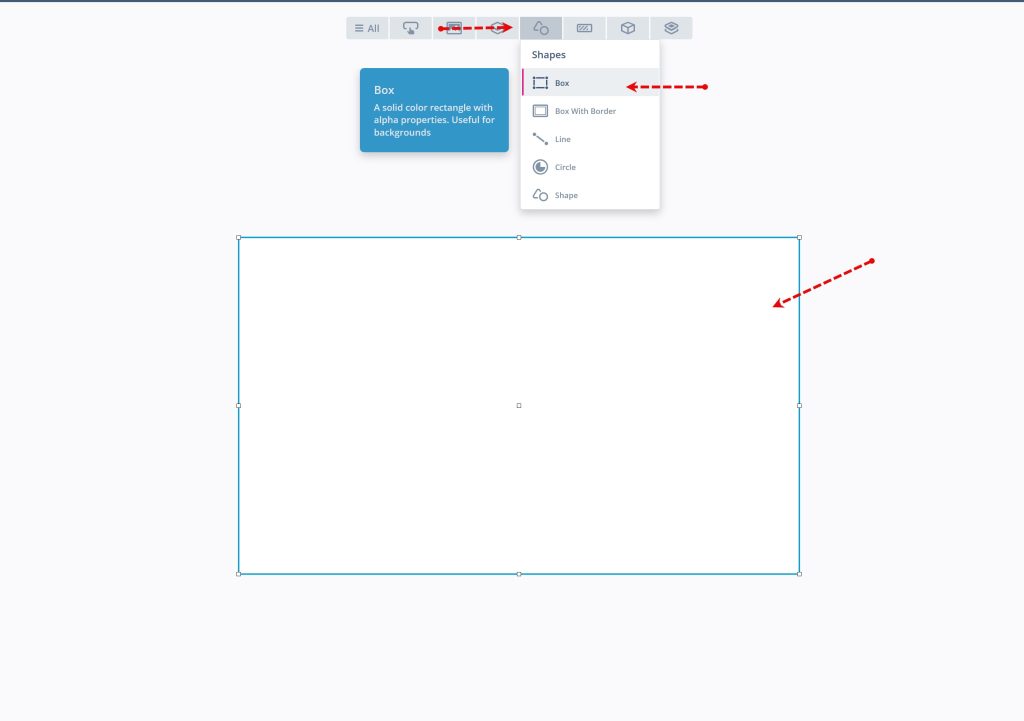
Click on Shapes and select Box, let the box cover the entire screen as follows:
Next, from Miscellaneous, select the Gauge and place it accordingly.
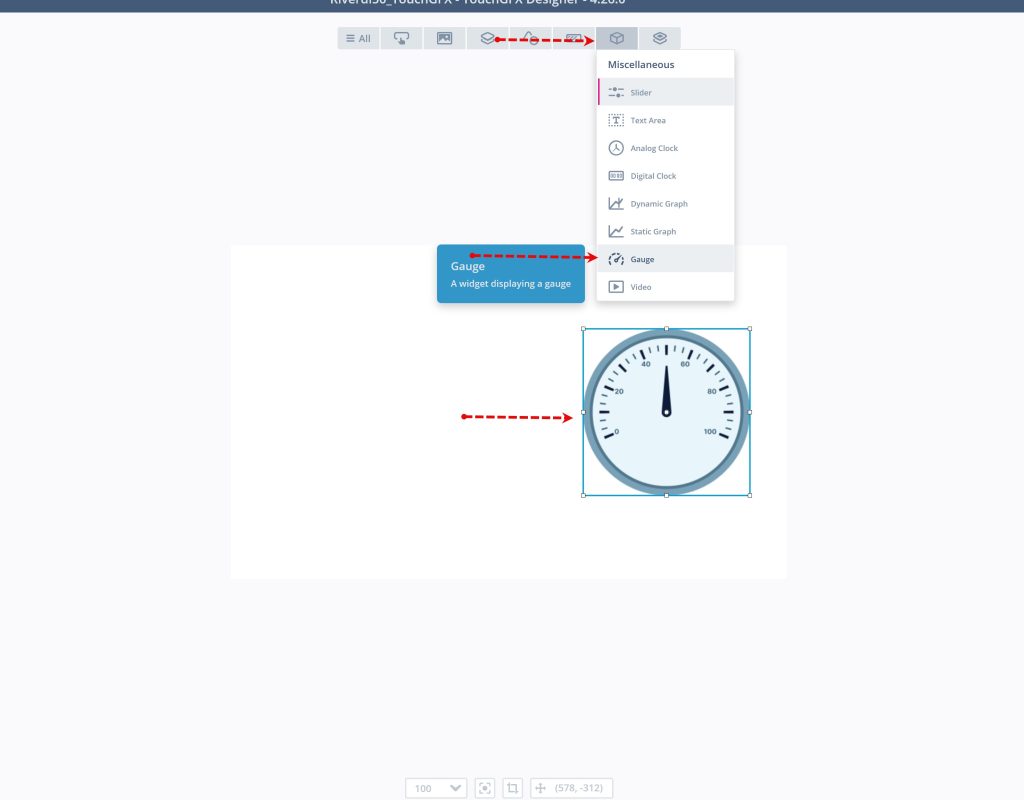
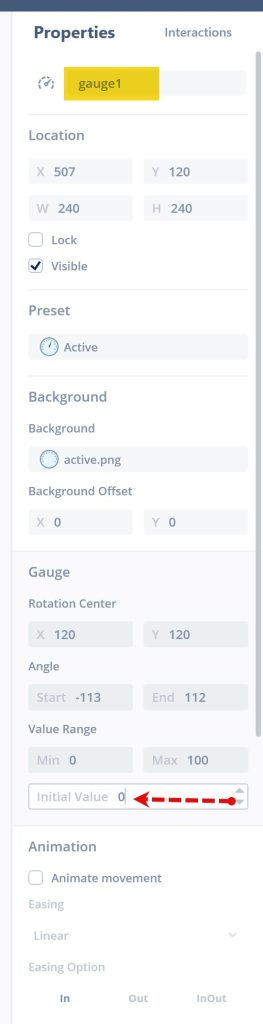
From Properties of Gauge, set the initial value 0 also, take note about the name (gauge1 in this case or you can rename it if you like).
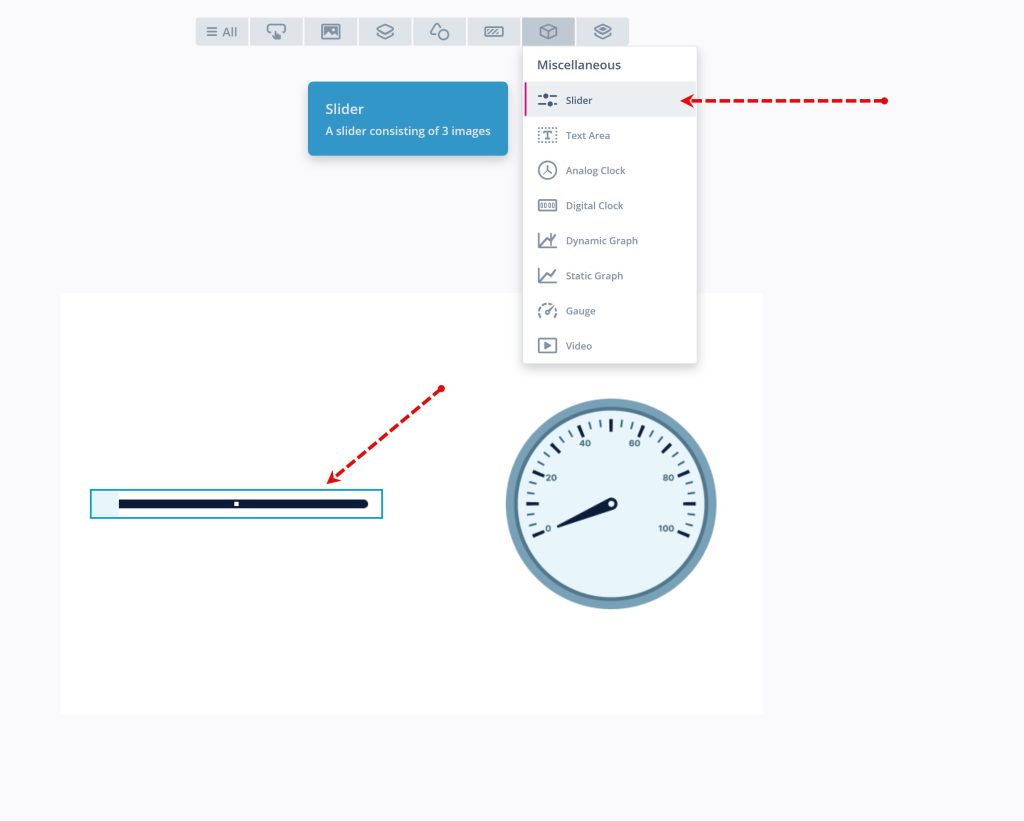
Next, add slider by clicking on Miscellaneous and the slider and position the slider accordingly.
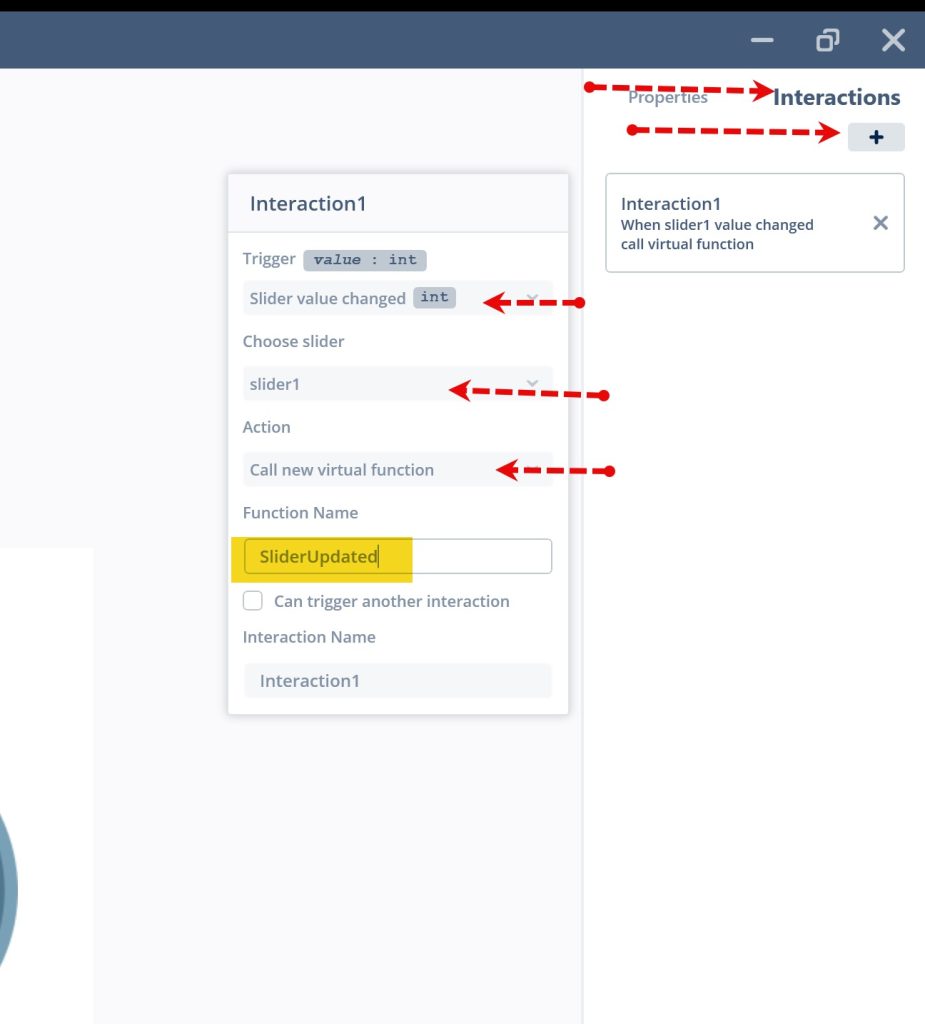
Next, we need to add interactions for the slider.
Click on slider and from right select interactions as follows:
Add new interaction with the following parameter:
- Trigger: Slider value changed.
- Choose slider (Slider1 or the name you gave to the slider).
- Action: Call new virtual function.
- Function Name : SliderUpdated ( Or any other name).
Next, click on generate code (or press F4) as follows:

Thats all for UI. Keep TouchGFX opened. We shall use to flash the display.
4. Control UI element:
Head to the following folder:
ProjectLocation\ProjectName\TouchGFX\gui\include\gui\screen1_screen
Within the folder, open Screen1View.hpp with a text editor. In the public section of the header file, add the following virtual function:
virtual void SliderUpdated(int value);
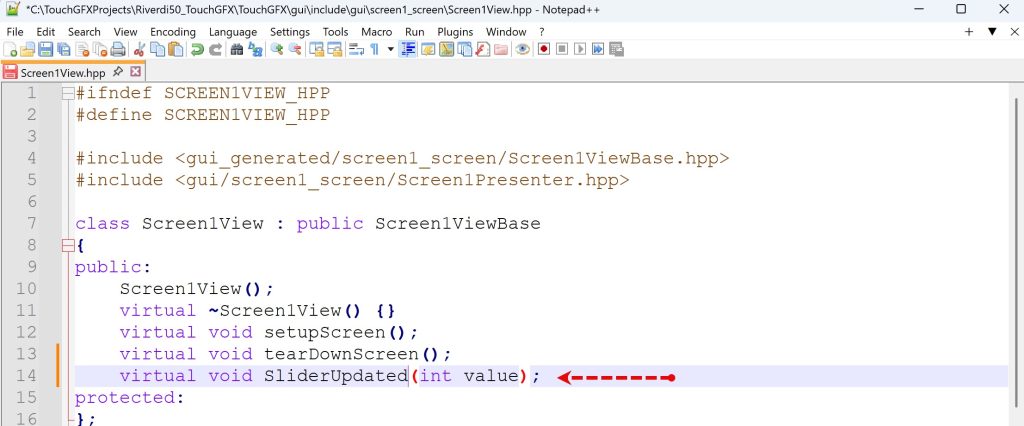
Note: If you gave different name to the function, then you need to modify the function to reflect the name you gave.
Next, head to the following folder:
ProjectLocation\ProjectName\TouchGFX\gui\src\screen1_screen
Within the folder, open Screen1View.cpp with a text editor.
Add the new following function:
void Screen1View::SliderUpdated(int value)
{
	gauge1.setValue(value);
	gauge1.invalidate();
}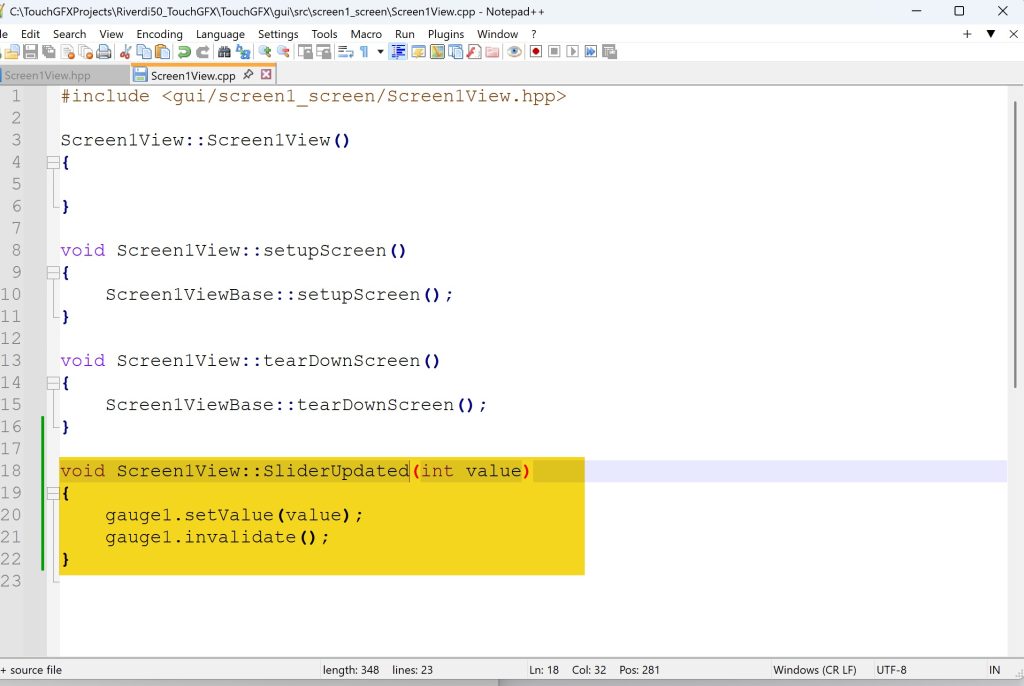
Note: If you gave the gauge different name, replace gauge1 with the given name.
Save both header and source files.
Now, head back to TouchGFX and click on Program and Run on Target as follows:
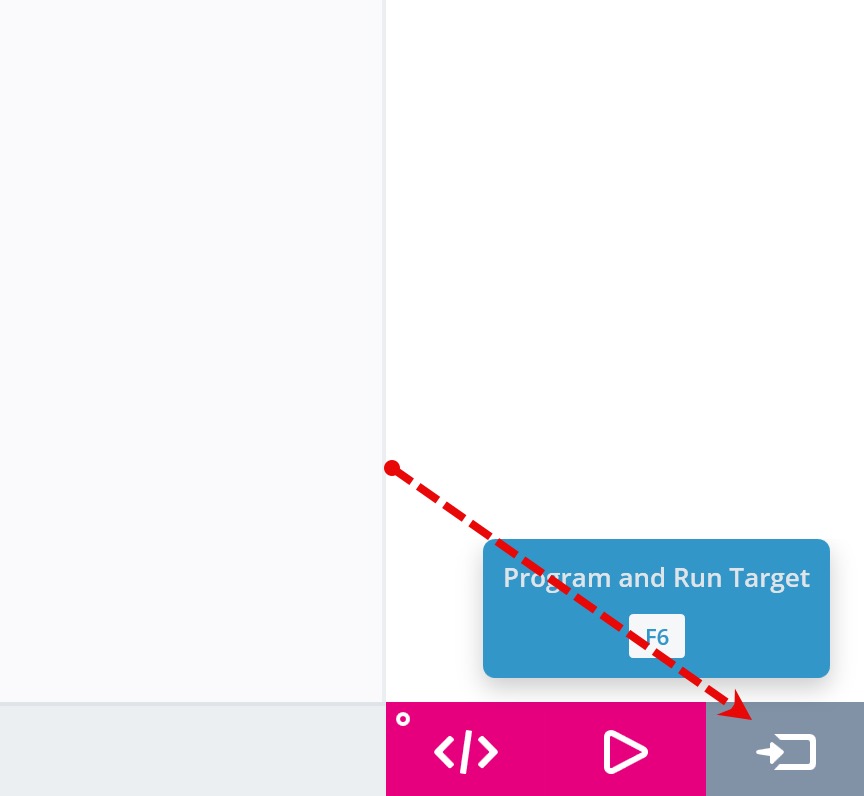
This will compile and flash the display.
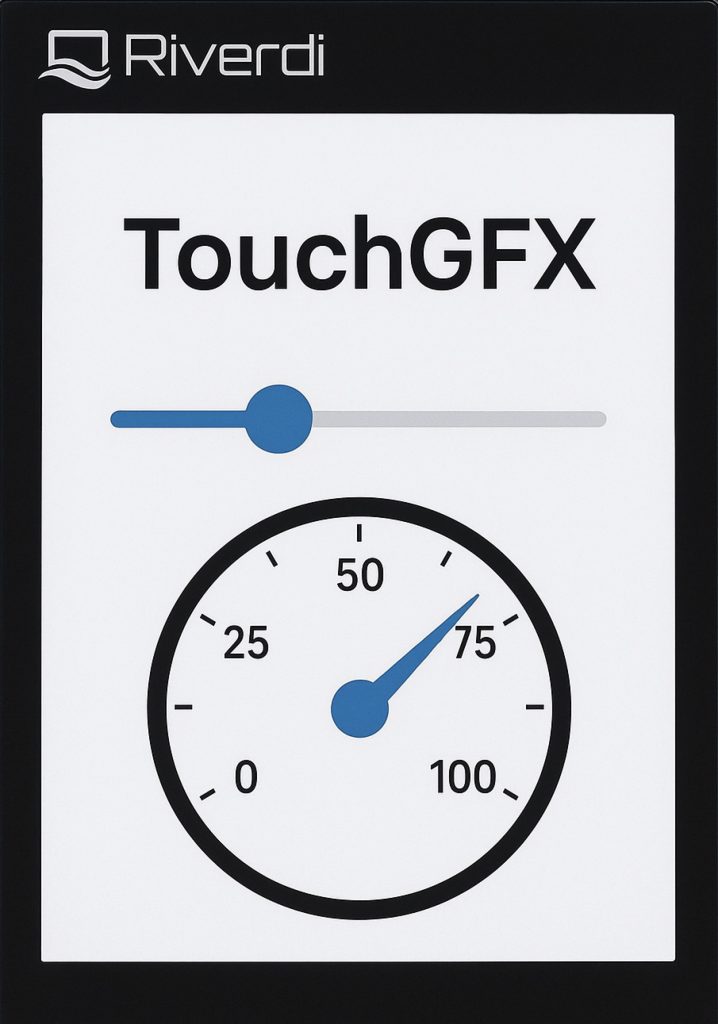
5. Results:
Once the flashing process is completed, the display will be restarted and the UI will be displayed.
Happy coding 😉
Add Comment