U8G2 is a powerful, open-source graphics library ideal for driving monochrome OLEDs and LCDs with STM32 microcontrollers, offering extensive display support and efficient rendering. This first part of the guide covers the essential steps for setting up your STM32 hardware with an OLED display and configuring the STM32CubeIDE environment to prepare for U8G2 integration.
In this guide, we shall cover the following:
- Introduction.
- OLED Connection.
- STM32CubeIDE setup.
- Get the required files.
1. Introduction:
The U8G2 graphics library has become a cornerstone in embedded development, renowned for its versatility in driving monochrome OLEDs, LCDs, and e-paper displays across a vast array of controllers—from ubiquitous SSD1306 OLEDs to niche PCD8544 Nokia screens. Its lightweight architecture, rich feature set (including scalable fonts, geometric primitives, and efficient buffer management), and cross-platform compatibility make it an ideal choice for developers seeking to create polished graphical interfaces on resource-constrained microcontrollers like STM32. However, while U8G2 enjoys widespread adoption in Arduino ecosystems, its integration into professional STM32 workflows using STM32CubeIDE remains a less-documented process, often leaving developers to navigate complex configurations, hardware abstraction layers, and toolchain nuances without clear guidance.
This guide bridges that gap, providing a systematic, step-by-step approach to porting U8G2 to STM32CubeIDE—STMicroelectronics’ official integrated development environment that combines HAL/LL libraries, peripheral configuration tools, and debugging capabilities. Part 1 focuses on the foundational pillars: hardware setup for interfacing an OLED display (e.g., SSD1306 via I2C or SPI) with an STM32 microcontroller, and environment preparation within STM32CubeIDE. We will demystify critical prerequisites such as selecting the correct U8G2 display driver, configuring communication protocols (I2C/SPI), setting up GPIO pins, and integrating the U8G2 source files into a CubeIDE project. By the end of this section, you will have a fully configured hardware and software environment, ready to compile and deploy U8G2-based graphics onto your STM32 board—paving the way for advanced display implementation in subsequent parts of this series.
Key Elements Covered in This Introduction:
- U8G2’s Significance
- Highlights its role in embedded graphics, display support breadth, and efficiency for STM32.
- The STM32CubeIDE Challenge
- Acknowledges the lack of streamlined documentation for U8G2 in CubeIDE vs. Arduino.
- Scope of Part 1
- Clearly defines the focus on hardware wiring and IDE setup (not code implementation).
- Practical Outcomes
- Sets expectations: Readers will complete a functional hardware/IDE foundation.
- Audience Alignment
- Targets developers moving from Arduino to professional STM32 workflows.
2. OLED Connection:
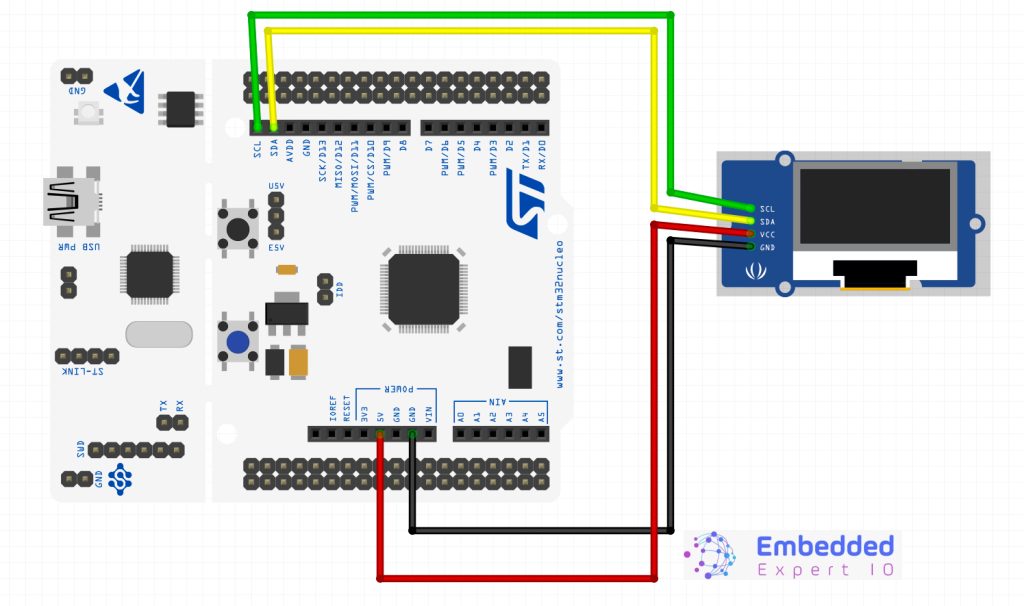
To interface an OLED display with STM32F411, we use four pins only such as Vcc, GND, and I2C communication pins such as SCL and SDA. STM32F411 microcontroller which comes with STM32F411 has three built-in I2C modules such as I2C1, I2C2 and I2C3.
In this tutorial, we will use the I2C1 module of STM32F411 to communicate with OLED. For I2C1 port, PB9 and PB8 (GPIOB) are SDA and SCL pins respectively. Now make connection with STM32F411 and OLED display according to the diagram shown below:
| STM32F411 | SSD1306 OLED |
|---|---|
| PB8 /I 2C1 | SCL |
| PB9 / I2C1 | SDA |
| 3.3V | Vcc |
| GND | GND |
3. STM32CubeIDE Setup:
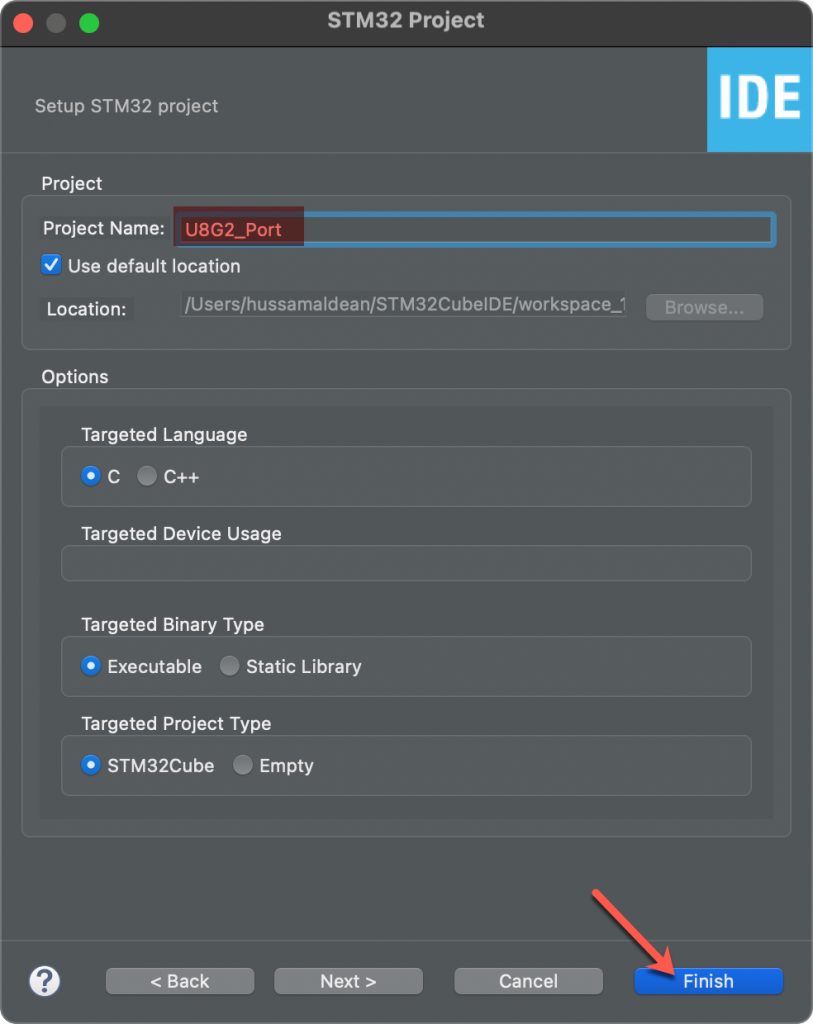
Open STM32CubeIDE after selecting the workspace and create new project as following:

Select the MCU:

Give the project a name:
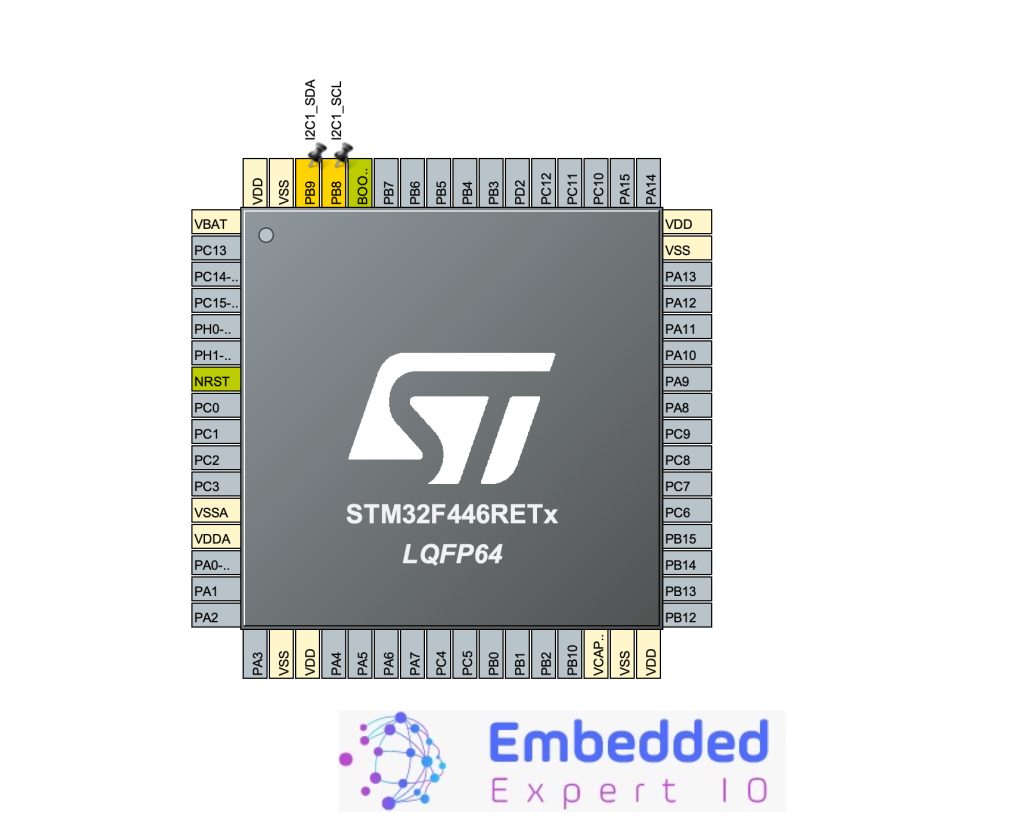
Once the project has been created, STM32CubeMX tab shall appear.
After that, set PB8 and PB9 for I2C1 or I2C3, here we shall use I2C1 as following:
Next, configure the I2C as follows:
- Set Speed to fast mode and this will set the clock to 400KHz.
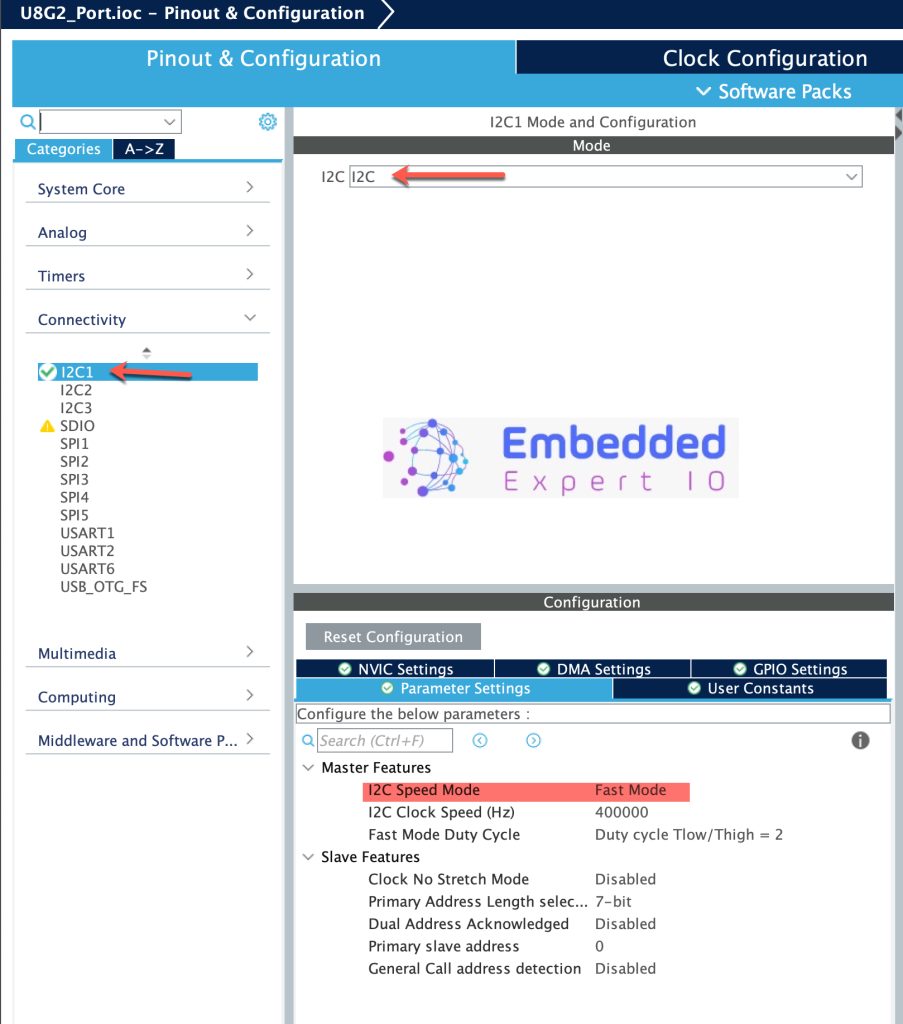
Thats all for the configuration.
Save the project and this will generate the project.
4. Getting the Required Files:
Next, head to this github repository and download the library as follows:
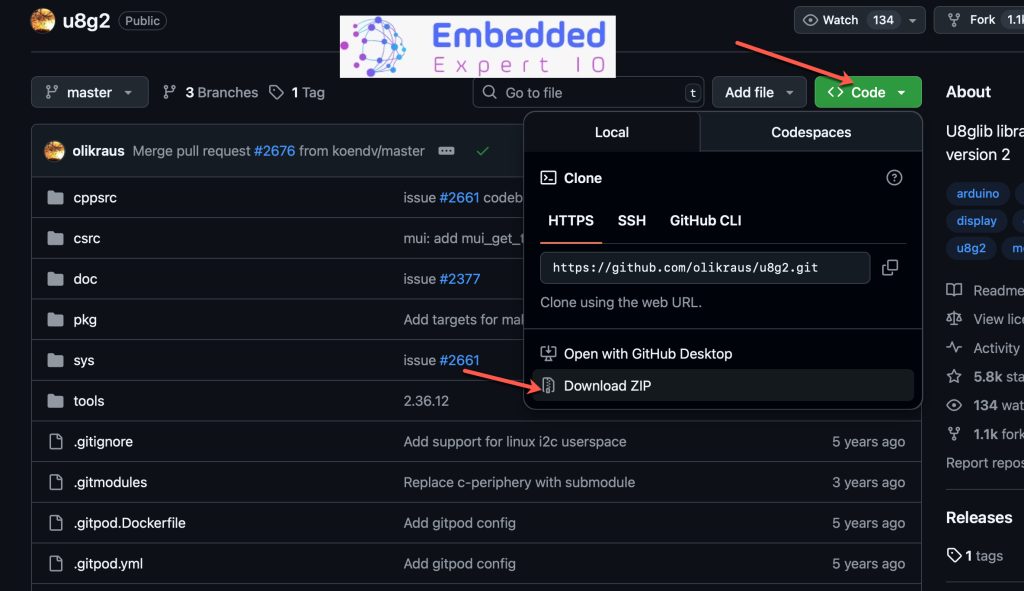
In part 2, we shall include it in the IDE and interface it with OLED display.
Stay tuned and happy coding 😉
Add Comment