
In this guide, we shall see how to configure the I2C to work in DMA and transmit and receive data from a slave device (DS3231 RTC).
In this guide, we shall cover the following:
- Configure I2C to work in DMA.
- Develop the main code.
- Results.
1. Configure I2C to Work in DMA:
We shall continue from the previous guide from here.
Open i2c_fullduplex.ioc file as following:
Next, from connectivity, select I2C1, then NVIC setting as following:
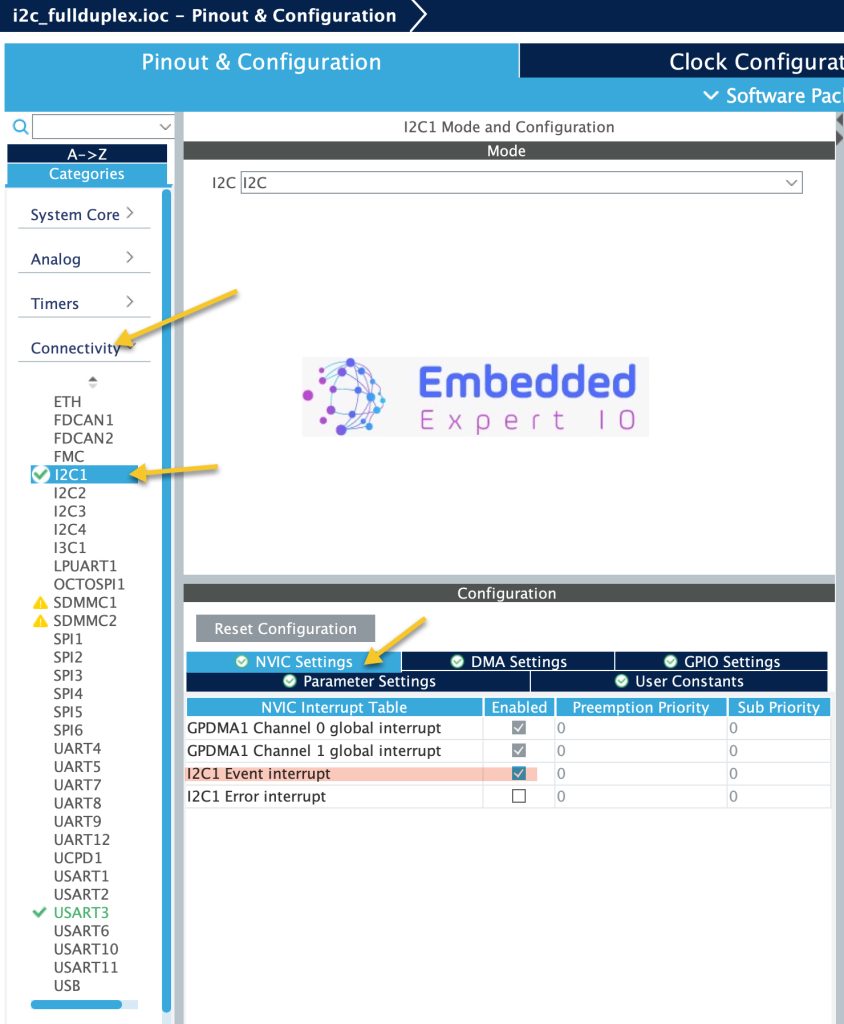
Enable I2C1 Event interrupt as shown.
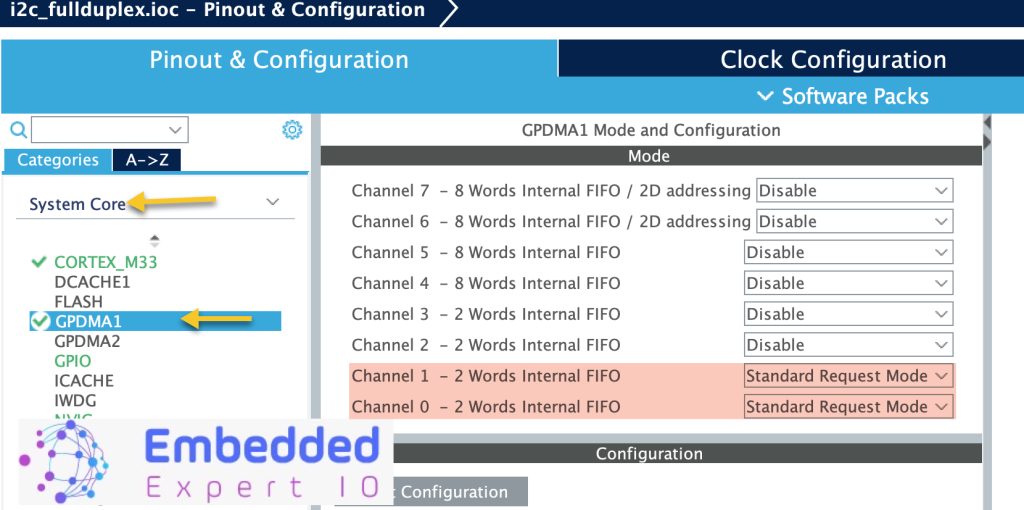
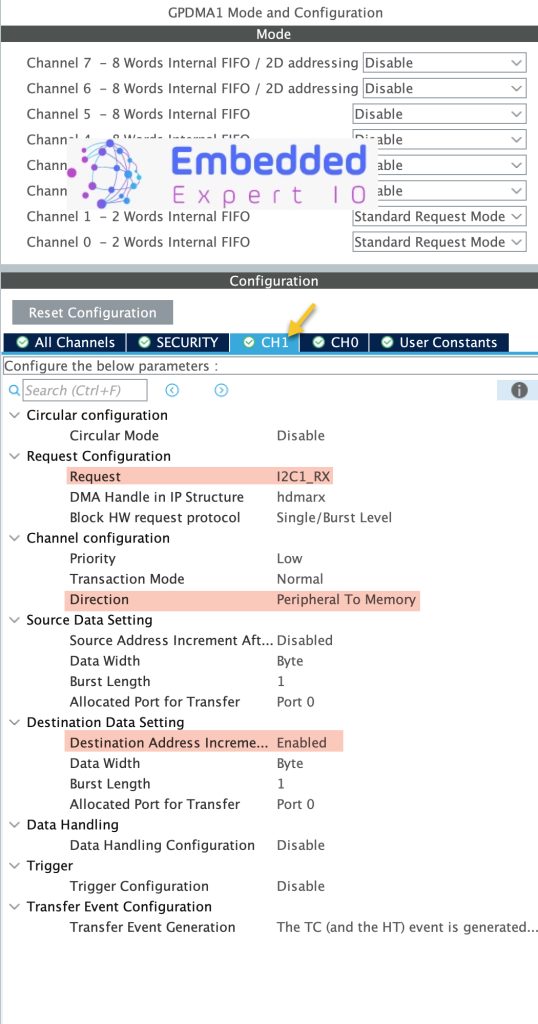
Next, from System Core, select GPDMA1, enable CH0 and CH1 in standard request mode as following:
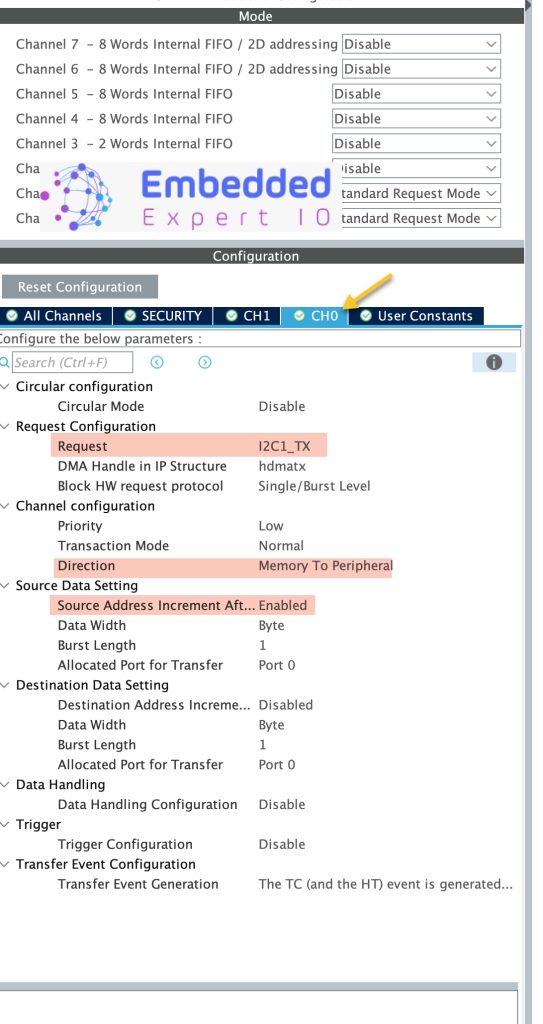
Next, configure CH0 as following:
- Request: I2C1_TX
- Direction: Memory to peripheral.
- From Source Data setting, enable Address Increment
For CH1, configure it as following:
- Request: I2C1_RX
- Direction: Peripheral to Memory
- From destination Data Setting, enable address increment.
Thats all for the configuration. Save the project. This will generate the code.
2. Develop the Main Code:
Continue from the previous guide, in user code begin PV in main.c, add the following volatile variable to handle tx and rx communication completion as following:
volatile uint8_t txcompleted=0;
volatile uint8_t rxcompleted=0;
The reason behinds this since they shall be called in the interrupts, using volatile will let the compiler not to optimize the variable.
Next, in user code begin 3 in while 1 loop:
First, read from memory location using DMA as following:
HAL_I2C_Mem_Read_DMA(&hi2c1, DS3231_Addr, 0x00, 0x01, rtc_data, 3);
The function takes the following parameters:
- Instant to the i2c which is hi2c1 in this case.
- I2C address which is DS3231_address (defined from the previous guide).
- Memory location which is 0x00 for the seconds.
- Buffer to hold the read data which is rtc_data (declared already from the previous guide).
- Size of the data to be read which is 3.
Notice there is no timeout needed since this will be handled by the hardware.
Wait until the read operation completed as following:
 while(rxcompleted==0);
	  rxcompleted=0;
Convert the BCD to decimal as following:
	  for (int i=0;i<3;i++)
	  {
		  rtc_data[i]=bcd_to_decimal(rtc_data[i]);
	  }
Print the RTC data:
printf("RTC DATA H=%d M=%d S=%d\r\n",rtc_data[2],rtc_data[1],rtc_data[0]);In case the seconds is 5, random the values of hours and minutes and set seconds to zero as following:
if(rtc_data[0]==5)
	  {
		  rtc_data[0]=0x00;
		  rtc_data[1]=(rand() % 5);
		  rtc_data[2]=(rand() % 5);
Then transmit the data using DMA and wait for tx to complete.
		  HAL_I2C_Mem_Write_DMA(&hi2c1, DS3231_Addr, 0x00, 0x01, rtc_data, 3);
		  while(txcompleted==0);
		  txcompleted=0;
Finally, delay by 200ms as following:
HAL_Delay(200);
Hence, the while 1 loop as following:
	  HAL_I2C_Mem_Read_DMA(&hi2c1, DS3231_Addr, 0x00, 0x01, rtc_data, 3);
	  while(rxcompleted==0);
	  rxcompleted=0;

	  for (int i=0;i<3;i++)
	  {
		  rtc_data[i]=bcd_to_decimal(rtc_data[i]);
	  }
	  printf("RTC DATA H=%d M=%d S=%d\r\n",rtc_data[2],rtc_data[1],rtc_data[0]);
	  if(rtc_data[0]==5)
	  {
		  rtc_data[0]=0x00;
		  rtc_data[1]=(rand() % 5);
		  rtc_data[2]=(rand() % 5);
		  HAL_I2C_Mem_Write_DMA(&hi2c1, DS3231_Addr, 0x00, 0x01, rtc_data, 3);
		  while(txcompleted==0);
		  txcompleted=0;
	  }

	  HAL_Delay(200);
Next, from drivers, STM32H5 drivers folder, src folder, open stm32h5xx_hal_i2c.c source file as following:
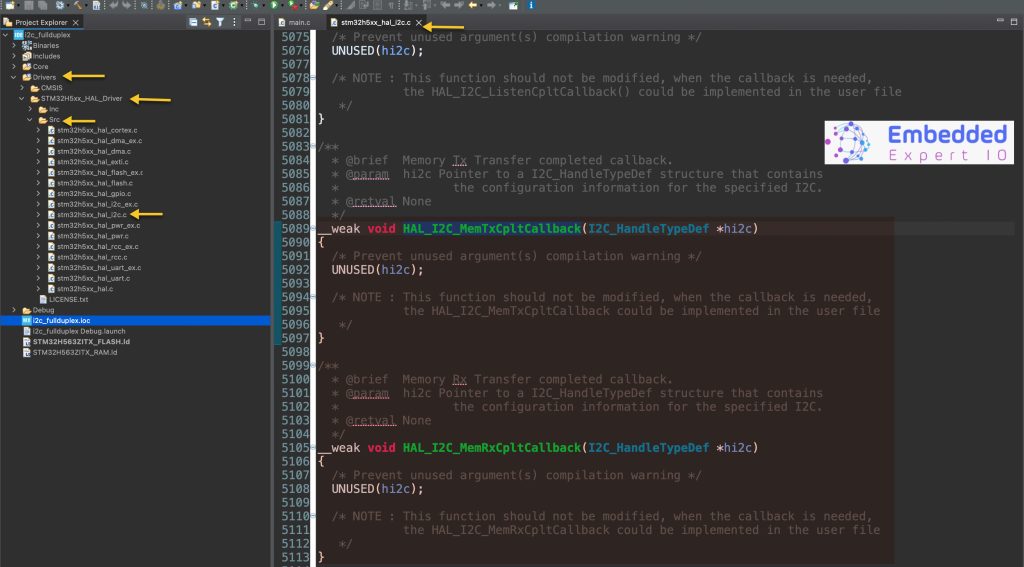
The following functions shall be called when HAL_I2C_Mem_Read_DMA and HAL_I2C_Write_DMA is called:
void HAL_I2C_MemTxCpltCallback(I2C_HandleTypeDef *hi2c)
And
void HAL_I2C_MemRxCpltCallback(I2C_HandleTypeDef *hi2c)
In case you are using normal read and write for the I2C, the following functions will be called:
In case read using DMA:
void HAL_I2C_MasterTxCpltCallback(I2C_HandleTypeDef *hi2c)
In case write using DMA:
void HAL_I2C_MasterRxCpltCallback(I2C_HandleTypeDef *hi2c)
Hence, in main.c in user code begin 4, we shall handle the interrupt of Tx and Rx completed as following:
void HAL_I2C_MemRxCpltCallback(I2C_HandleTypeDef *hi2c)
{
	if(hi2c->Instance ==I2C1)
		rxcompleted=1;

}

void HAL_I2C_MemTxCpltCallback(I2C_HandleTypeDef *hi2c)
{
	if(hi2c->Instance ==I2C1)
		txcompleted=1;

}
In the functions, we shall check which i2c has generated the interrupt which is i2c1 in this case.
Thats all for the guide.
Save the project, build it and run it on your STM32H563Zi board.

3. Results:
Open your favourite terminal applicaton, set the buadrate to be 115200 and you should get the following:
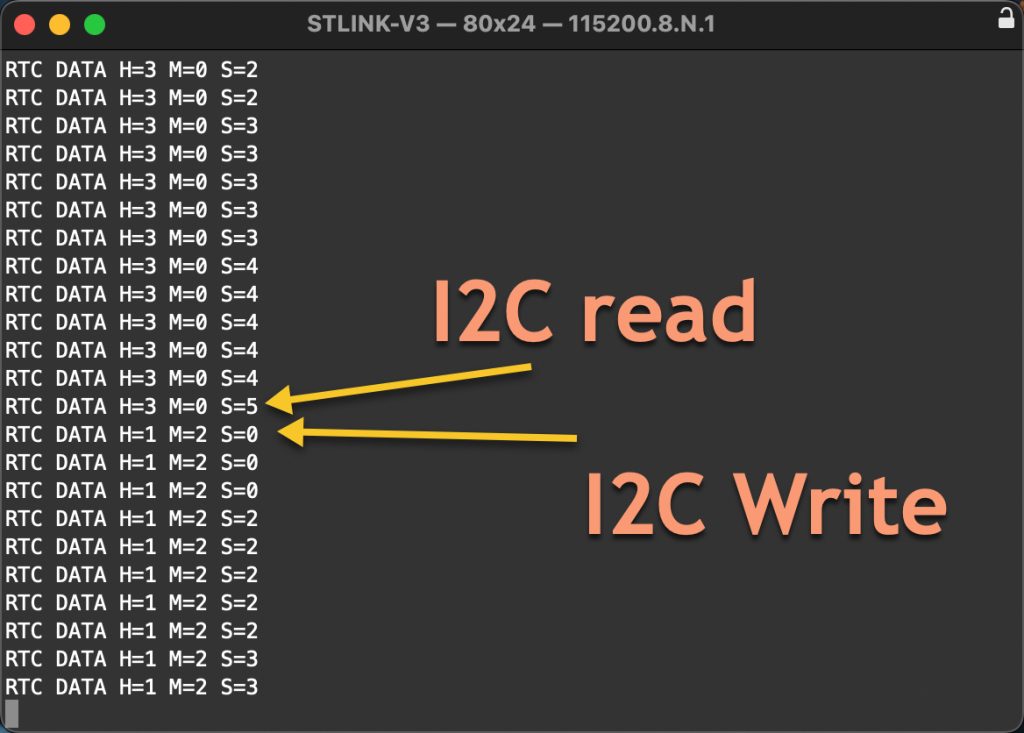
Note when second part becomes 5, new data for hours and minutes are written.
Happy coding 😉
Add Comment