In the previous guide (here), we took a look at what is the ADC and how to develop driver for ADC in polling mode.
In this guide, we shall cover the ADC in interrupt mode.
This guide shall cover the following:
- Difference between polling mode and interrupt mode.
- Driver development.
- Results.
1. Difference between polling mode and interrupt mode
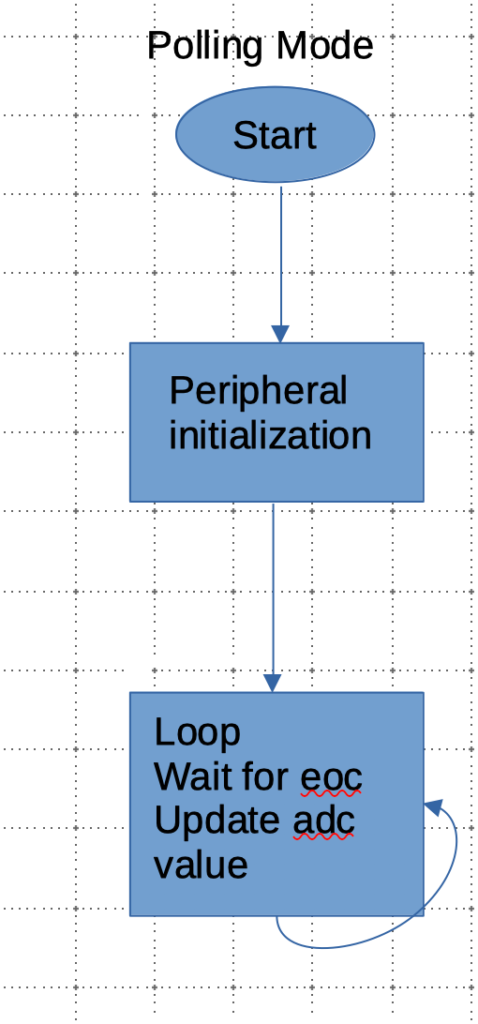
In polling as we saw in previous two guides, we need to wait for end of conversion each time we want to read the adc value as illustrated in figure below.
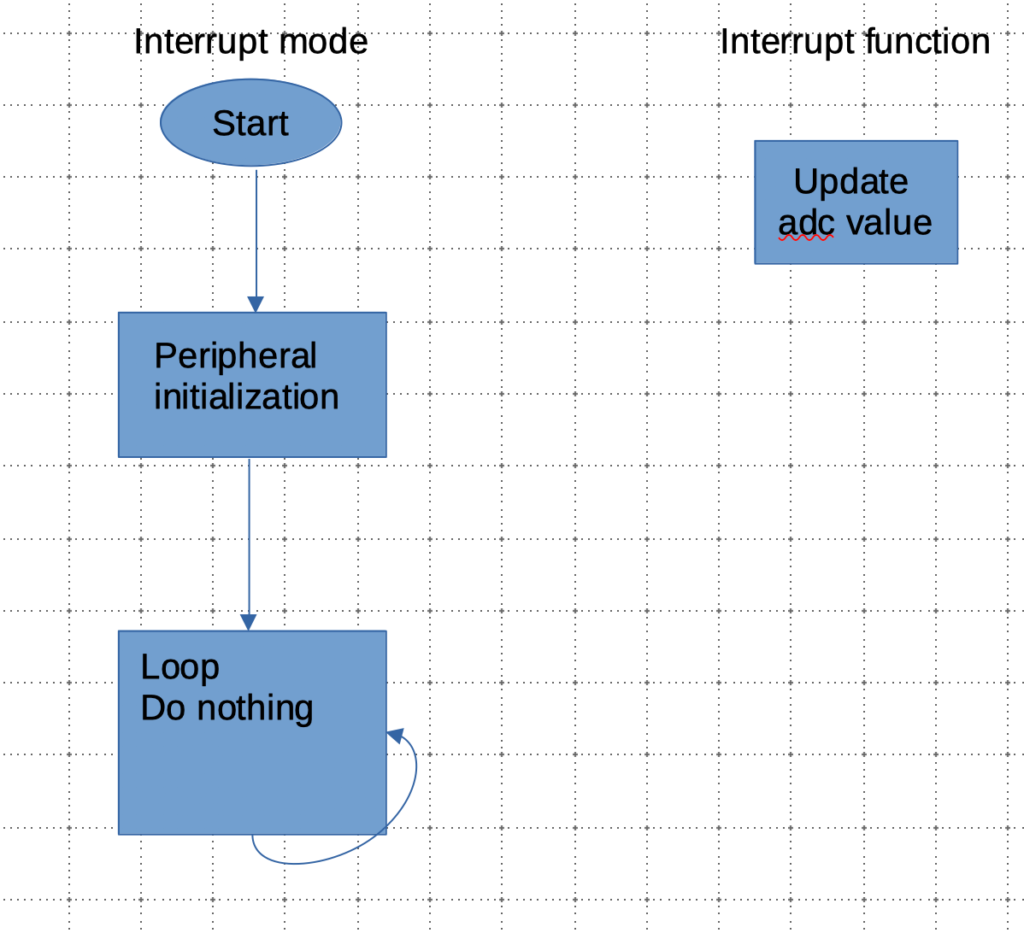
On another hand, in interrupt mode, the adc value can be update in background (no need to wait for EOC) since in handled in the interrupt handler function as illustrated in figure below.
2. Driver development:
Create new project with name of ADC_Continuous_Interrupt.
From Pin and Configuration:
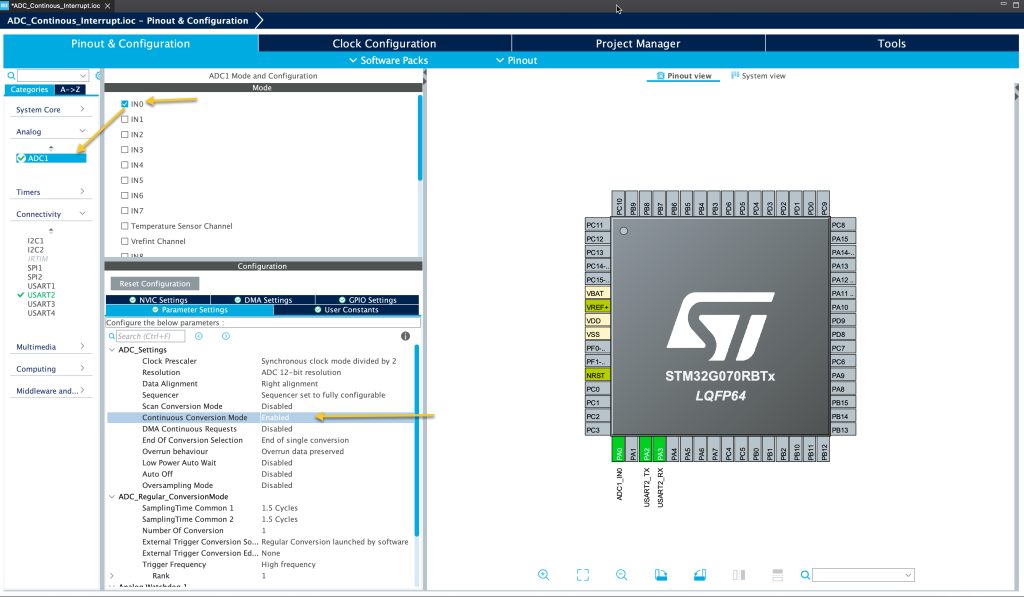
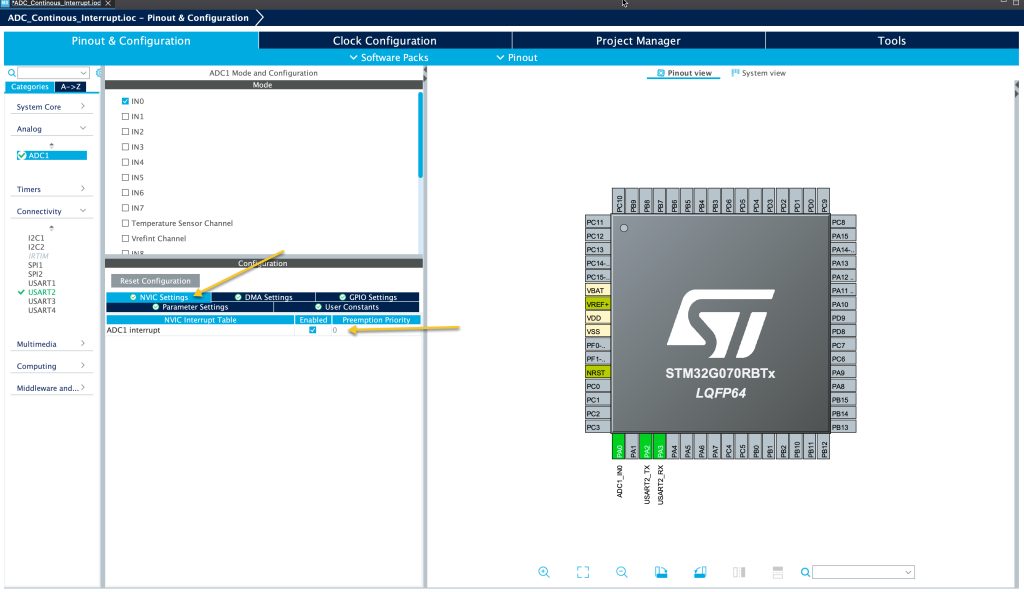
Go to ADC section and enable IN0. This will set PA0 in Analog Mode.
Also, from parameter settings of the ADC, set Continuous Conversion Mode to enabled.
From NVIC settings, enable ADC1 interrupt.
Since the ADC is running at maximum speed, we need to reduce the clock of the ADC.
In parameters settings of the ADC, set the ADC as following:
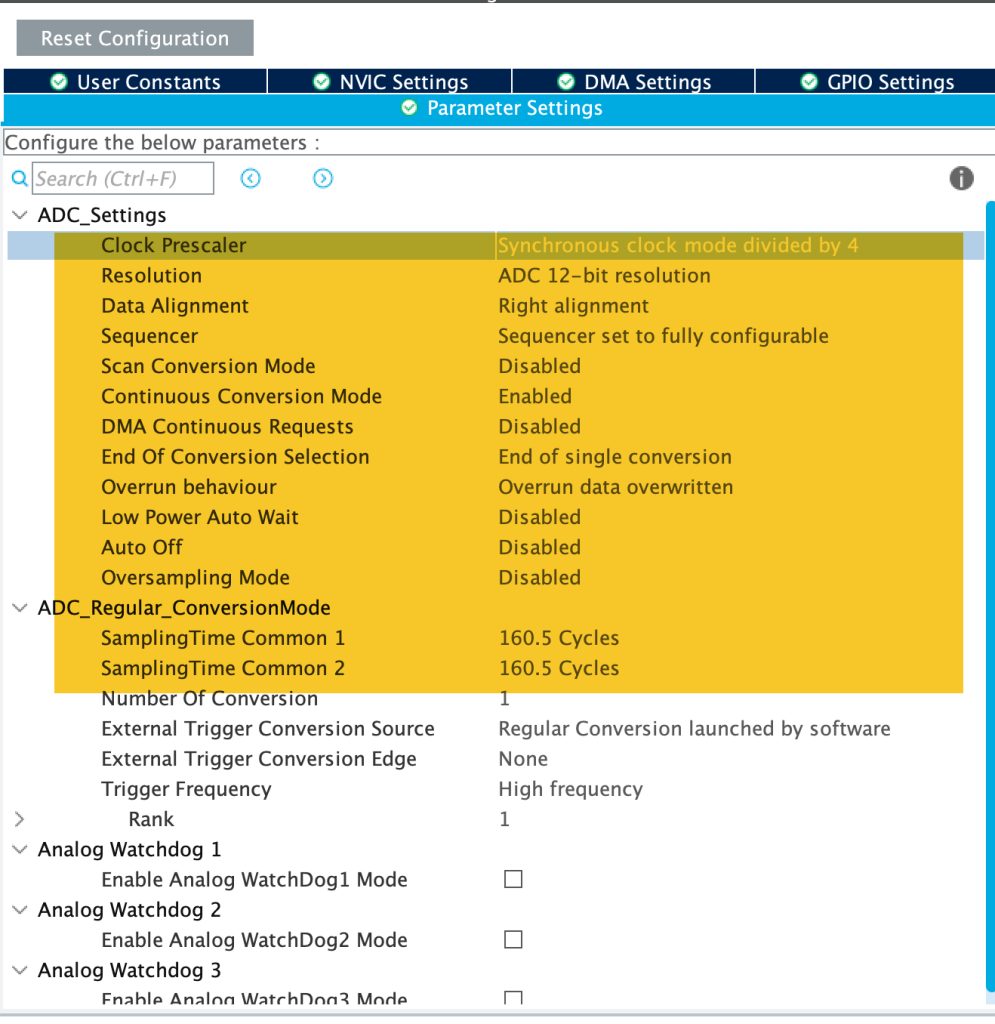
This will reduce the ADC significantly and reduce the number of interrupts.
Don’t forget to enable the UART (refer to this guide).
Save the project and this will generate the code.
In main.c:
In user begin include headers, include the stdio as following:
#include "stdio.h"
In private variable section:
/*ADC values*/
uint16_t adc_value;

/*Length of the string*/
uint32_t len;

/*Array for UART transmit*/
uint8_t uart_data[100];
In user code begin 0:
void HAL_ADC_ConvCpltCallback(ADC_HandleTypeDef* hadc)
{
    // Read & Update The ADC Result
	adc_value = HAL_ADC_GetValue(&hadc1);

}
This function shall be called each time the ADC finishes conversion. Once it is called, we shall read the ADC value using the following line:
    // Read & Update The ADC Result
	adc_value = HAL_ADC_GetValue(&hadc1);
In user code begin 2:
Start the ADC in interrupt mode:
HAL_ADC_Start_IT(&hadc1);
in user code begin 3:
Print the ADC value over the serial.
	  len=sprintf(uart_data,"ADC Value =%d\r\n",adc_value);
	  HAL_UART_Transmit(&huart2, uart_data, len, 100);
	  HAL_Delay(500);
Thats all.
Save, build and run the project.
3. Results:
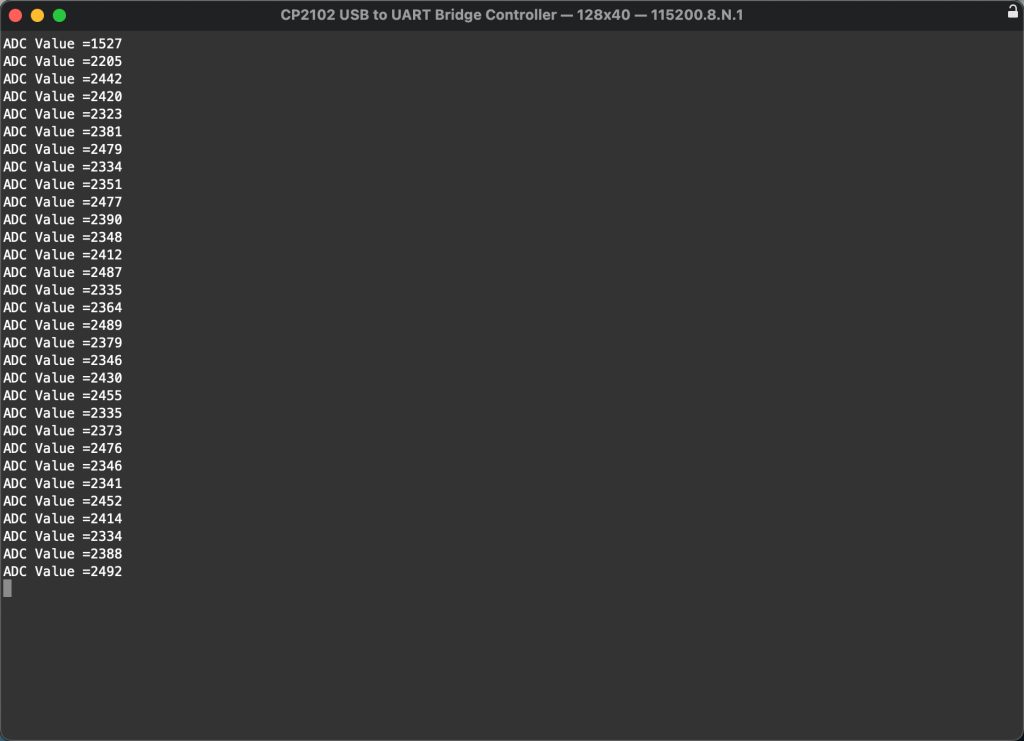
Open any serial terminal application, set the baudrate to 115200 and you should get the following:
Happy coding 🙂
Add Comment