In this guide, we shall interface HK1100C pressure sensor with STM32 and able to measure the pressure from 0 up to 1.2MPa.
In this guide, we shall cover the following:
- HK1100C pressure sensor.
- Connection with STM32F4.
- Getting the relative equation.
- Code.
- Results.
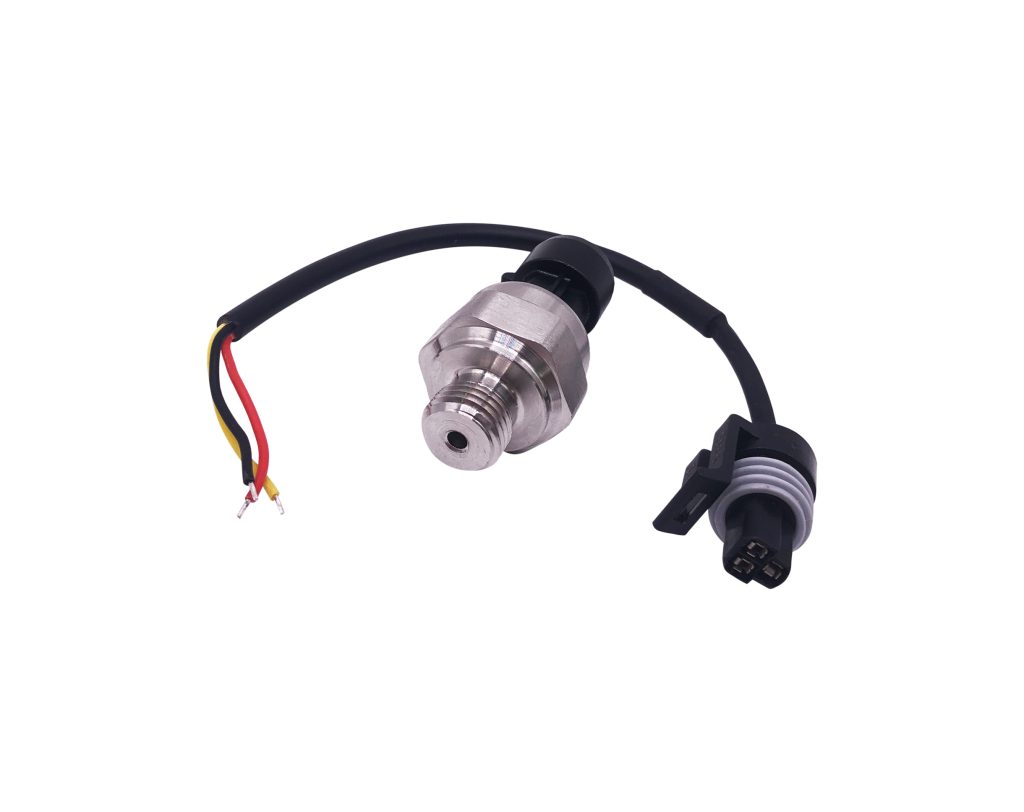
1. HK1100C Pressure Sensor:
Low cost pressure sensor, stainless steel package, socket type connection, convenient replacement and installation, 1/2 inch pressure connector, quick connect pressure interface,
prominent in the engineering
application, the test atmospheric pressure, water pressure and oil pressure ,customers have good feedback. Pressure range includes 0-1.2MPa, can meet most applications.
- Sensor type: HK1100C
- Size: ¼ Inch
- Working Voltage: 5.0 VDC
- Output Voltage: 0.5-4.5 VDC
- Working Current: <=10mA
- Working Pressure Range: 0-1.2MPa
- The Biggest Pressure: 2.4MPa
- Destroy Pressure: 3.0MPa
- Working TEMP. Range: 0-85 Celsius Degree
- Storage Temperature Range: 0-100 Celsius Degree
- Measuring Error: 1.5%FSO
- Temperature Range Error: +3.5%FSO
- Response Time: <=2.0ms
2. Connecting the Sensor with STM32F4:
Since the sensor has three wires, which they are Red, Black and Yellow. The connection as following:
| STM32F411 Nucleo-64 | HK1100C Sensor |
| 5V | Red wire |
| GND | Black wire |
| PA1 | Yellow wire. |
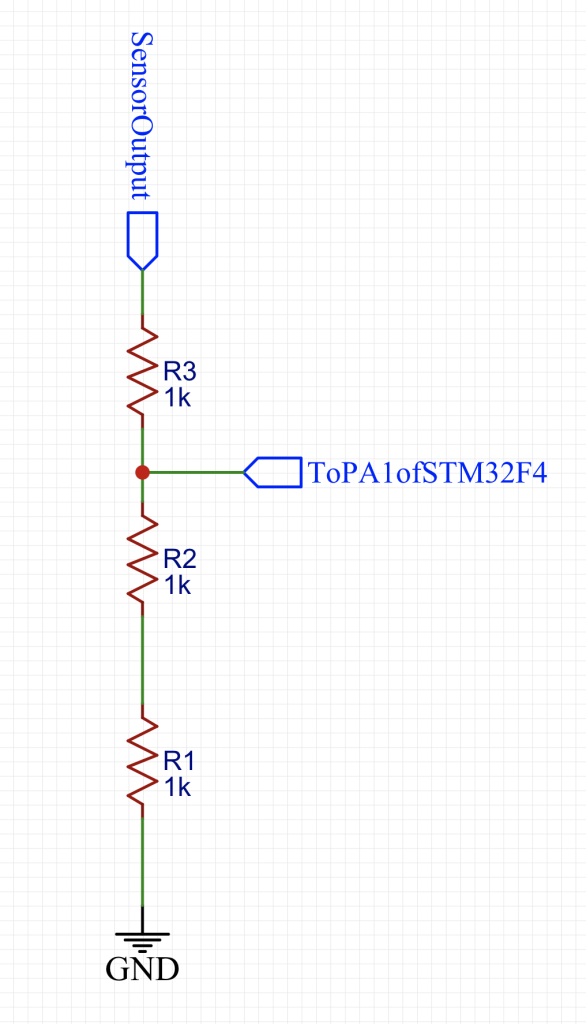
Since the output of the sensor between 0 and 5V and STM32F4 can’t measure beyond the 3.3V on any adc pin, we need to convert the 5 down to 3.3V using simple three resistors as following:
3. Getting the relative equation:
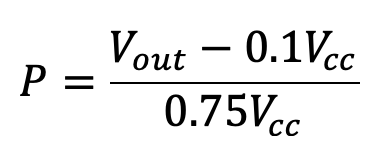
The mentioned equation in the datasheet as following:

By rearranging the equation to get the P which is the pressure value, we can get the following equation:
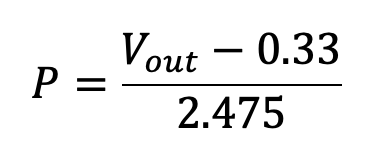
Since STM32 is working with 3.3V, we shall insert 3.3 to the Vcc and the final equation as follows:
4. Code:
We shall use continuous conversion mode for the ADC. For how to configure the ADC, check this guide here.
The code as following:
#include "delay.h"
#include "stdio.h"

extern void uart2_rxtx_init(void);

float get_voltage()
{
	while(!((ADC1->SR)&ADC_SR_EOC)){;}
	uint16_t adc_value= ADC1->DR;

	return (float)((adc_value)*3300/4095)/1000;

}


float pressure (float voltage)
{
return (float)(voltage - 0.33)/(2.475);

}


int main(void)
{
	uart2_rxtx_init();
	RCC->AHB1ENR|=RCC_AHB1ENR_GPIOAEN; //enable gpio a clock
	RCC->APB2ENR|=RCC_APB2ENR_ADC1EN; //enable adc clock
	GPIOA->MODER|=GPIO_MODER_MODER1;  //set the PA1 to analog mode
	ADC1->CR2=0; //disable the adc
	ADC1->CR2|=ADC_CR2_CONT;
	ADC1->SQR3|=1; //we are converting only one channel
	ADC1->CR2|=1; //enable the adc
	ADC1->CR2|=ADC_CR2_SWSTART; //start adc conversion

	while(1)
		{
			printf("pressure is = %f MPa\r\n",pressure(get_voltage()));
			delay(500);
		}

}
You may download the source code from here:
5. Results:
After compiling and program your STM32F411 Nucleo64, open serial terminal program and set the baudrate to be 115200 and you should get the following:
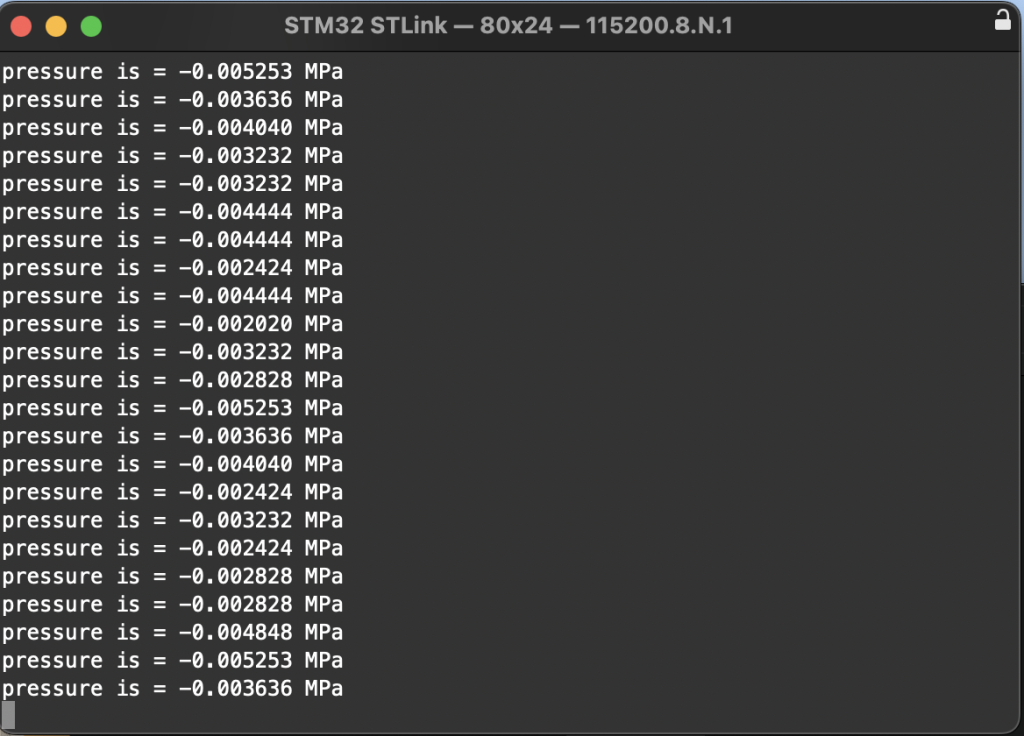
Note: Sensor is not calibrated, hence the results won’t be accurate.
Happy coding 🙂
Add Comment