
In this guide, we shall see how to configure STM32WB55 to start advertising it’s BLE present and connect to our smartphone.
In this guide, we shall cover the following:
- Driver development.
- Results.
1. Driver Development:
We start off by creating new project with name of BLE_Broadcasting.
From the Pinout and Configuration:
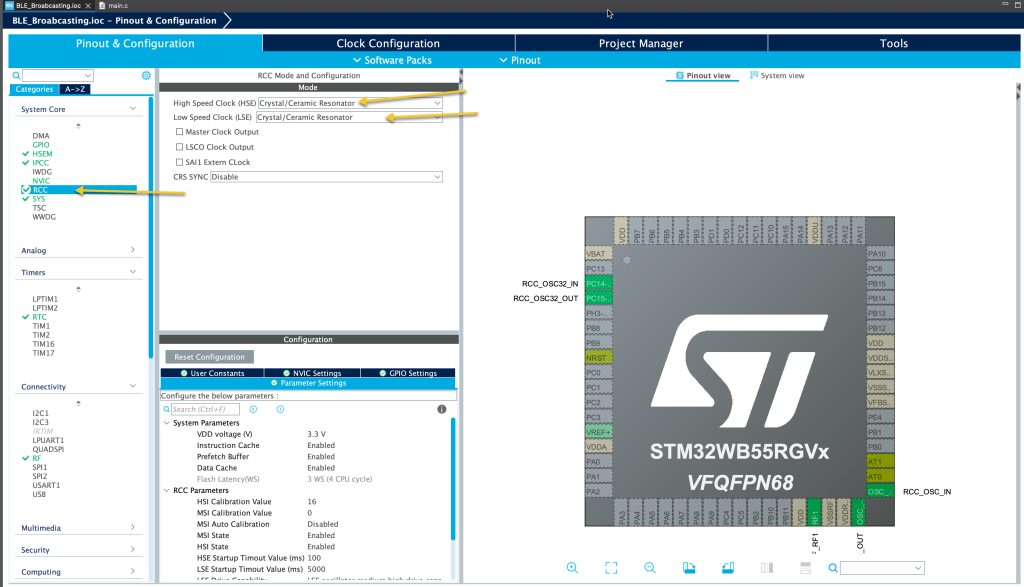
From System Core select RCC and enable both External high speed and low speed clocks as following:
From HSEM (Hardware Semaphore), enable the HSEM as following:

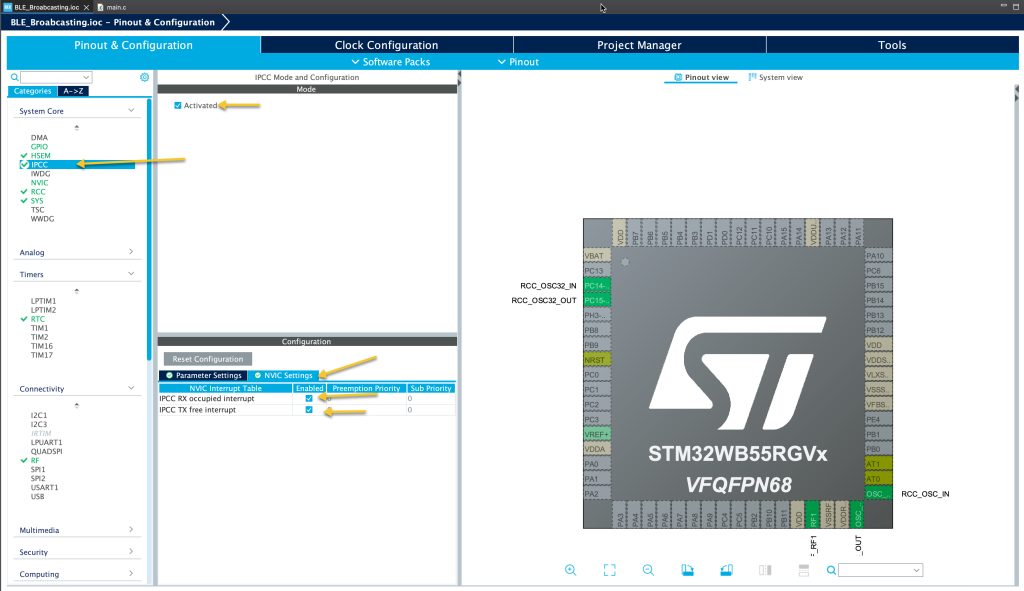
From IPCC (Inter Processor Communication Controller), enabled it and the NVIC for both interrupt as following:
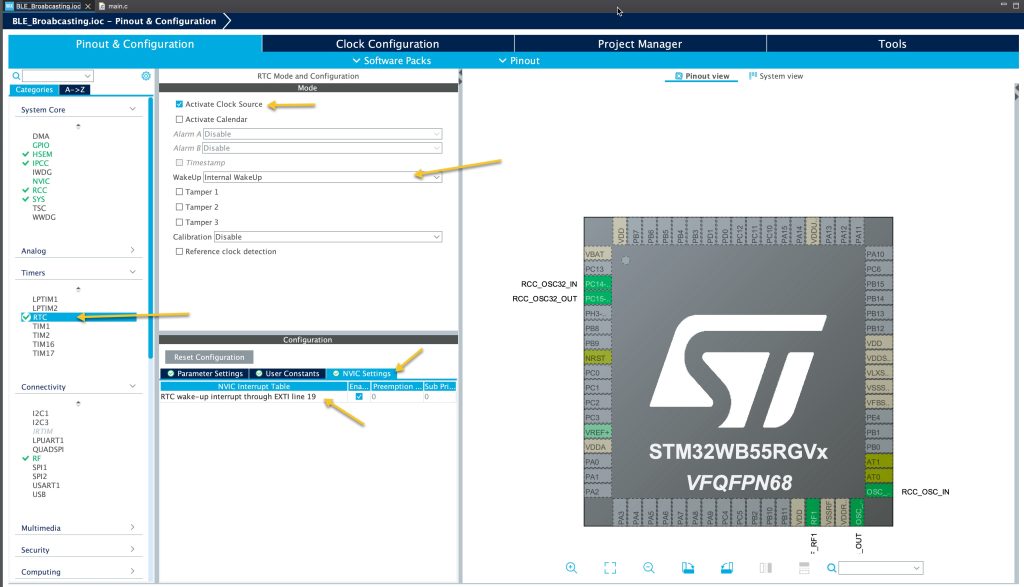
From timers, select RTC and enable the following:
- Activate clock source.
- Enable internal wakeup.
- Enable wakeup interrupt.
as following:
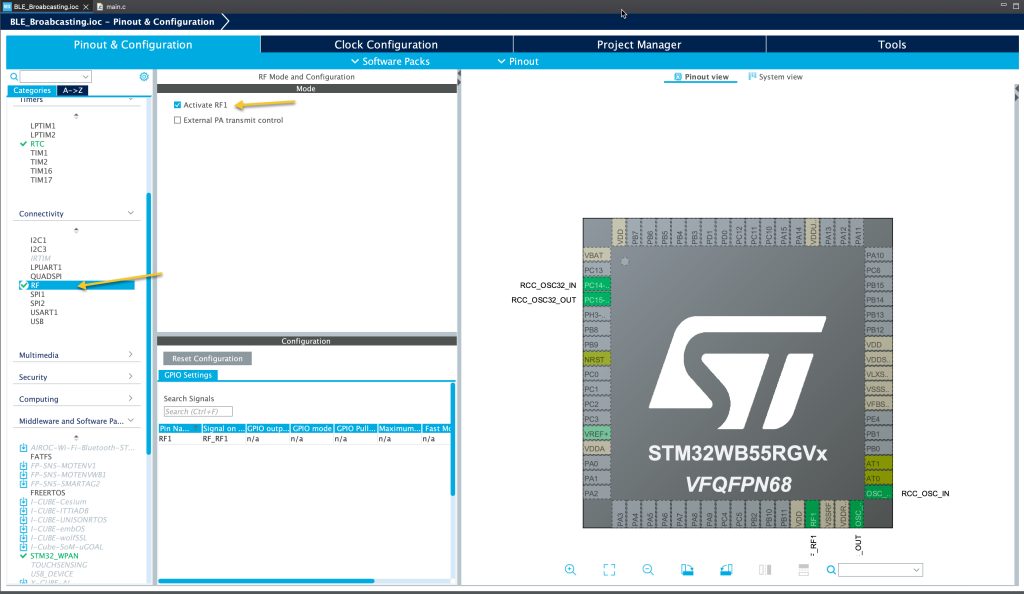
From connectivity, RF section, Activate RF1 as following:
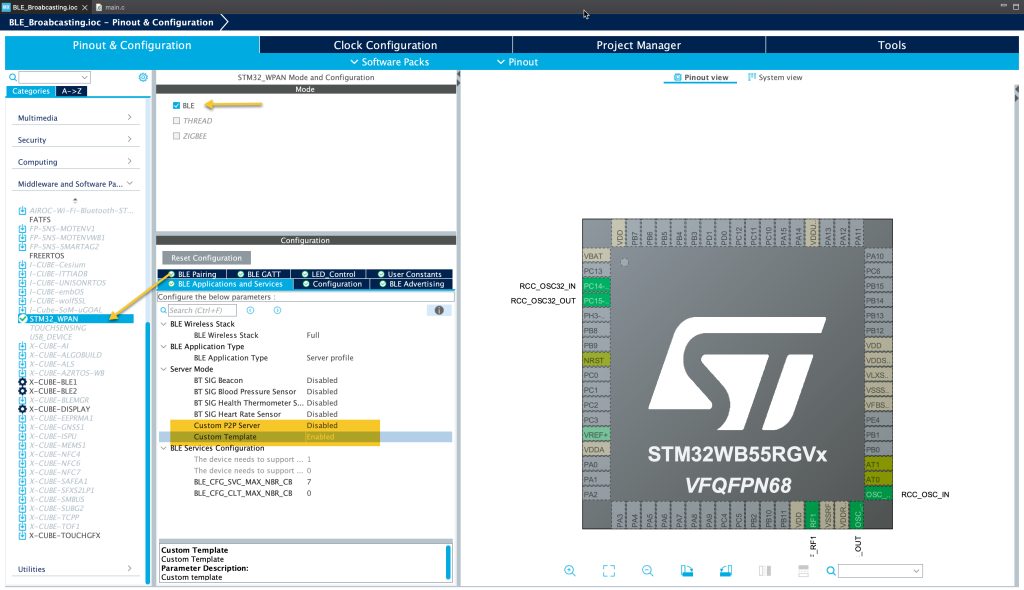
From middleware and software pack, select STM32_WPAN and set the mode to be BLE and set the following:
- Disable Custom P2P.
- Enable Custom Template
As following:
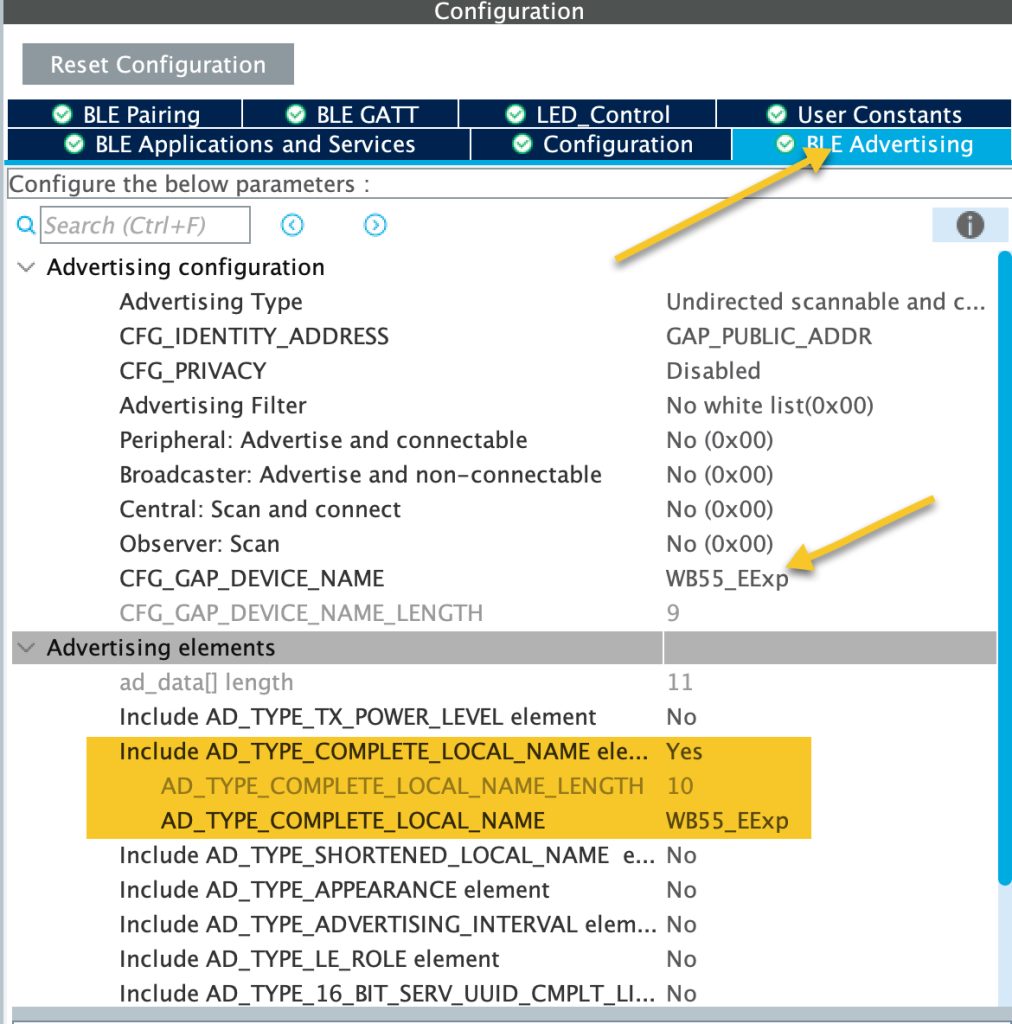
From BLE Advertising, set GAP name as WB55_EExp (Can be a unique name).
Enable Complete local name as to be WB55_EExp as following:
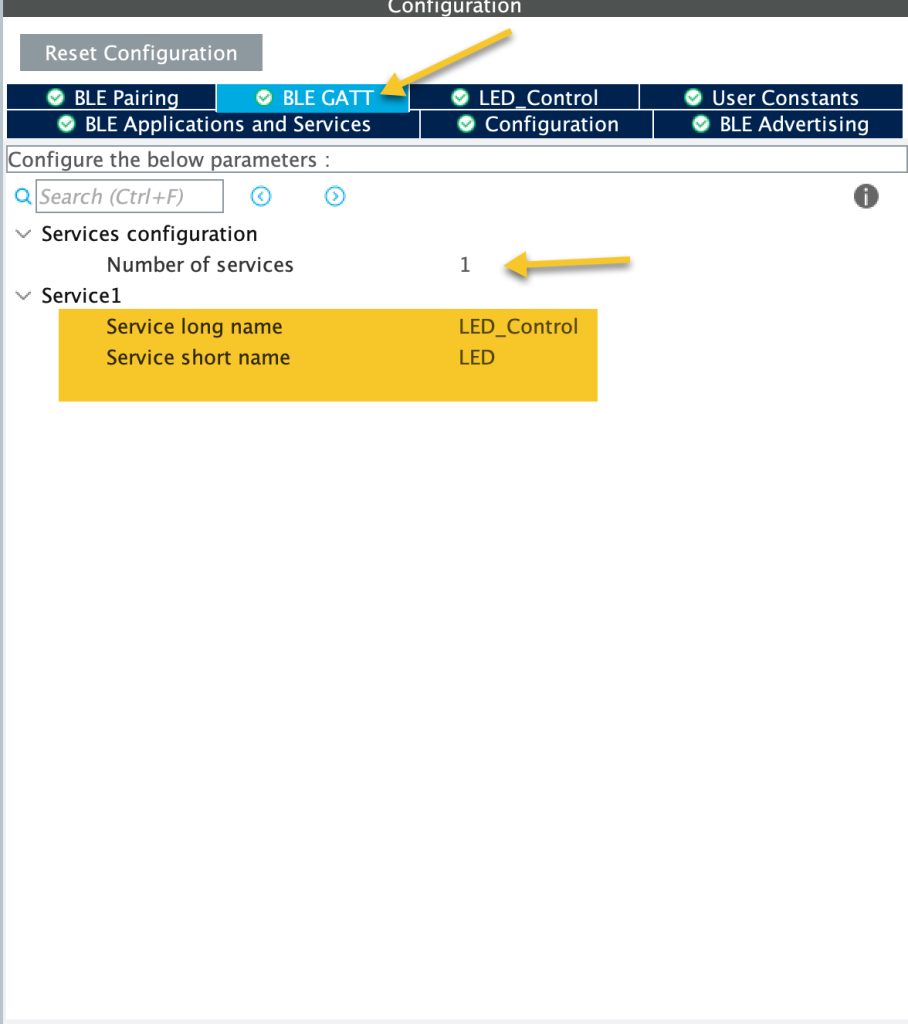
From BLE GATT:
- Set number of services to 1.
- Set long name to LED_Control.
- Set short name to LED.
As following:
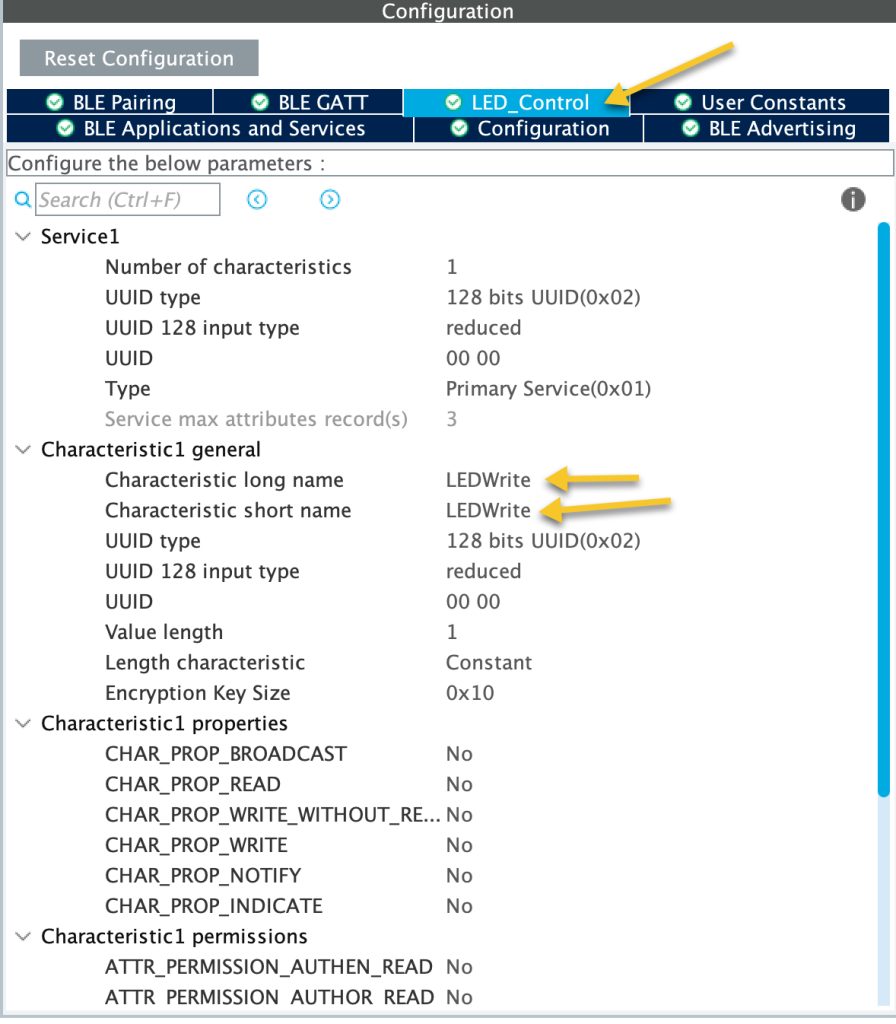
A new tab with name of LED_Control shall appear, select it.
Set the name as following:
- Characteristic long name as LEDWrite.
- Characteristic short name as LEDWrite.
As following:
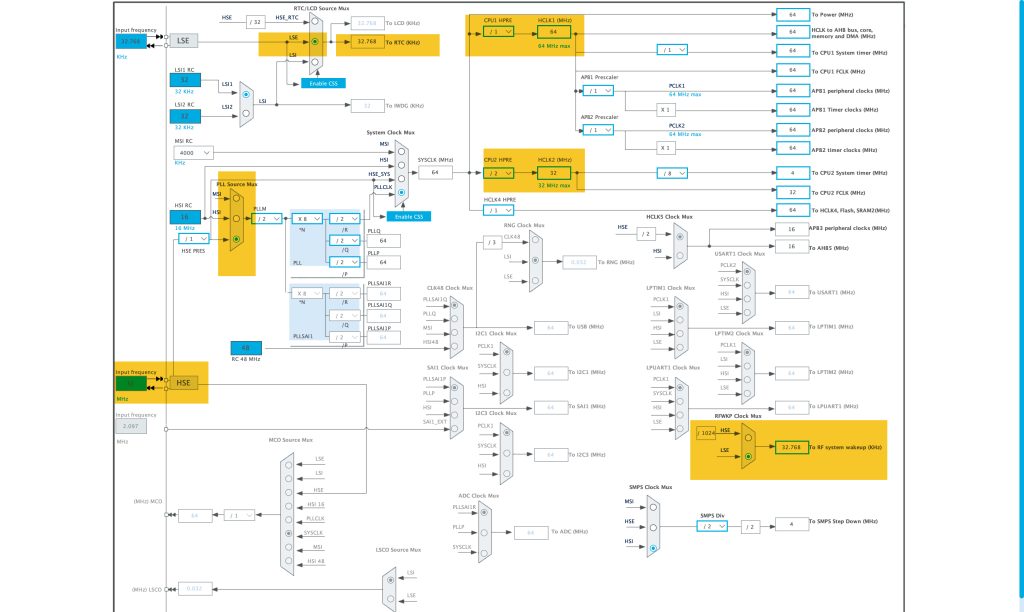
From clock configuration, set the clocks as following:
Thats all for the configuration.
Save the project and this will generate the code.
2. Results:
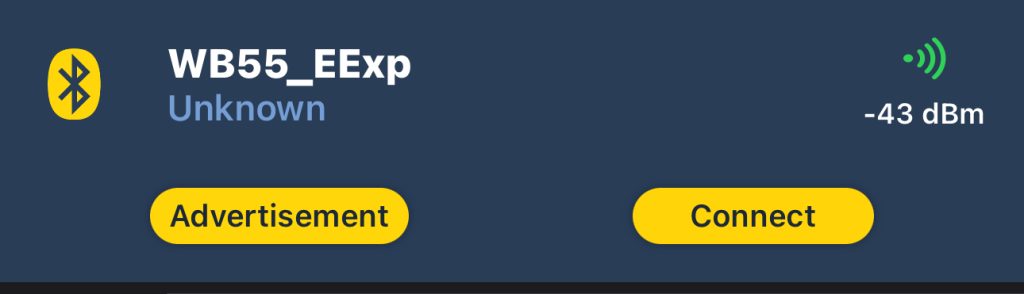
Build the code and run it on your STM32WB55 Nucleo and open STM32 BLE ToolBox.
You should see the following:
Press on connect and you should see something like this:
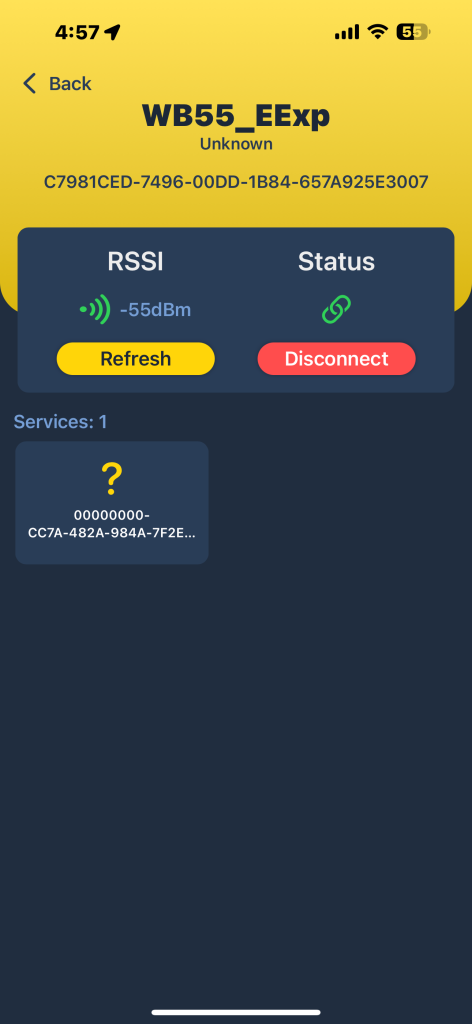
Next, we shall control the LED from the smartphone.
Stay tuned.
Happy coding 😉
6 Comments
Hi,
I followed all the steps outlined in your post exactly as described. However, I am unable to find the name of the board in the ST BLE Toolbox app.
To troubleshoot, I have also tried other online examples, but the issue persists. I would appreciate any suggestions you might have to resolve this problem. Are there any additional settings, firmware updates, or debugging steps you recommend?
Looking forward to your guidance.
Hi,
you need to install wireless stack on the board.
Follow this instructions:
https://wiki.st.com/stm32mcu/wiki/Connectivity:STM32WB_BLE_Hardware_Setup
This is fantastic, thank you Husamuldeen.
Looking forward to controlling the LED, in your next instalment. Do you have a release schedule, or just when time serves?
Thanks again,
James
Hi,
it is already published:
https://blog.embeddedexpert.io/?p=2491
Hii I am trying to send and receive the command but after following your instructions i generate code but what to change in code
I am working on revised version of the guide.
Add Comment