
It this guide, we shall control the LED wirelessly using BLE feature of STM32WB55.
In this guide, we shall cover the following:
- Enable the LEDs.
- Services and Characteristics modification.
- LED Control.
- Results.
1. Enable the LEDs:
From the schematic of the STM32WB55 Nucleo, we can find the following:

It has three on board LEDs connected to PB0, PB1 and PB5:
Set the pins as GPIO output as following:
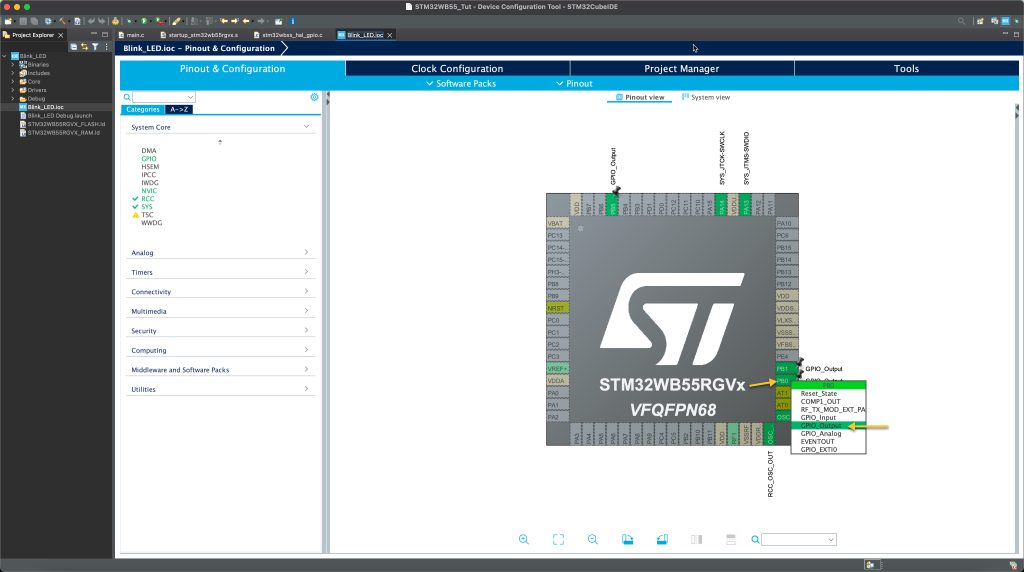
Also, give them a name as LD1, LD2 and LD3 for easy write later.
Thats all for the LED section.
2. Services and Characteristics Modification:
In order to make the BLE accept data from another device, we need to set the characteristics and services with write permission.
From STM32_WPAN, Select LEDControl (or what ever name you gave for the service in BLE GATT):

First, set CHAR_PROP_WRITE to yes. This will set the properties of the characteristics to be writable.
Second, Set the GATT_NOTIFY_ATTRIBUTE_WRITE to yes also. This will notify the GATT in case there is new data to be written.
Save the project and this will generate the code.
Thats all for the services and Characteristics section.
3. LED Control:
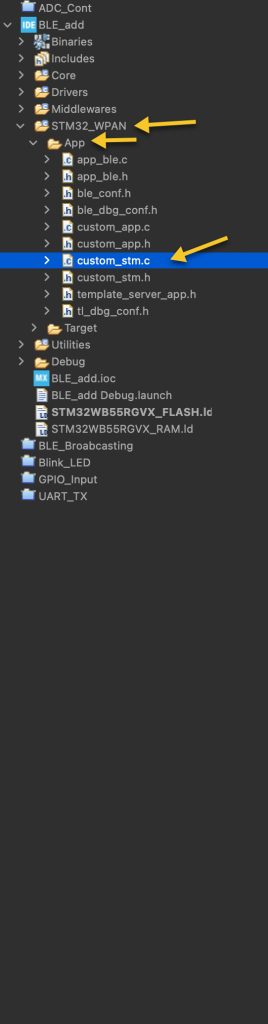
Now, open custom_stm.c source file as following:
In user begin include, include the main.h header file as following:
/* USER CODE BEGIN Includes */
#include "main.h"
/* USER CODE END Includes */
In the following function:
static SVCCTL_EvtAckStatus_t Custom_STM_Event_Handler(void *Event)
Within the function:
There is this line:
/* USER CODE BEGIN CUSTOM_STM_Service_1_Char_1_ACI_GATT_ATTRIBUTE_MODIFIED_VSEVT_CODE */
Here, we shall implement the LED control as following:
When the data is transmitted from phone to Nucleo, the attribute changes. Since the LED control has one 1 variable to hold the data which is the first byte of the attribute data, we can read it as following:
uint8_t data=attribute_modified->Attr_Data[0];
Check the state of the variable:
- 1-> Turn on the LED.
- 2-> Turn off the LED.
            if(data==0)
            {
            	HAL_GPIO_WritePin(LD1_GPIO_Port, LD1_Pin, GPIO_PIN_RESET);
            }
            if(data==1)
            {
            	HAL_GPIO_WritePin(LD1_GPIO_Port, LD1_Pin, GPIO_PIN_SET);
            }
Thats all.
Save the project, build it and run it on your board.
4. Results:
Next, we shall control multiple LEDs.
Stay tuned.
Happy coding 😉
4 Comments
Can you also provide your whole project file
Just follow the instruction as shown.
Hello again Husamuldeen,
Thank you for replying to my previous comment.
Could you please link where I can access all your “Getting Started With STM32WB55” series?
Many Thanks,
James
I am working on revised version of this guide.
Add Comment