
In this second part of the guide, we integrate the Mongoose source and header files into the STM32 project and walk through the required configuration steps for a successful build. We then bring up the Ethernet interface and verify basic network functionality by performing a ping test to confirm reliable connectivity.
In this guide, we shall cover the following:
- Configure Mongoose.
- Run ping test.
5. Configure Mongoose:
First, create the following source and header files:
- mongoose.c
- mongoose.h
- mongoose_config.h
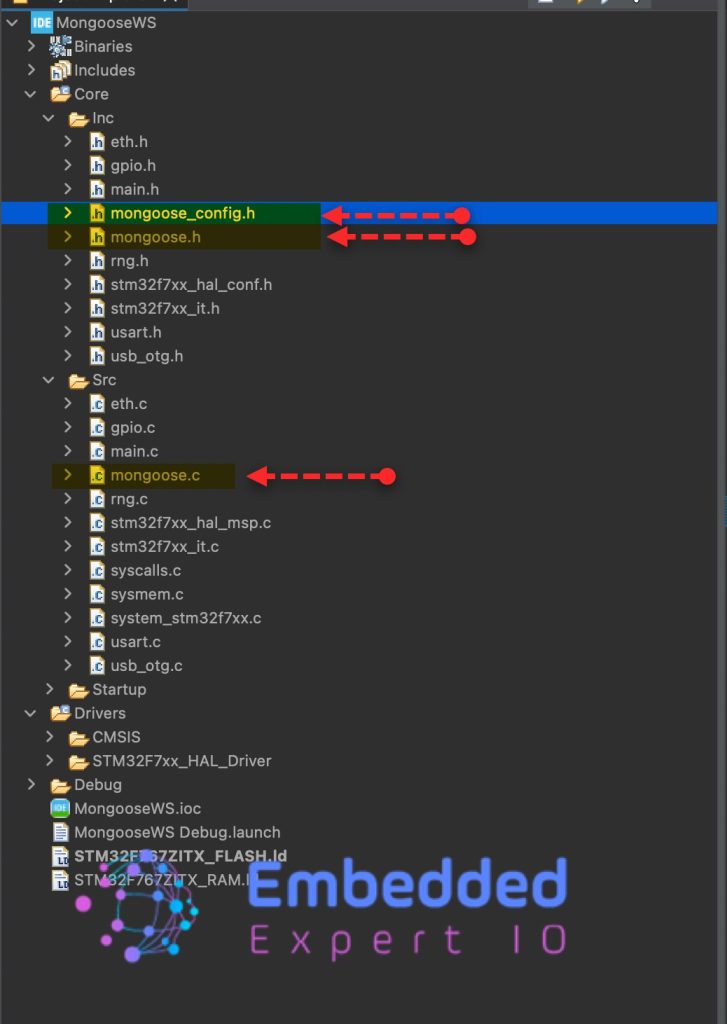
Next, copy the content of mongoose.c file from this github repository to mongoose.c in STM32CubeIDE.
Also, copy the content of mongoose.h file from this github repository to mongoose.h in STM32CubeIDE.
Next, we shall configure the mongoose_config.
Within the header guard of mongoose_config header file, declare the following:
#pragma once
#define MG_ARCH MG_ARCH_NEWLIB     // For all ARM GCC based environments
#define MG_ENABLE_TCPIP 1          // Enables built-in TCP/IP stack
#define MG_ENABLE_CUSTOM_MILLIS 1  // We must implement mg_millis()
#define MG_ENABLE_TCPIP_PRINT_DEBUG_STATS 1  // Enable debug stats log
#define MG_ENABLE_CUSTOM_RANDOM 1
#define MG_TCPIP_PHY_ADDR 0
#pragma once
Prevents the header file from being included more than once during compilation, avoiding duplicate definitions and build errors.
MG_ARCH MG_ARCH_NEWLIB
Selects the runtime environment used by Mongoose.MG_ARCH_NEWLIB targets ARM GCC toolchains that rely on the newlib C library, which is standard for STM32CubeIDE and bare-metal or RTOS-based projects.
MG_ENABLE_TCPIP 1
Enables Mongoose’s internal TCP/IP stack.
With this enabled, Mongoose implements IP, ARP, ICMP, TCP, and UDP internally instead of relying on an external stack such as lwIP—useful for compact, self-contained Ethernet designs.
MG_ENABLE_CUSTOM_MILLIS 1
Indicates that the application must provide the timing function:
uint64_t mg_millis(void);
This supplies system uptime in milliseconds and is used for protocol timeouts, retransmissions, and scheduling.
On STM32, it is commonly derived from HAL_GetTick() or an RTOS tick counter.
MG_ENABLE_TCPIP_PRINT_DEBUG_STATS 1
Enables logging of TCP/IP runtime statistics.
This outputs packet counters, retransmissions, memory usage, and protocol state information, which is valuable during Ethernet bring-up and ping testing but usually disabled in production builds.
MG_ENABLE_CUSTOM_RANDOM 1
Requires the user to implement:
uint64_t mg_random(void);
Random numbers are used for TCP sequence numbers, ephemeral ports, and security features.
On STM32, this should preferably come from the hardware RNG peripheral or a well-seeded software generator.
MG_TCPIP_PHY_ADDR 0
Defines the Ethernet PHY address on the MDIO bus.
The value must match the strap-configured address of the PHY chip on the board; an incorrect value will prevent link detection and block network communication. This value for STM32 ranges from 0 to 4. You can experiment with the value to determine which one that will work in your setup. Usually either 0 or 1 will work without any issue.
Next, define which STM32 are you using, either STM32F or STM32H:
#define MG_ENABLE_DRIVER_STM32H 0
#define MG_ENABLE_DRIVER_STM32F 1
This guide uses STM32F767Zi, hence, STM32F is set to 1 while STM32H is set to 0. In case you are using H series, such as H7/H5, set STM32F to 0 and set STM32H to 1.
Next, in main.c file, in user code begin 0, declare the following function that mongoose will use it to generate random MAC address as follows:
bool mg_random(void *buf, size_t len) {  // Use on-board RNG
  for (size_t n = 0; n < len; n += sizeof(uint32_t)) {
    uint32_t r;
    HAL_RNG_GenerateRandomNumber(&hrng, &r);
    memcpy((char *) buf + n, &r, n + sizeof(r) > len ? len - n : sizeof(r));
  }
  return true; // TODO(): ensure successful RNG init, then return on false above
}
Next, create run mongoose function as follows:
static void run_mongoose(void) {
  struct mg_mgr mgr;        // Mongoose event manager
  mg_mgr_init(&mgr);        // Initialise event manager
  mg_log_set(MG_LL_DEBUG);  // Set log level to debug
  for (;;) {                // Infinite event loop
    mg_mgr_poll(&mgr, 0);   // Process network events
  }
}
Next, in use code begin 2 in main function, call run_mongoose function as follows:
run_mongoose();
In user code begin include, include mongoose header file as follows:
#include "mongoose.h"
At this point, connect an ethernet cable from your router to your Nucleo board.
Save, build and run the project as follows:

6. Run Ping Test:
Open your serial monitor application and you should see the IP address provided by the router to your board as follows:
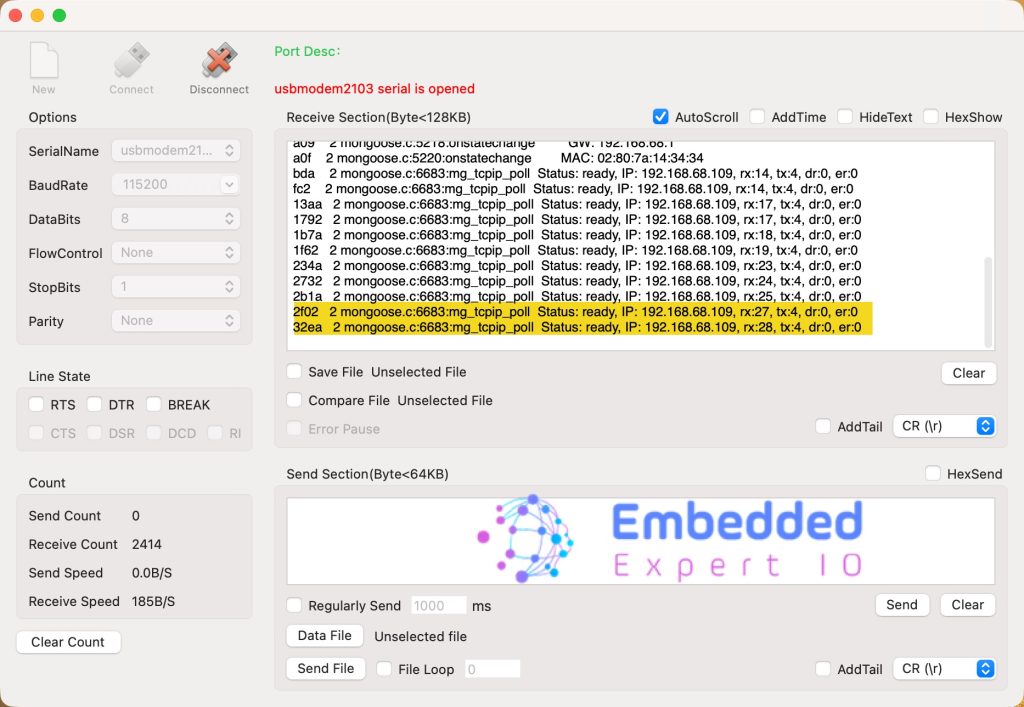
Note: the address is different from device to device. Here, my router provided the ip address of 192.168.68.109 to my device.
Run ping test by opening terminal on macOS or command prompt in windows and type the following:
ping 192.168.68.109
You should the following:
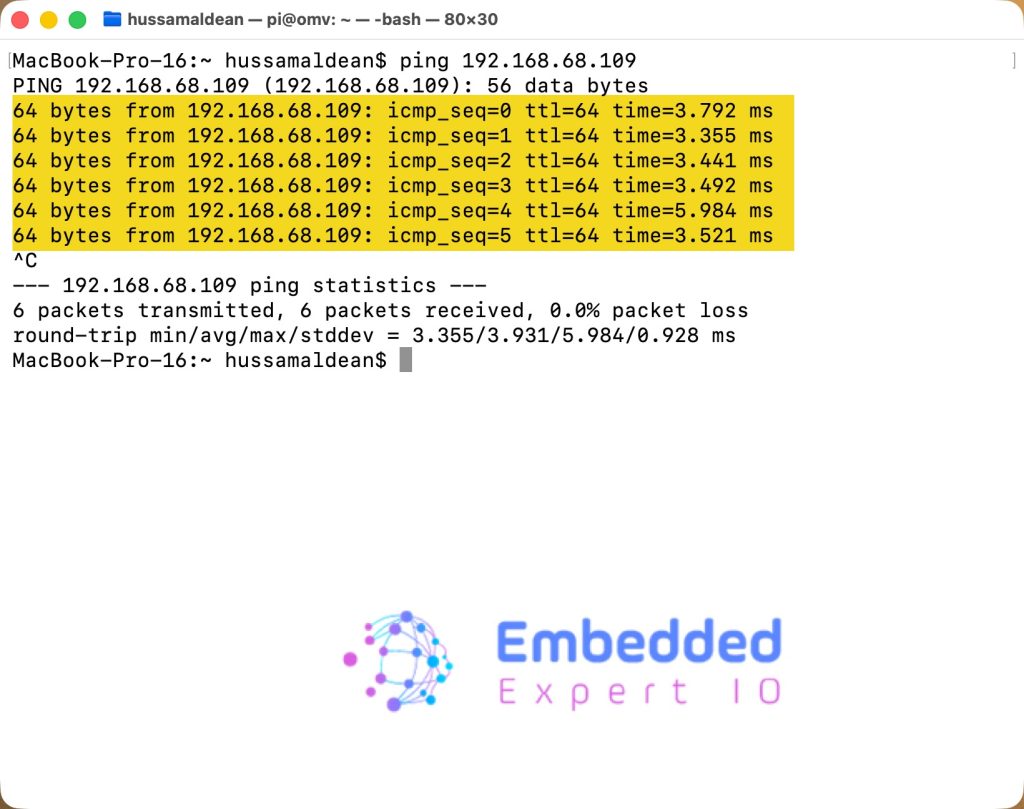
We have successfully configured the ethernet, set it up properly and ping test it. All that done with minimal effort from us.
In part 3, we shall develop web server to display some variables.
Stay tuned.
Happy coding 😉
Add Comment