
In this first part of the Mongoose guide for STM32, we focus on the foundational steps required to get the platform up and running, starting with the hardware setup and basic system initialization. We also cover UART configuration to enable reliable serial communication for debugging and early-stage validation.
In this guide, we shall cover the following:
- Introduction.
- STM32CubeMX setup.
- Importing project to STM32CubeIDE.
- Basic code setup and test.
1. Introduction:
Mongoose is a lightweight, event-driven networking library designed to simplify the development of connected applications on resource-constrained systems as well as full-featured operating systems. It provides a unified, consistent API for implementing common network protocols such as TCP/IP, UDP, HTTP/HTTPS, WebSocket, MQTT, and others, allowing developers to build robust networked firmware without needing to manage low-level socket handling, state machines, or protocol parsing manually. By abstracting these complexities, Mongoose enables engineers to focus on application logic rather than infrastructure, significantly reducing development time and potential sources of error.
One of Mongoose’s key strengths is its suitability for embedded systems, including microcontrollers like STM32. It is written in portable C, has a small memory footprint, and can be integrated with popular embedded TCP/IP stacks such as lwIP. This makes it particularly well-suited for Ethernet-enabled STM32 platforms, where deterministic behavior, low RAM usage, and clear control over execution flow are critical. Its non-blocking, event-based architecture aligns well with embedded design best practices, ensuring that networking tasks do not interfere with real-time constraints or peripheral handling.
In addition to its technical efficiency, Mongoose is designed with scalability and maintainability in mind. The same core API can be used across vastly different environments, from bare-metal or RTOS-based microcontrollers to Linux, macOS, and Windows systems. This consistency allows developers to prototype, test, and debug applications on a desktop environment before deploying them to embedded hardware, reducing risk and improving overall software quality.
Within the context of STM32 development, Mongoose serves as a powerful foundation for building modern connected devices, including IoT nodes, industrial controllers, gateways, and diagnostic tools. Whether the goal is to expose a simple HTTP configuration interface, stream data over WebSockets, or implement a secure cloud-connected service, Mongoose provides the essential building blocks in a compact and well-structured form. This guide aims to introduce Mongoose step by step, starting from hardware and basic initialization, and gradually progressing toward fully functional networked applications on STM32 platforms.
2. STM32CubeMX Setup:
In this guide, STM32F767ZI Nucleo-144 shall be used to develop the ethernet firmware.
We shall use the default setup offered by STM32CubeMX.
Please note that you need to configure the ethernet manually in case of custom board.
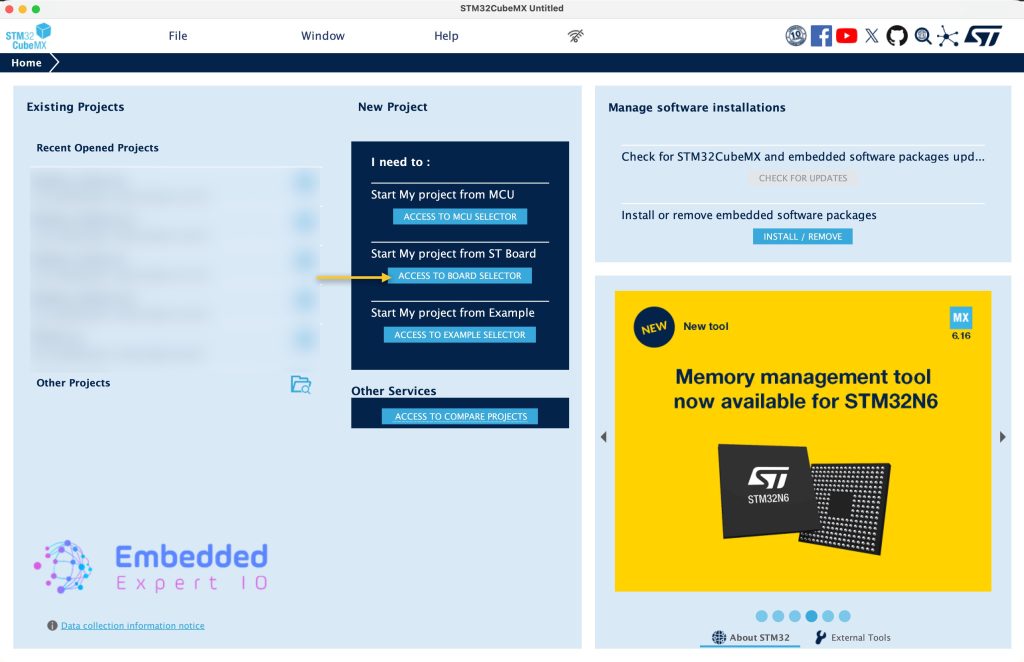
Open STM32CubeMX and click on Access to board select as follows:
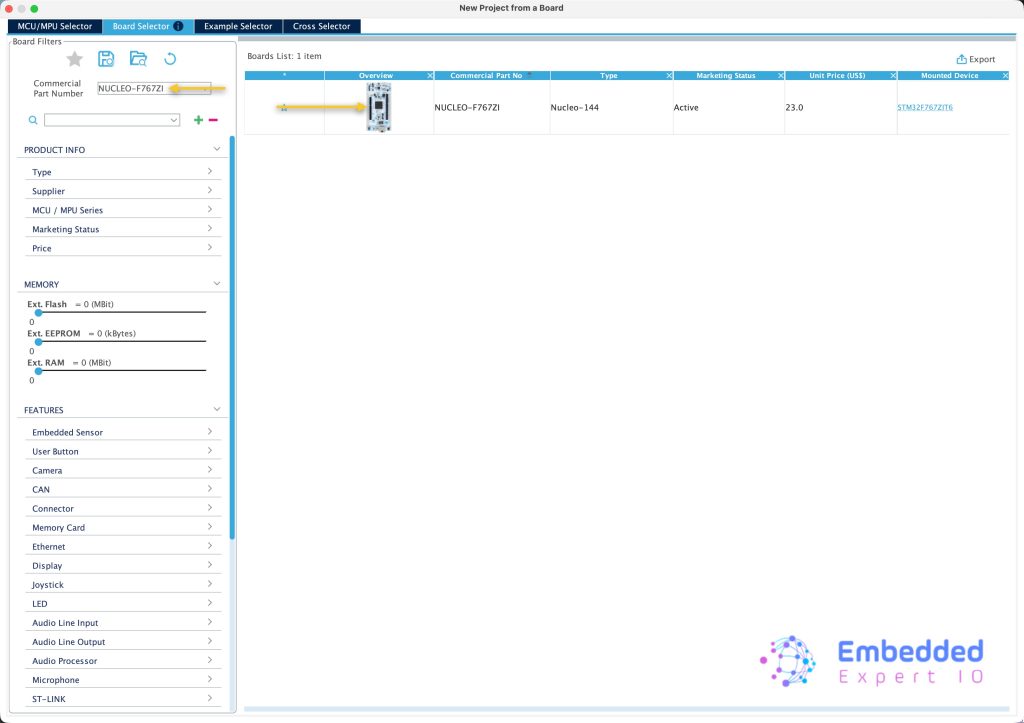
Type Nucleo-F767ZI, double click on the board as follows:
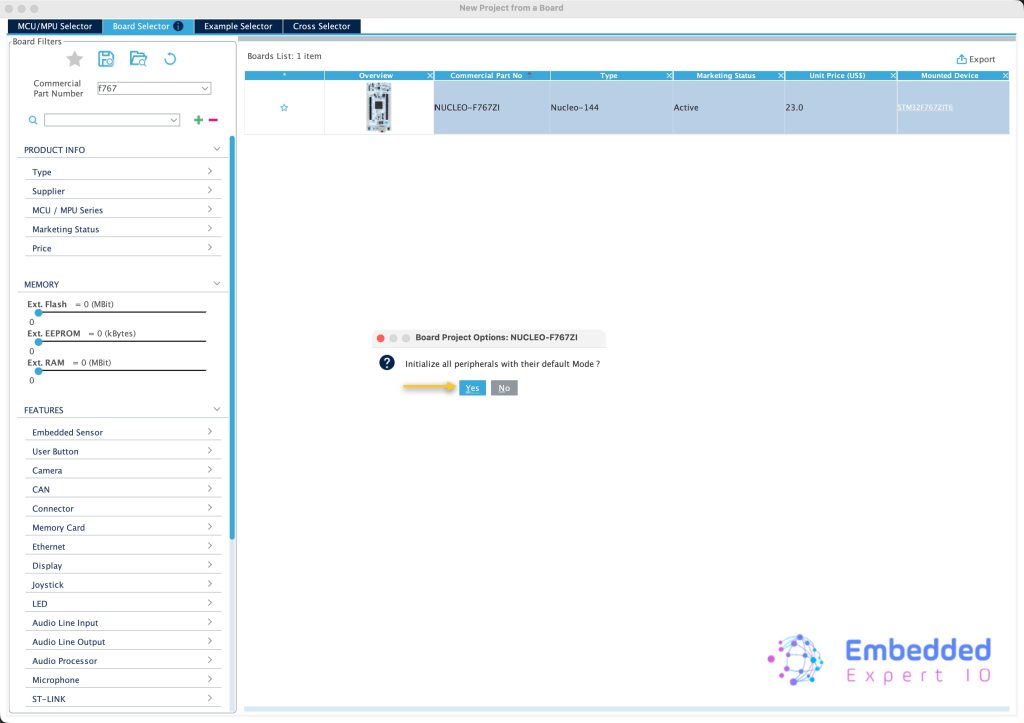
Initialize the peripheral to their default mode as follows:
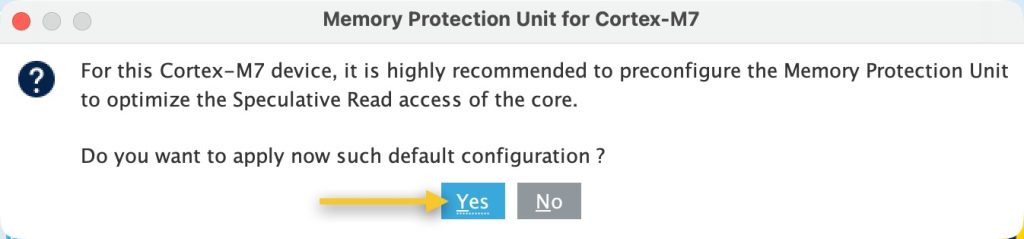
It will ask you to enable the MPU click on yes as follows:
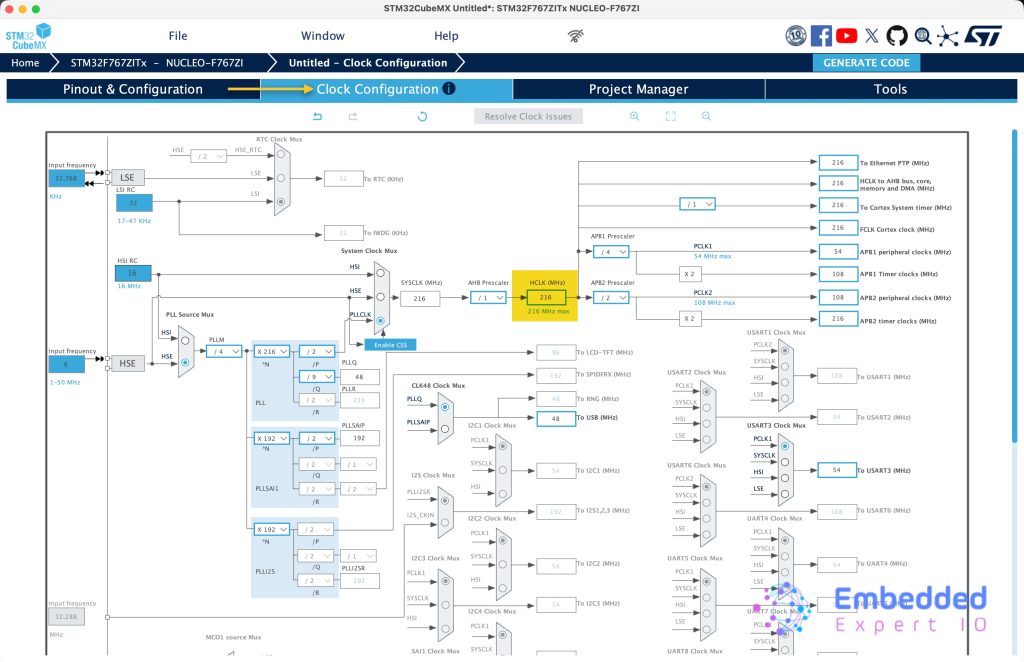
Next, from Clock Configuration Tab, set the speed to maximum of 216Hz for STM32F767Zi as follows:
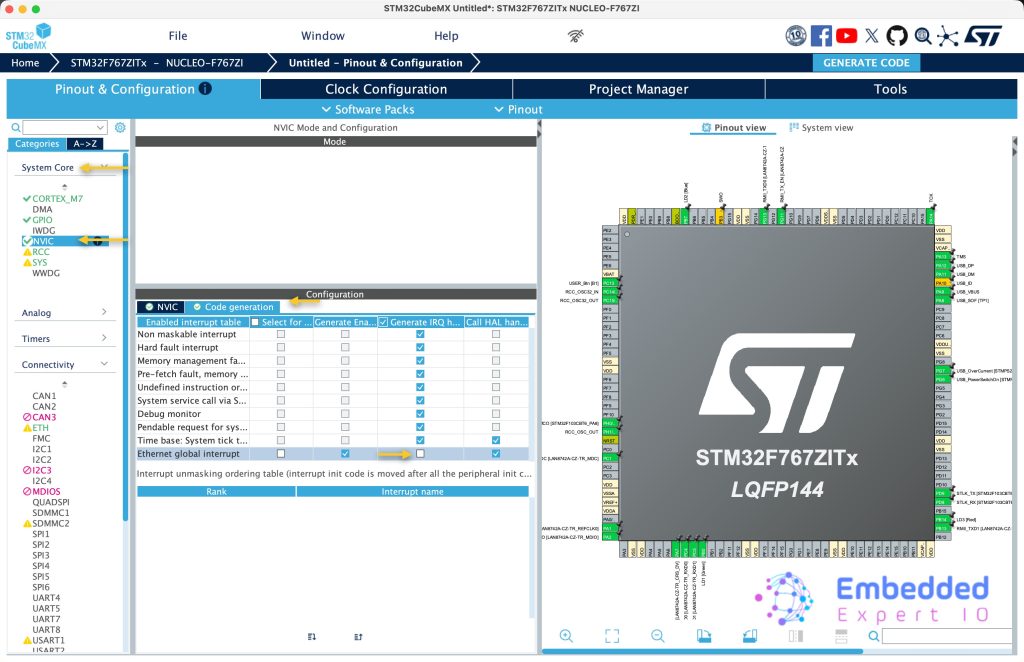
Next, from Pinout & Configuration, select connectivity, ETH and select NVIC settings tab and enable global interrupt for ETH as follows:

Next, from System Core, NVIC, select Code generation and uncheck Generate IRQ handler. The interrupt handler is handled by mangoose itself.
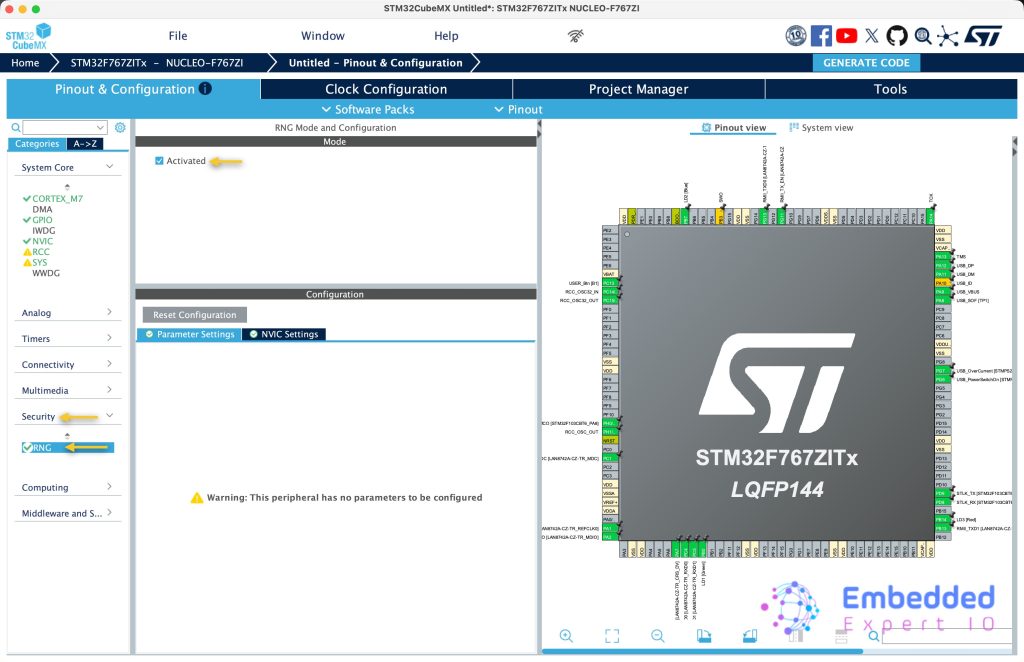
Next, from Security, enable RNG peripheral as follows:
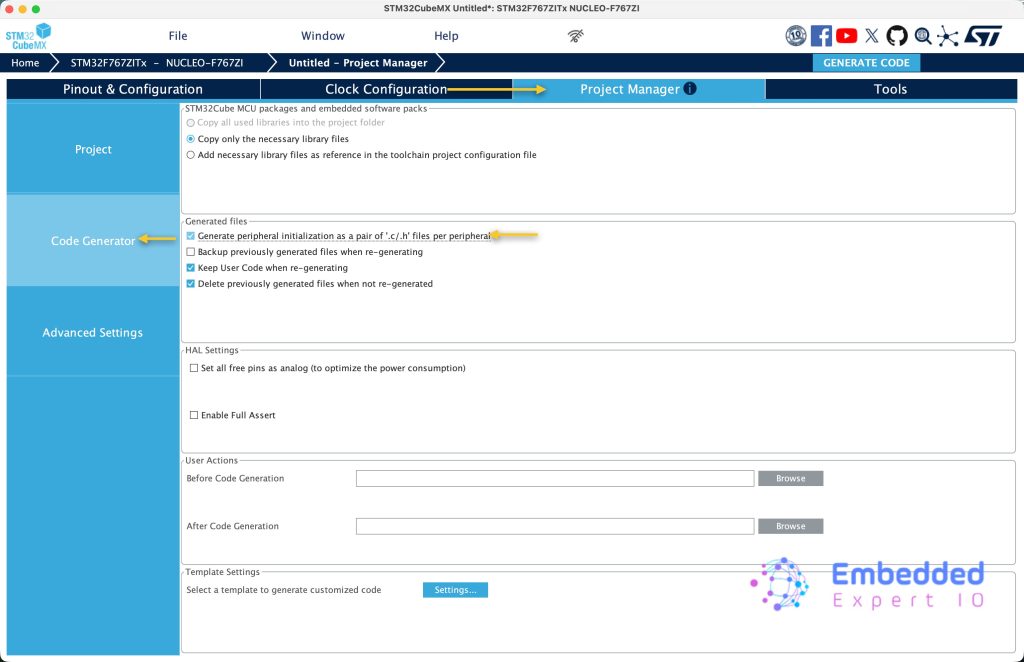
Next, from Project Manager tab, select code generation and enable Generate peripheral as pair of “.c/.h” files per peripheral as follows:
Next, from project, give the project a name, select toolchain/IDE to be STM32CubeIDE and click on generate code as follows:
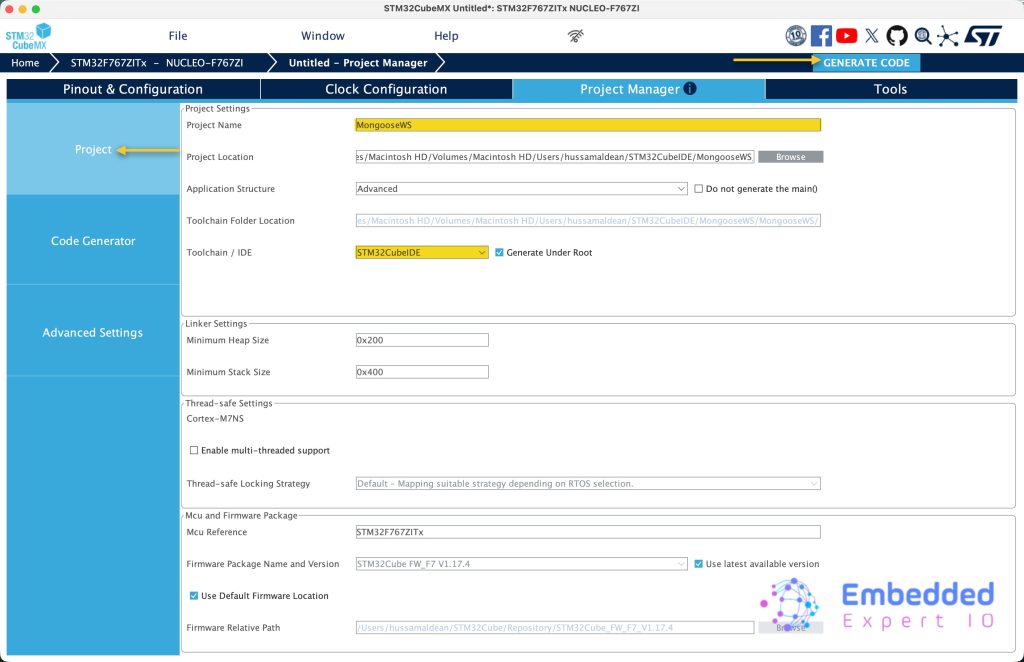
This will generate the code.
3. Importing Project to STM32CubeIDE:
Open STM32CubeIDE, select your workspace and click on Launch.
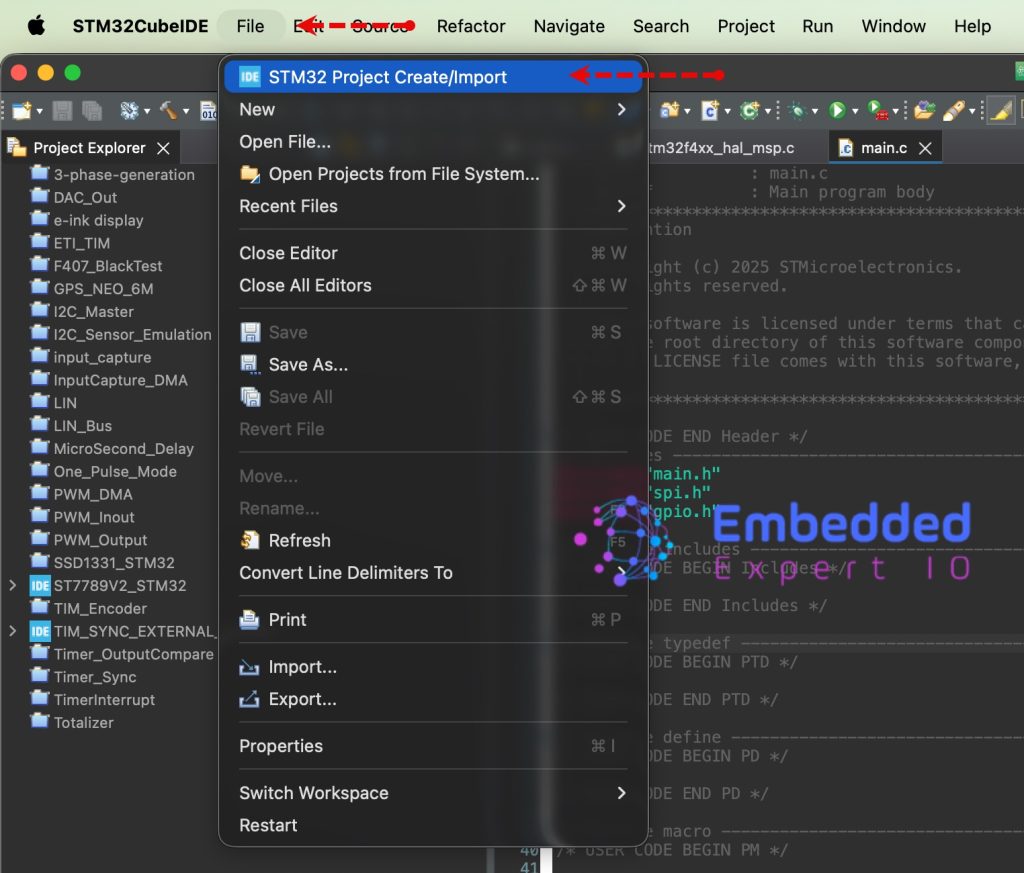
From the IDE, click File and select STM32 Project Create/Import as follows:
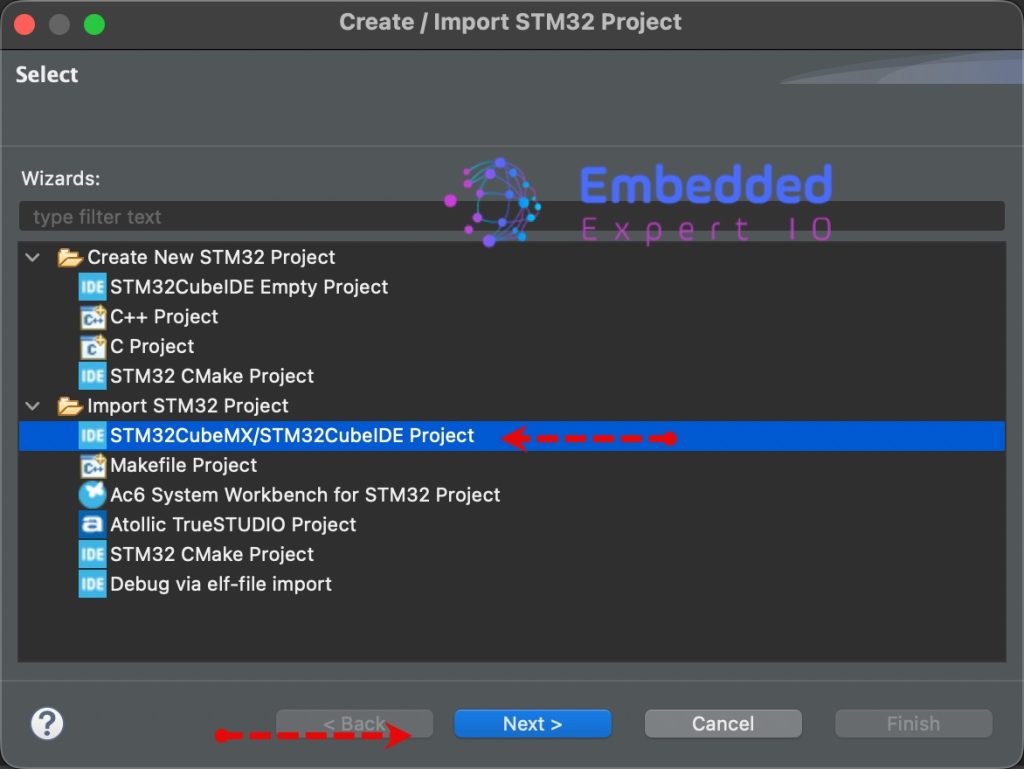
Next, from Import STM32 Project, select STM32CubeMX/STM32CubeIDE Project and click on Next as follows:
Next, select the folder that contains the .ioc file and click on Finish as follows:
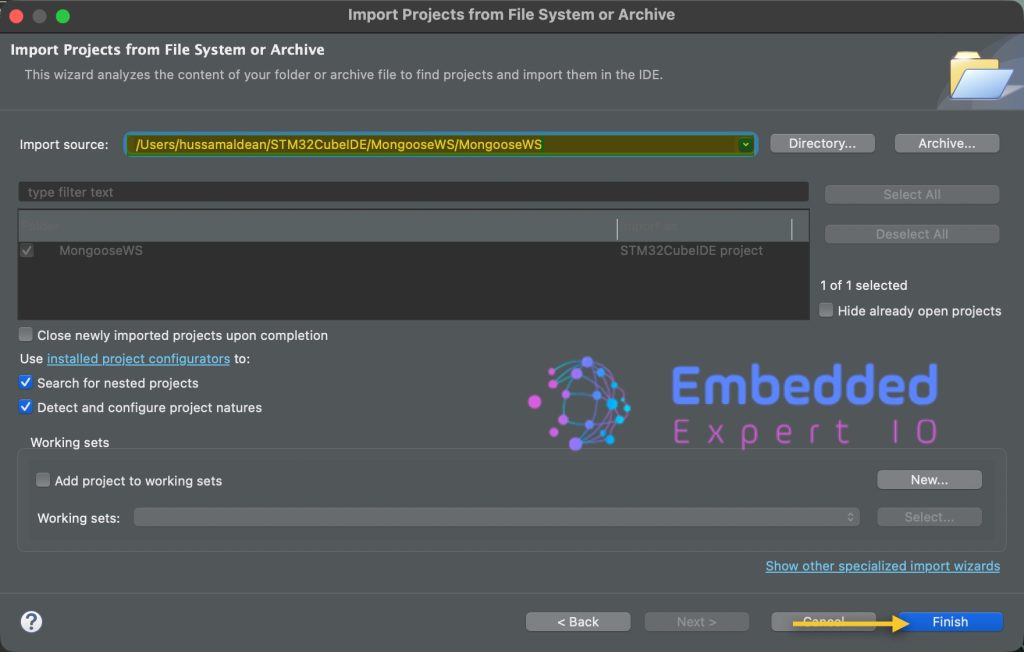
The project now shall appear in project window.
4. Basic Code Setup and Test:
Open main.c file.
In user begin Includes, include stdio.h as follows:
#include "stdio.h"
In user code begin 0, declare the following two functions:
int _write(int fd, unsigned char *buf, int len)
{
  if (fd == 1 || fd == 2)
  {                     // stdout or stderr ?
    HAL_UART_Transmit(&huart3, buf, len, 999);  // Print to the UART
  }
  return len;
}

uint64_t mg_millis(void)
{
  return HAL_GetTick();
}
In while 1 loop in user code begin 3:
printf("Tick: %lu\r\n", HAL_GetTick());
HAL_Delay(500);
Save, build and run the project as follows:

You should get the following results:
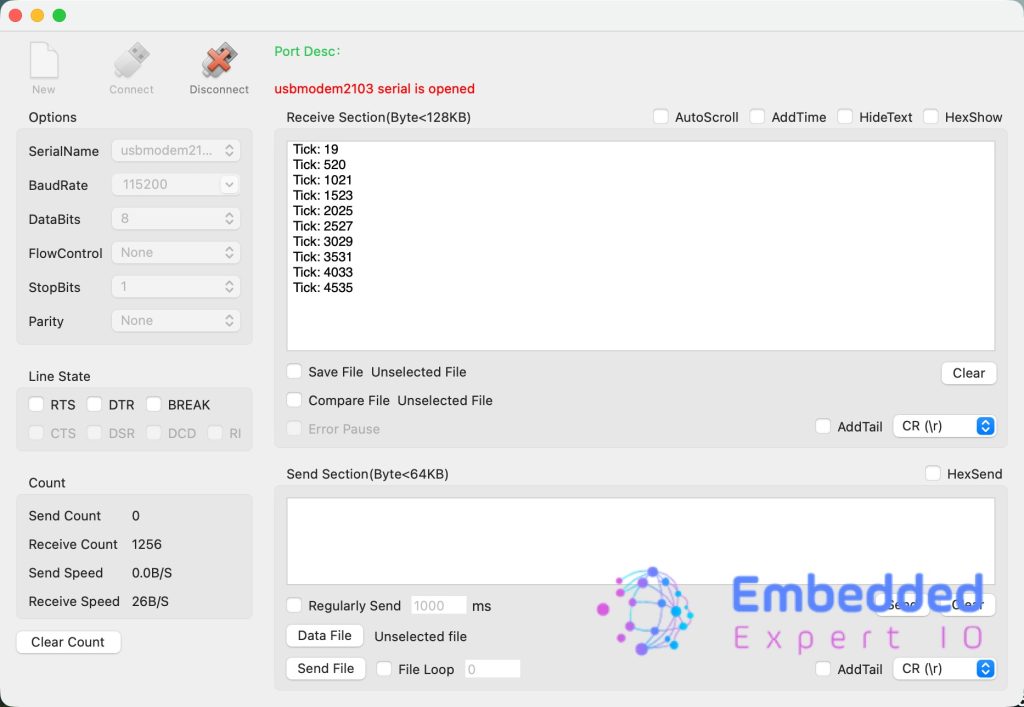
Now, the minimal firmware is working.
Next, we shall include mangoose itself and ping test the ethernet.
Stay tuned.
Happy coding 😉
Add Comment