This guide is part one of a two-part series that explains how to interface a 1602 Liquid Crystal Display (LCD) module with the HD44780 driver to an STM32F4 microcontroller. In this part, we focus on the LCD features, hardware connections, and STM32CubeMX initialization.
In this guide, we shall cover the following:
- Feature of 1602 display.
- Connection.
- STM32CubeMX Initialization.
1. Feature of 1602 Display:
The Liquid Crystal 1602 is a versatile and widely used display module, ideal for embedded systems and microcontroller projects. Here are its standout features:
- Display Format:
- 2 rows × 16 characters (total 32 characters).
- Character size of 5×8 or 5×10 dots.
- Driver IC:
- Equipped with the HD44780 controller, enabling easy interfacing with most microcontrollers.
- Interface:
- Supports both 4-bit and 8-bit parallel communication for flexible integration.
- Character Generation:
- Built-in character generator ROM with a wide range of pre-defined characters.
- Custom characters can be created using the Character Generator RAM (CGRAM).
- Power Requirements:
- Operates at 5V, with a typical current consumption of 1-2 mA.
- Low-power option for battery-operated devices.
- Backlight:
- LED backlighting for clear visibility in low-light conditions.
- Adjustable Contrast:
- Contrast can be tuned using an external potentiometer, enhancing user readability.
- Temperature Range:
- Operates reliably between -20°C to +70°C, suitable for diverse environments.
- Compact Design:
- Lightweight and easy to integrate into compact projects.
- Wide Applicability:
- Perfect for displaying text in DIY electronics, robotics, automation systems, and IoT applications.
This robust combination of features makes the Liquid Crystal 1602 a preferred choice for developers looking for a reliable and easy-to-use display module.
2. Connection:
The connection of the LCD to STM32F411RE Nucleo-64 is as following:
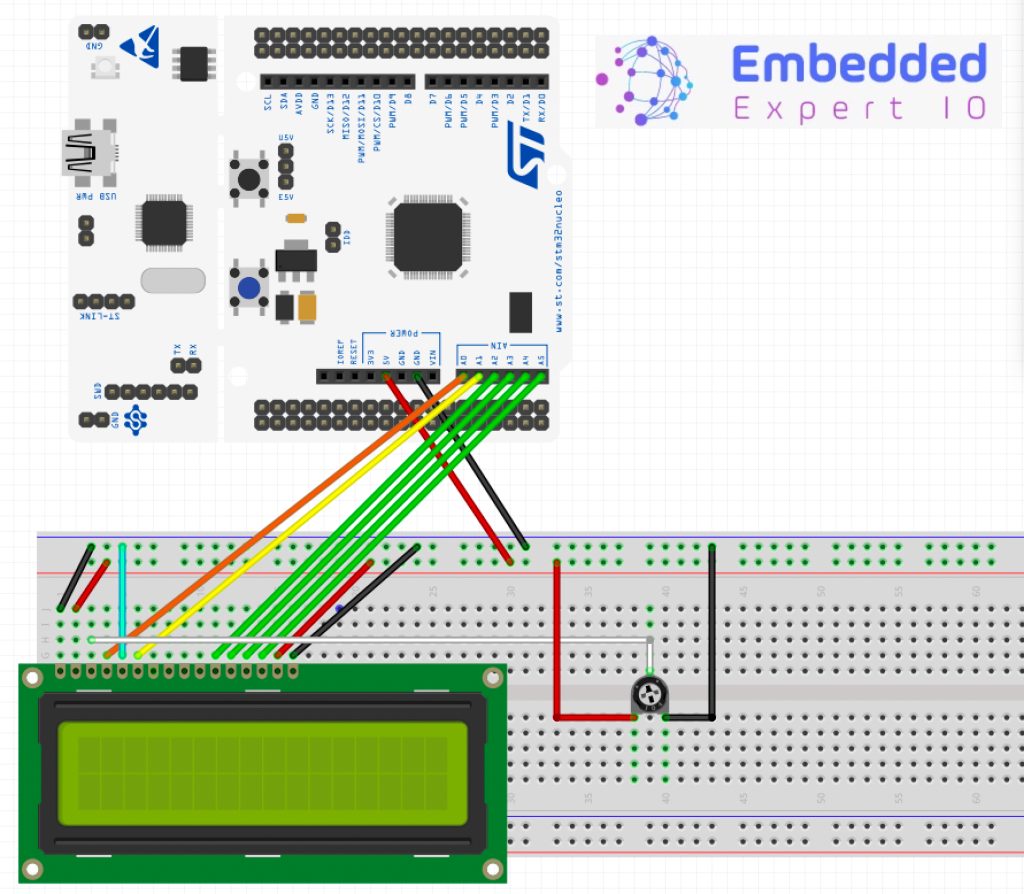
The pins of LCD1602 as following:
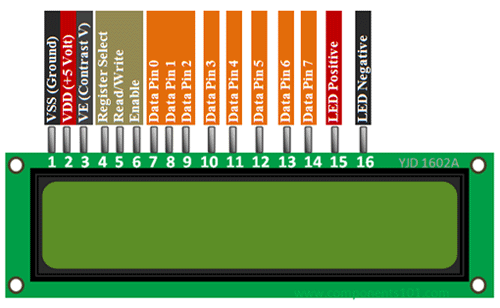
| LCD1602 Display | STM32F411 Nucleo-64 |
| Vss | GND |
| Vdd | 5V |
| Ve | Middle of Potentiometer |
| Register Select | PA0 (A0 of Arduino Uno Pin) |
| Read/Write | GND |
| Enable | PA1 (A1 of Arduino Uno Pin) |
| D0-D3 | Not connected |
| D4 | PA4 (A2 of Arduino Uno Pin) |
| D5 | PB0 (A3 of Arduino Uno Pin) |
| D6 | PC1 (A4 of Arduino Uno Pin) |
| D7 | PC0 (A5 of Arduino Uno Pin) |
| LED+ | 5V |
| LED- | GND |
Connect the two pins of the potentiometer to 5V and GND respectively.
3. STM32CubeMX Initialization:
Open STM32CubeIDE after selecting the workspace and create new project as following:

Select the MCU:

Give the project a name:

In the CubeMX window, enable the following GPIOs as output:
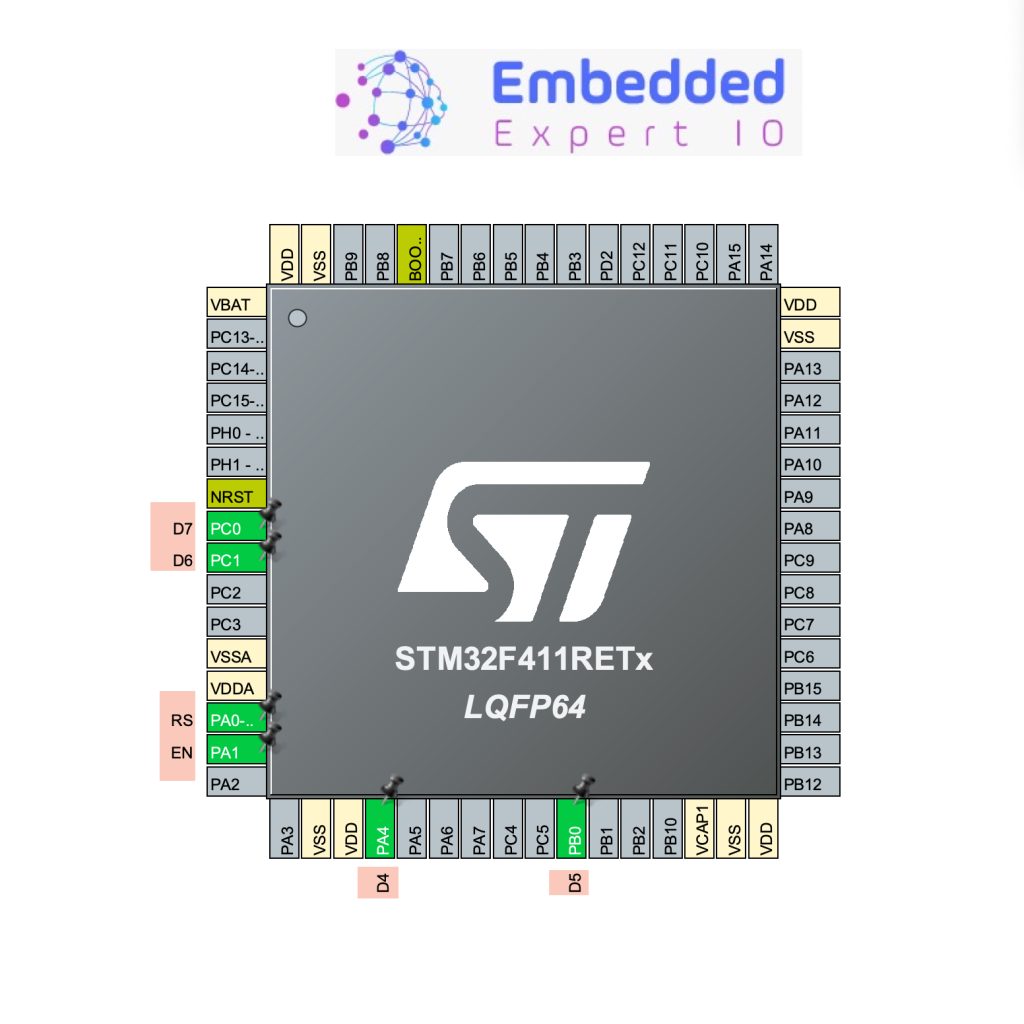
Give each GPIO a name as shown in the figure above.
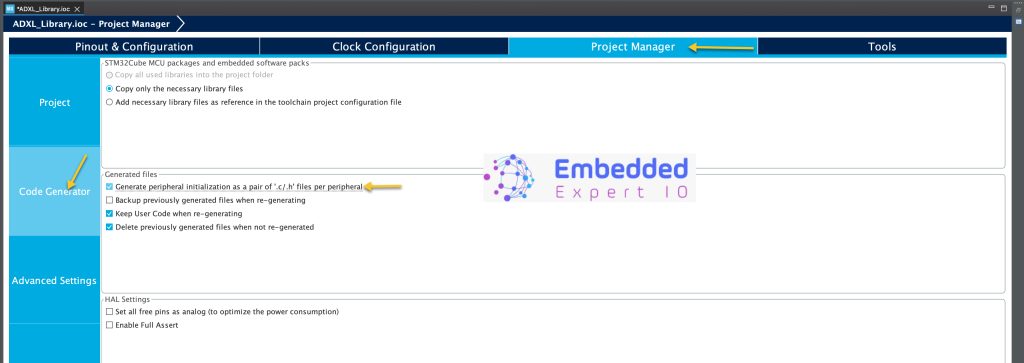
From Project Manager tab, select Code Generation and enable Generate peripheral initialization as pair of .c/.h files per peripheral as following:
Save the project this will generate the project.
Stay tuned for part 2.
Happy coding 😉
Add Comment