
In this guide series, we shall use ST TouchGFX with supported hardware to create UI, control peripheral from UI and control the UI from peripheral.
In this guide, we shall cover the following:
- What is TocuhGFX.
- Installing TouchGFX.
- Create First UI.
- Control UI element.
- Results.
1. What is TocuhGFX:
ouchGFX is a software framework developed by STMicroelectronics for creating advanced graphical user interfaces (GUIs) on embedded systems, particularly on STM32 microcontrollers. It provides a high-performance environment to design, develop, and deploy sophisticated UIs on resource-constrained devices like microcontrollers.
Key Features:
- Graphical Design Tools: TouchGFX Designer is an intuitive, drag-and-drop graphical design tool that allows developers to create UI layouts and animations without deep knowledge of coding.
- Performance Optimization: It is optimized for low-power, resource-limited microcontrollers, ensuring smooth performance even with complex graphics.
- Extensive Widget Library: The framework includes a rich set of pre-designed widgets like buttons, sliders, graphs, and animations, which can be easily customized.
- Integration with STM32 Ecosystem: TouchGFX integrates seamlessly with STM32CubeMX, a configuration tool for STM32 microcontrollers, allowing easy setup and initialization of peripherals.
- Hardware Acceleration Support: It leverages the hardware acceleration features available on STM32 microcontrollers, like Chrom-ART and DMA2D, to enhance graphic rendering performance.
- Multilanguage Support: TouchGFX supports multiple languages, making it easier to create multilingual applications.
- Scalability: Suitable for various display sizes and types, from simple monochrome displays to full-color TFT displays with high resolutions.
Applications:
TouchGFX is used in a wide range of applications, including home appliances, industrial control panels, medical devices, automotive displays, and consumer electronics, where an intuitive and visually appealing user interface is crucial.
2. Install TouchGFX:
ST made youtube video for how to install TouchGFX:
3. Create Your First UI:
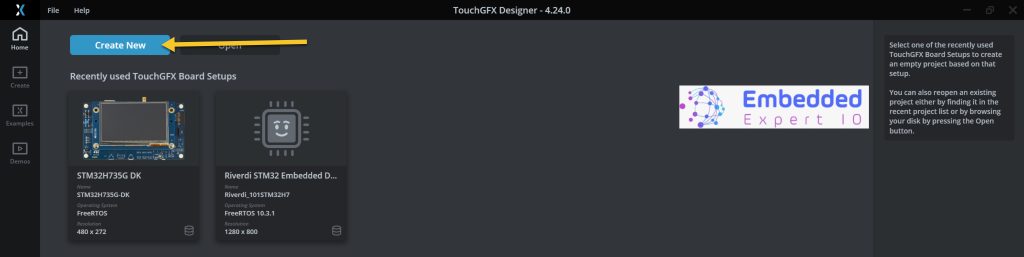
Open TouchGFX then click on Create New as following:
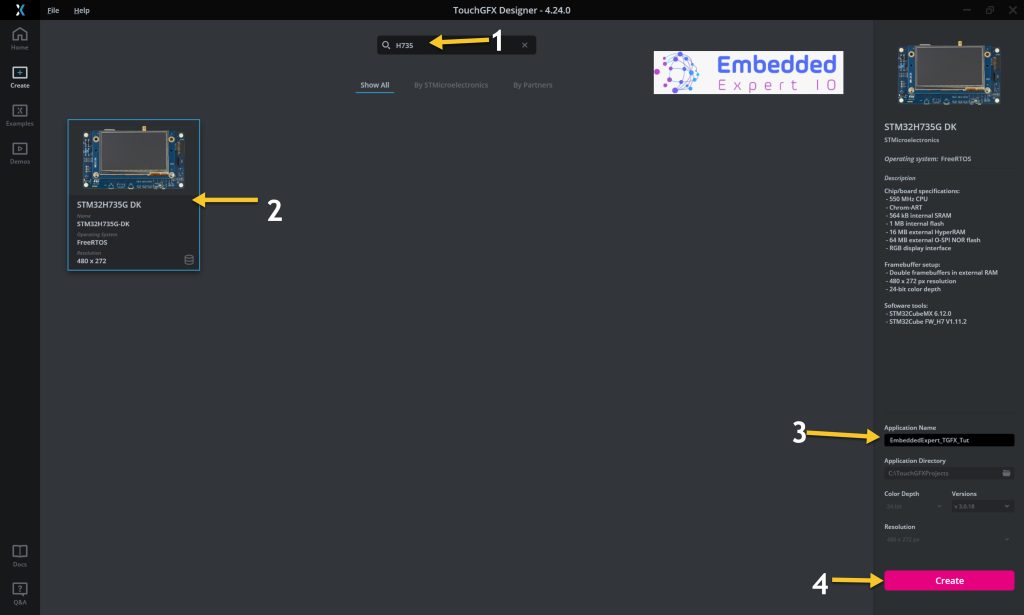
Then Select your board, in this case, STM32H735G-DK, give the project a name and click on create as following:
Next, window where you can put the UI element window appears.
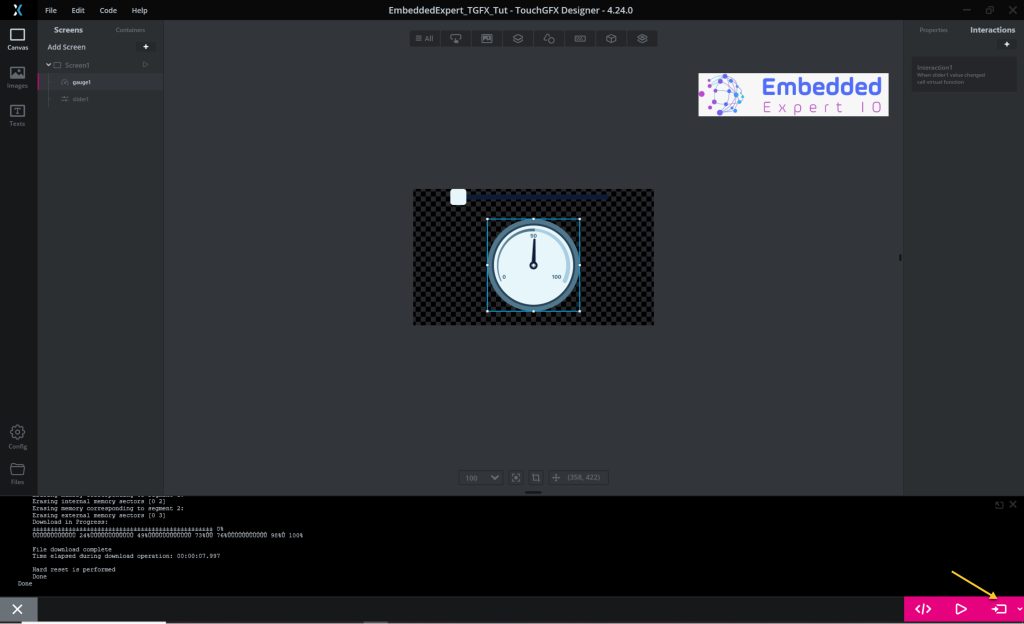
Create the following simple UI with slider and gauge as following:
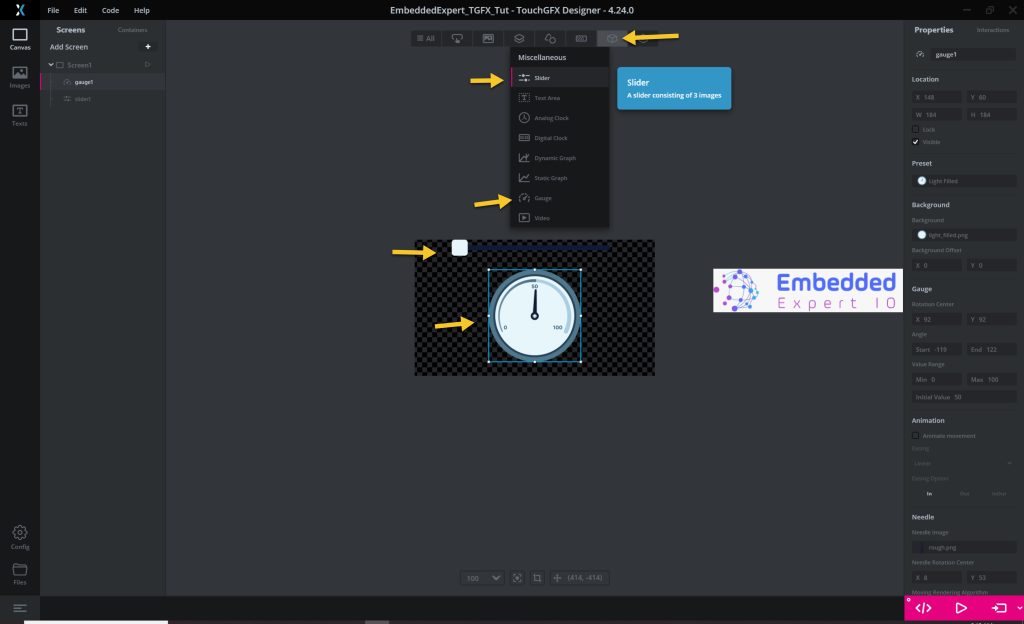
Keep everything to default for now.
Note: if the gauge seems big, click on it, from the right menu, select present and change the size from medium to small.
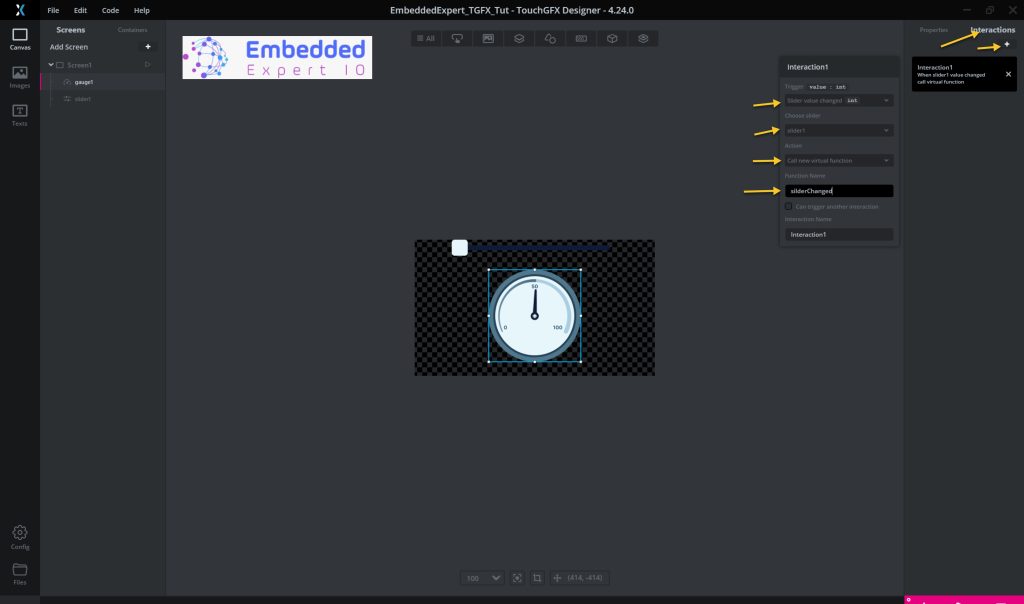
Next create new interaction with the following parameters:
- Trigger: Slider value changed.
- Choose slider: slider1
- Action: Call virtual function.
- Function name: silderChanged.
Next click on generate code then click on files.
4. Control UI element:
After the folder of project has been opened, go to this folder first:
ProjectLocation\ProjectName\TouchGFX\gui\include\gui\screen1_screen
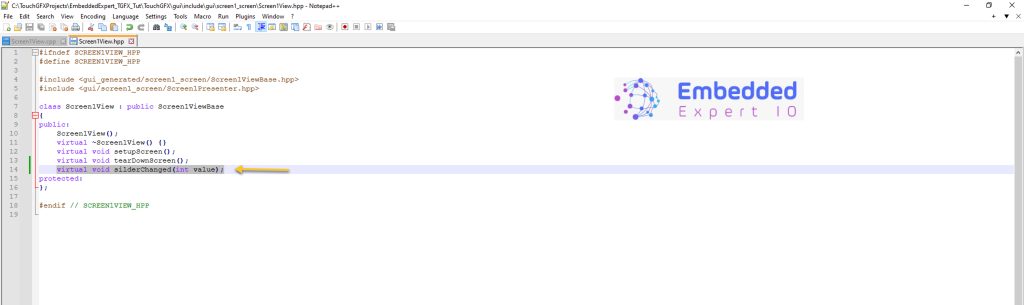
Then open the Screen1View.hpp file with your favourite text editor (NotePad++ in this case):
Within the header file declare the following function as virtual:
virtual void silderChanged(int value);
Next, go to this folder:
ProjectLocation\ProjectName\TouchGFX\gui\src\screen1_screen
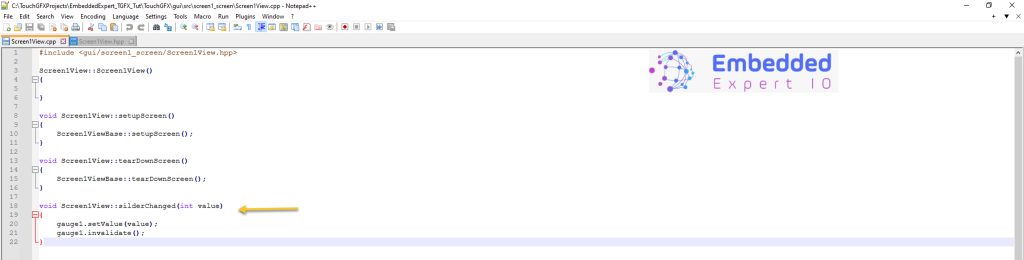
Open Screen1View.cpp file with the text editor you prefer
At the end of the source file, include the following function:
void Screen1View::silderChanged(int value)
{
	gauge1.setValue(value);
	gauge1.invalidate();
}
Don’t forget to save changes.
Next, TouchGFX editor, click on Program and Run Target as following:
5. Results:
You should get the following results.

Happy coding 😉
4 Comments
Hi Husamuldeen,
I am having problems getting the gauge to track with the slider both in simulation (not part of tutorial) and on the STM32f769i-discovery. I have gone through the tutorial several times, but cannot seem to find where I might have done something wrong. Any ideas?
Hi,
just make sure that you are modifying the screen1view source and header file not any other file.
Hi Husamuldeen,
Thanks for the feedback. I deleted the project and started from scratch. It works now. Not sure what I might have done, but it works.
I really like the apparent simplicity of these TouchGFX getting started series. Along the way, I have seen how to work with the GUI build (updating files for test) and importing it into the IDE for more extensive work.
Kudos,
John G
Great.
Add Comment