This guide shows how to use the HC-SR04 Ultrasonic Sensor with the STM32F411 Nucleo-64 board using only registers level with GPIO polling mode. The ultrasonic sensor uses sonar to determine the distance to an object. We’ll show you how to wire the sensor to the STM32F411 Nucleo-64 and provide an example application to determine the distance in cm to an object using the HC-SR04.
We well cover the following:
- Introduction to Ultrasonic
- Required Parts
- Schematic
- Code
- Results
1.1 Introduction to Ultrasonic
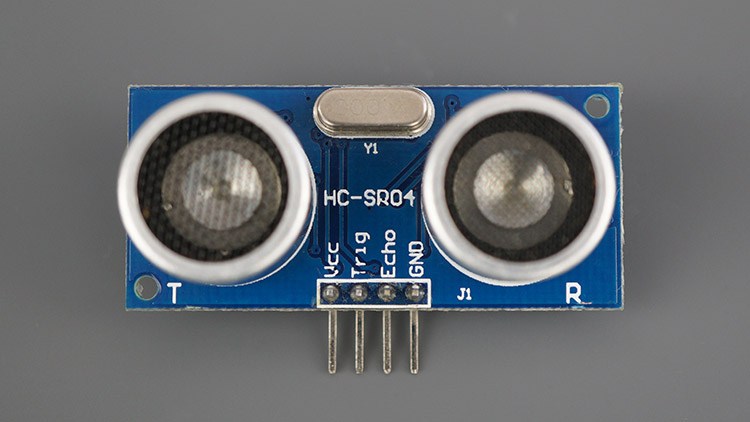
The HC-SR04 ultrasonic sensor uses sonar to determine the distance to an object. This sensor reads from 2cm to 400cm (0.8inch to 157inch) with an accuracy of 0.3cm (0.1inches), which is good for most hobbyist projects. In addition, this particular module comes with ultrasonic transmitter and receiver modules.
1.2 HC-SR04 Ultrasonic Sensor Technical Data
| Power Supply | 5V DC |
| Working Current | 15mA |
| Working Frequency | 40KHz |
| Maximum Range | 4m |
| Minimum Range | 2cm |
| Measuring Angle | 15o |
| Resolution | 0.3cm |
| Trigger Input Signal | 10uS TTL Pulse |
| Echo Output Signal | TTL pulse proportional to the distance range |
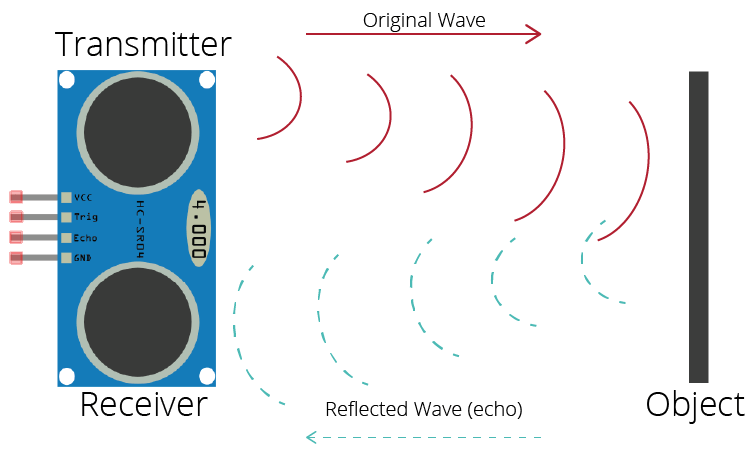
1.3 How does Ultrasonic work
The Ultrasonic uses sonar to determine the distance from the sensor and the object. This particular sensor works as following:
- When a trigger signal is received, an 8 burst of 40KHz is sent.
- Those bursts are traveled through the air to hit an object an return to to the sensor.
- Then the sensor and sends a pulse which its time is proportional to the distance.
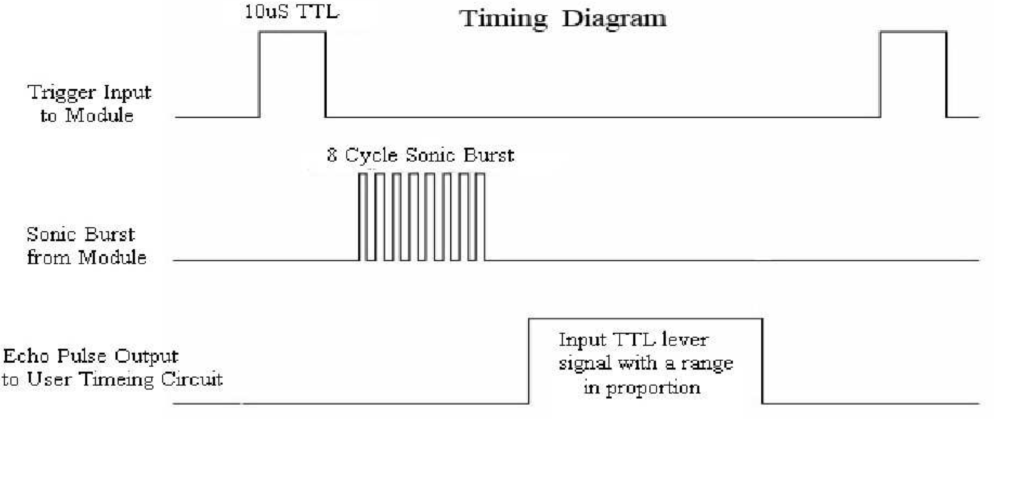
Taking into account the sound’s velocity in the air and the travel time (time passed since the transmission and reception of the signal) we can calculate the distance to an object. Here’s the formula:
distance to an object = ((speed of sound in the air)*time)/2
speed of sound in the air at 20ºC = 343m/s
2. Required Parts
We will be using the following parts:
- STM32F411RE Nucleo-64
- HC-SR04 Ultrasonic Sensor.
- Hookup wires
We will be using keil uVision to program the STM32
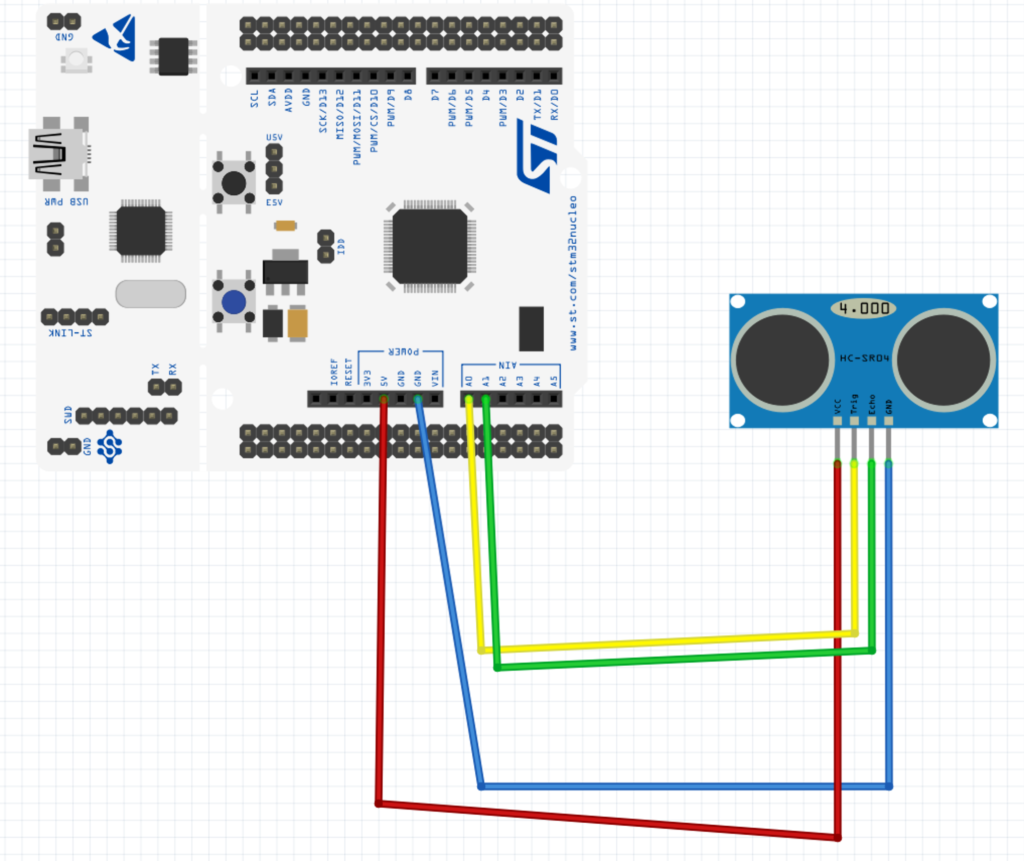
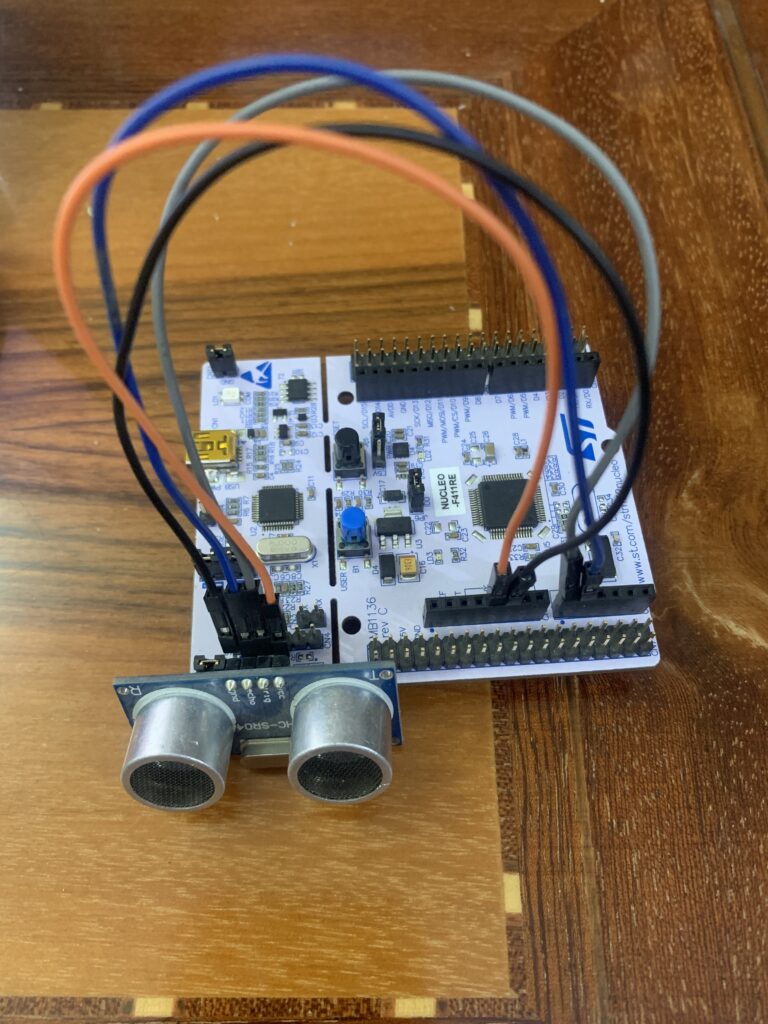
3. Schematic
The wiring of HC-SR04 with STM32 is shown as below. The Vcc of the HC-SR04 is connected to the 5V of the Nucleo board, GND to GND of the Nucleo board, Trig to A0 (PA0) and echo to A1 (PA1).
4. Code
The following code is the code which has been used in this article.
#include "stm32f4xx.h"                 			 // Device header
//macros for trigger pin
#define Trig_high		GPIOA->BSRR=GPIO_BSRR_BS_0 			// turn on 	PA0 (trig pin)
#define Trig_low		GPIOA->BSRR=GPIO_BSRR_BR_0 			// turn off 	PA0 (trig pin)

uint32_t duration;
float distance;
//prototypes of the used function
void delaymS(uint32_t ms);
void delayuS(uint32_t us);
uint32_t read_echo(uint32_t timeout);

int main(void)

{
RCC->AHB1ENR	|=	RCC_AHB1ENR_GPIOAEN; 						//enable GPIOA Clock
GPIOA->MODER	|=	(1<<0);   									//set PA0 to Output

//configure Timer1 to generate micorseconds delay
RCC->APB2ENR |= RCC_APB2ENR_TIM1EN;  /*Enable TIM3 clock*/
TIM1->PSC = 16 -1;  /* 16 000 000 /16 = 1000 000*/
TIM1->ARR = 1;  /* 1000 000 /1 = 1000000*/
TIM1->CNT =0;
TIM1->CR1 =1;
while(1)
{
Trig_low; 														//turn off trig
delayuS(10); 													//wait 4uS
Trig_high;  													//turn on trig
delayuS(10);
Trig_low;
duration=read_echo(400000); 								    //measure the time of echo pin
distance=duration/58;											//distance=duration/2*SOUND_SPEED
delaymS(1000);													//delay for 1 second between each read
}

}

void delaymS(uint32_t ms) //delay for certain amount in milliseconds
	{
	SysTick->LOAD=16000-1;
	SysTick->VAL=0;
	SysTick->CTRL=0x5;
		for (int i=0;i<ms;i++)
		{
			while(!(SysTick->CTRL &0x10000)){}
		}
	SysTick->CTRL=0;

	}

void delayuS(uint32_t us) //delay for certain amount in microseconds
	{
for(int i =0;i<us;i++){

		 while(!(TIM1->SR & 1)){}   /*wait for UIF set*/
			 TIM1->SR &= ~1;

	}
	}

uint32_t read_echo(uint32_t timeout)
	{
		uint32_t duration;
	while(!((GPIOA->IDR)&GPIO_IDR_ID1)){duration++;delayuS(1);
	if(duration>timeout){return 0;}
	}
	duration=0;
while((GPIOA->IDR&GPIO_IDR_ID1)){duration++;delayuS(1);if(duration>timeout){return 0;} }
	return duration;
	}
5. Results
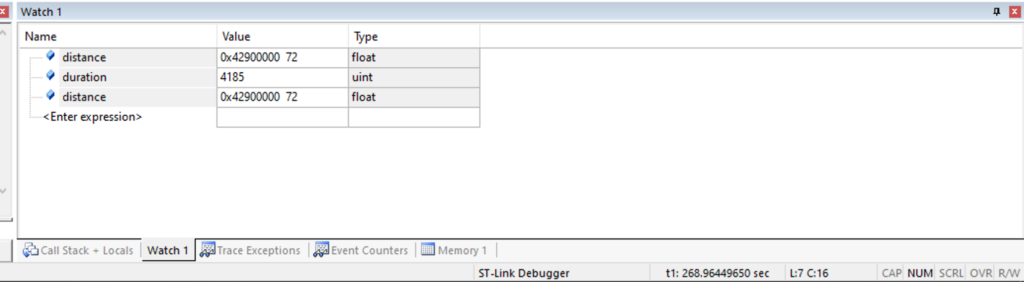
From debugging session in keil uVision, you can see the variable after they being added to watch windows
to add a variable open a debug session and select the variable and follow these steps:
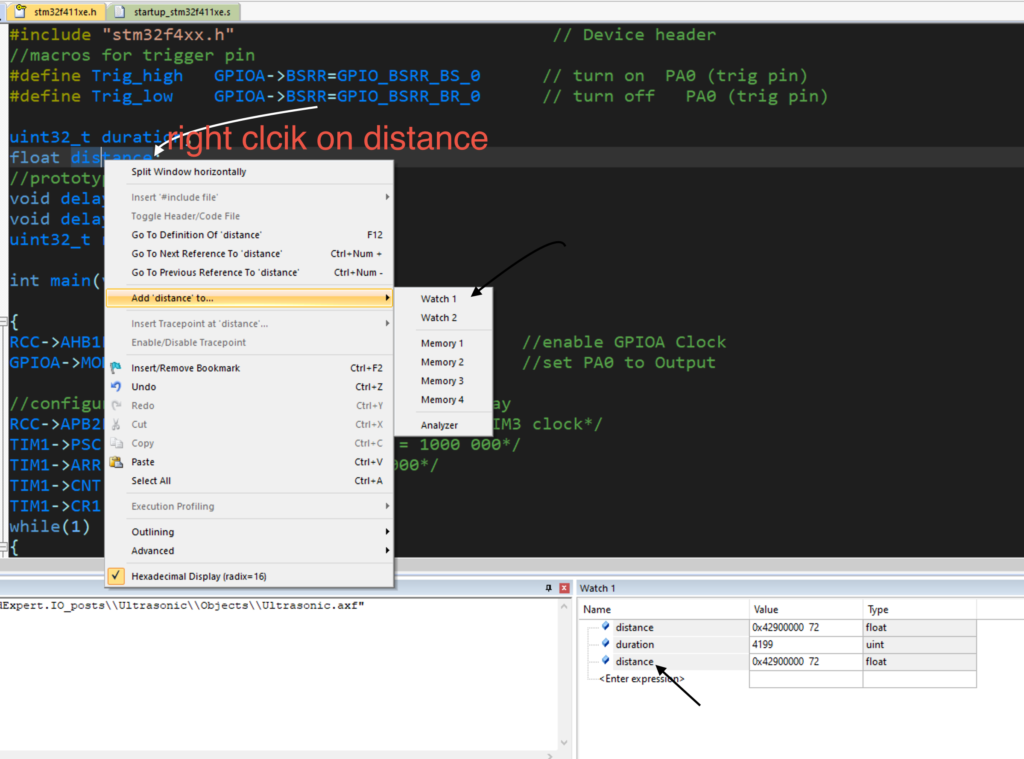
here is the results, the distance can be measured using ultrasonic sensor.
Add Comment