
In this guide, the installation of the IDE is presented.
In this guide, we shall cover the following:
- Installing the IDE
- Constructing the correct project tree
Note: This guide for STM32F411. However, the method will apply to most of STM32 families.
1. Installing the IDE
Head to main ST website (www.st.com).
From the website, in search bare, search for STM32CubeIDE:

After that, select STM32CubeIDE. Select the version or get the latest.
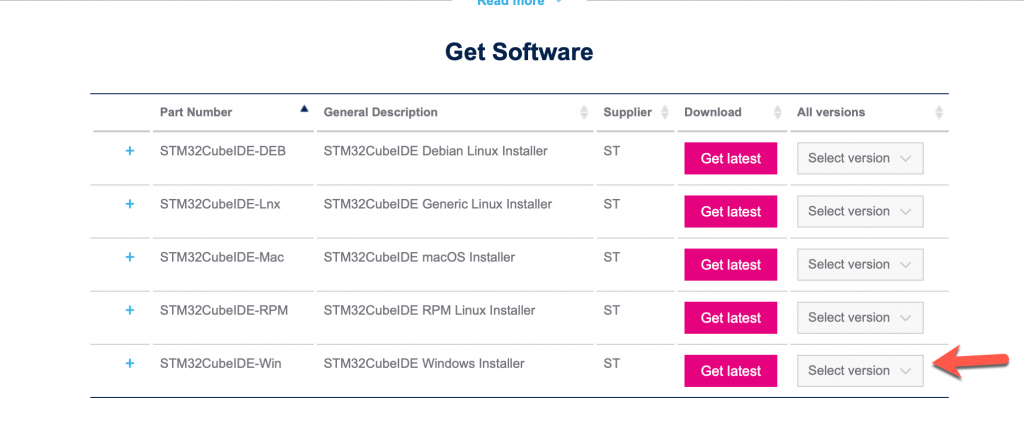
After selecting the version, the website will ask to accept the license agreement and requires either sign-in or create new account. Hence, either sign-in or create account.
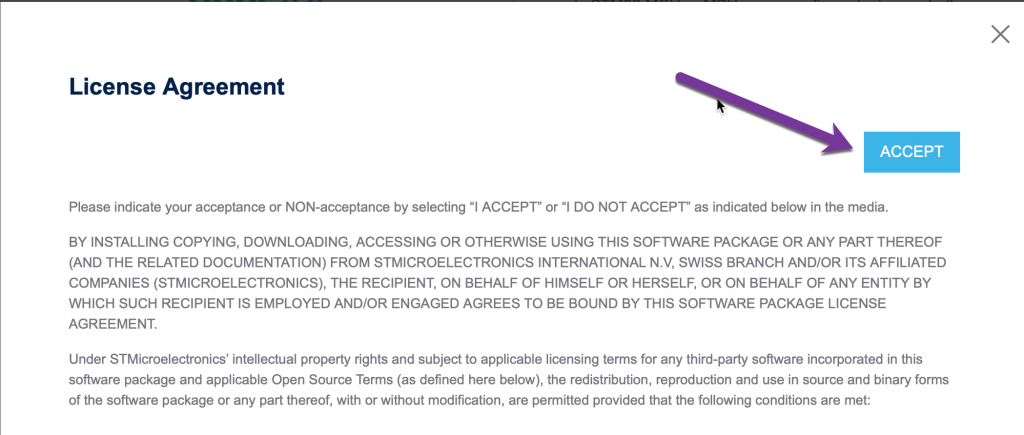

After log-in, the download shall start automatically. After Download finishes, extract the file and run the executable file.
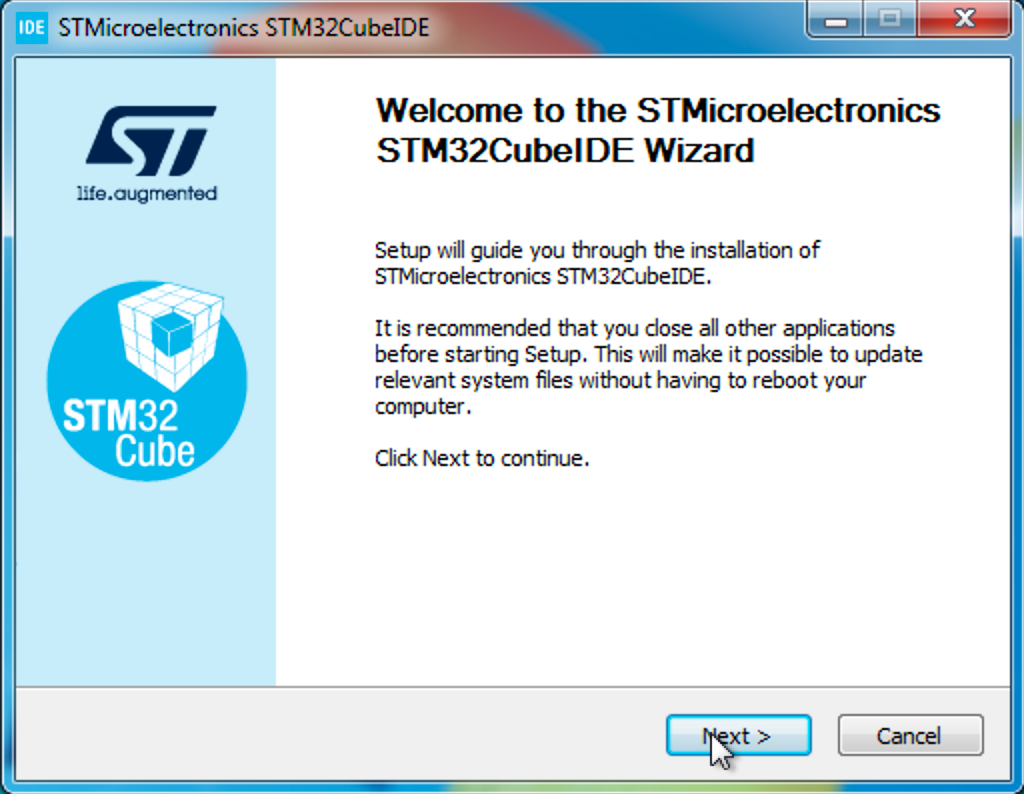
You can go through the installation by clicking on next.
2. Construct the right project tree:
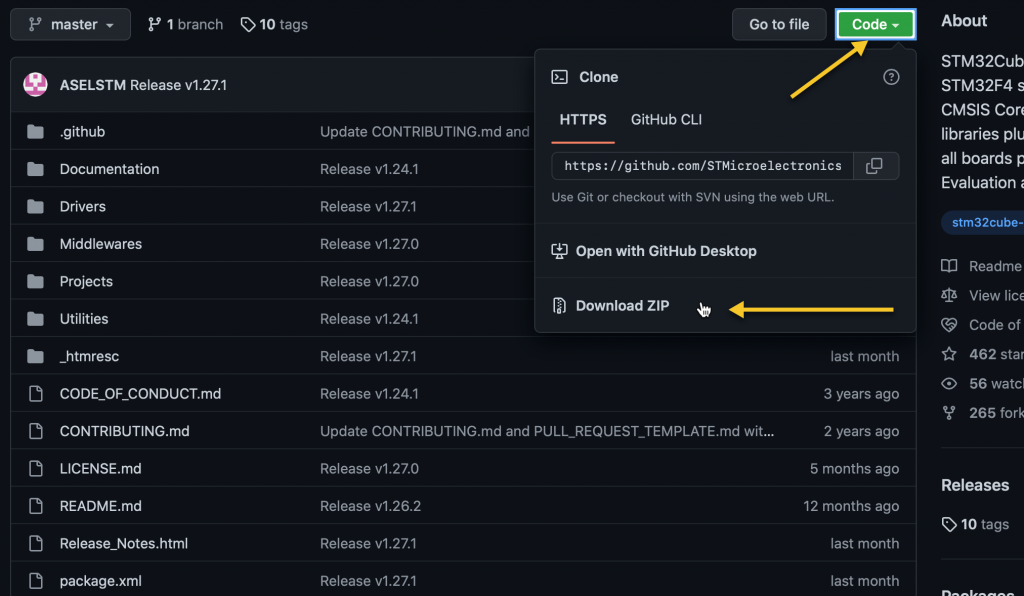
For constructing the right project tree, the header files can be downloaded from STM32CubeF4 repository on github.

Then go to github to download the firmware.
After downloading the firmware, extract it as following:
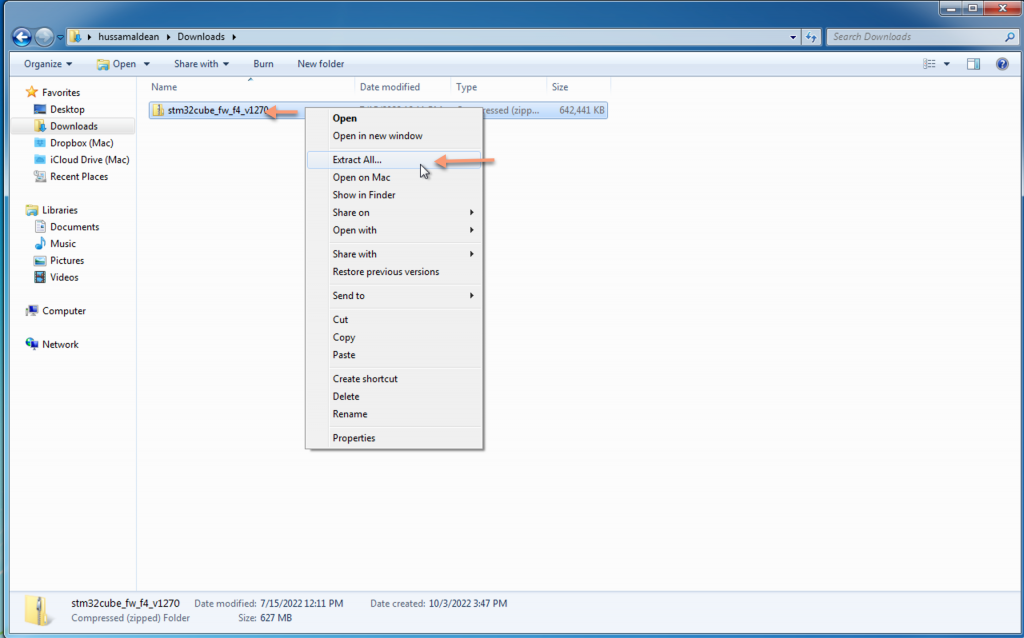
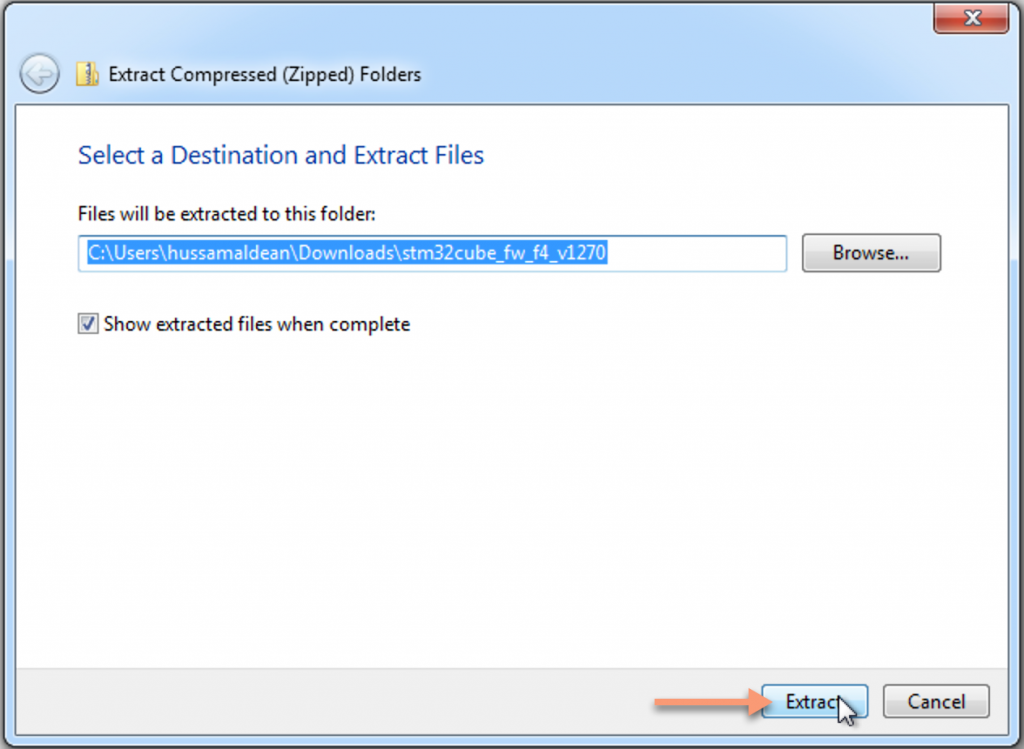
After clicking on extract here, this will pop-up:
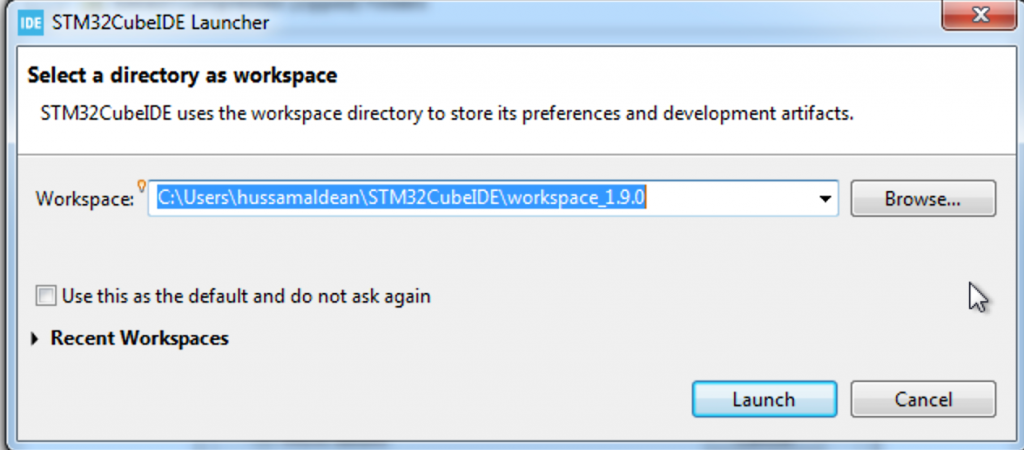
After extraction, open STM32CubeIDE and select your work space:
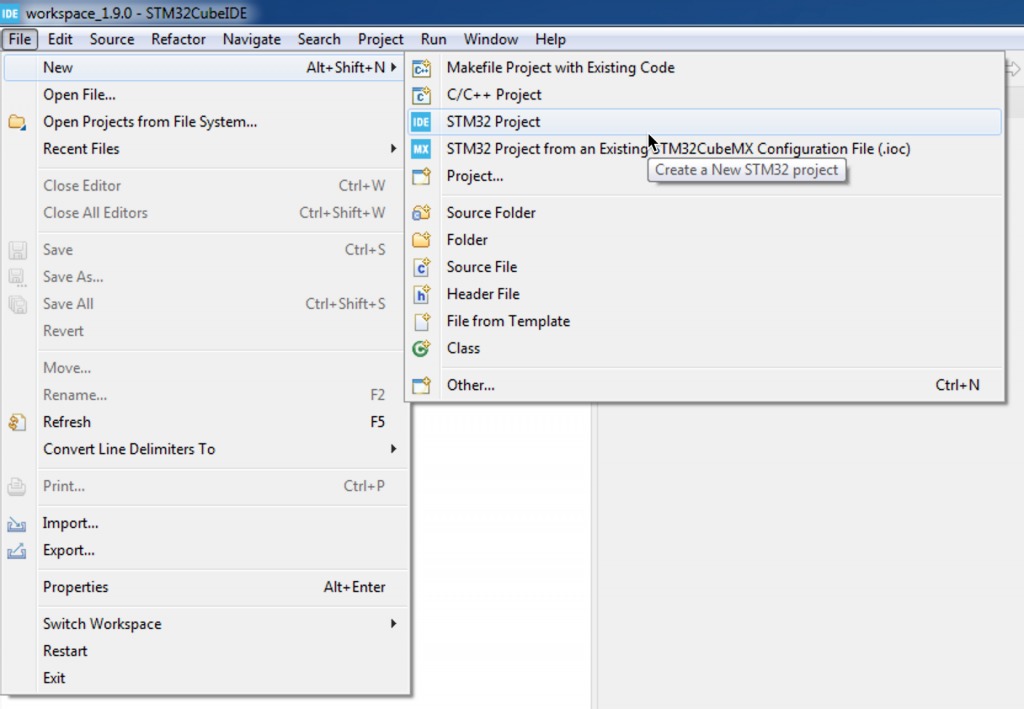
After that, go to file, new, STM32 Project:
Then, select your MCU by writing the part number in the dialog box. This book shall use STM32F411 as main MCU.
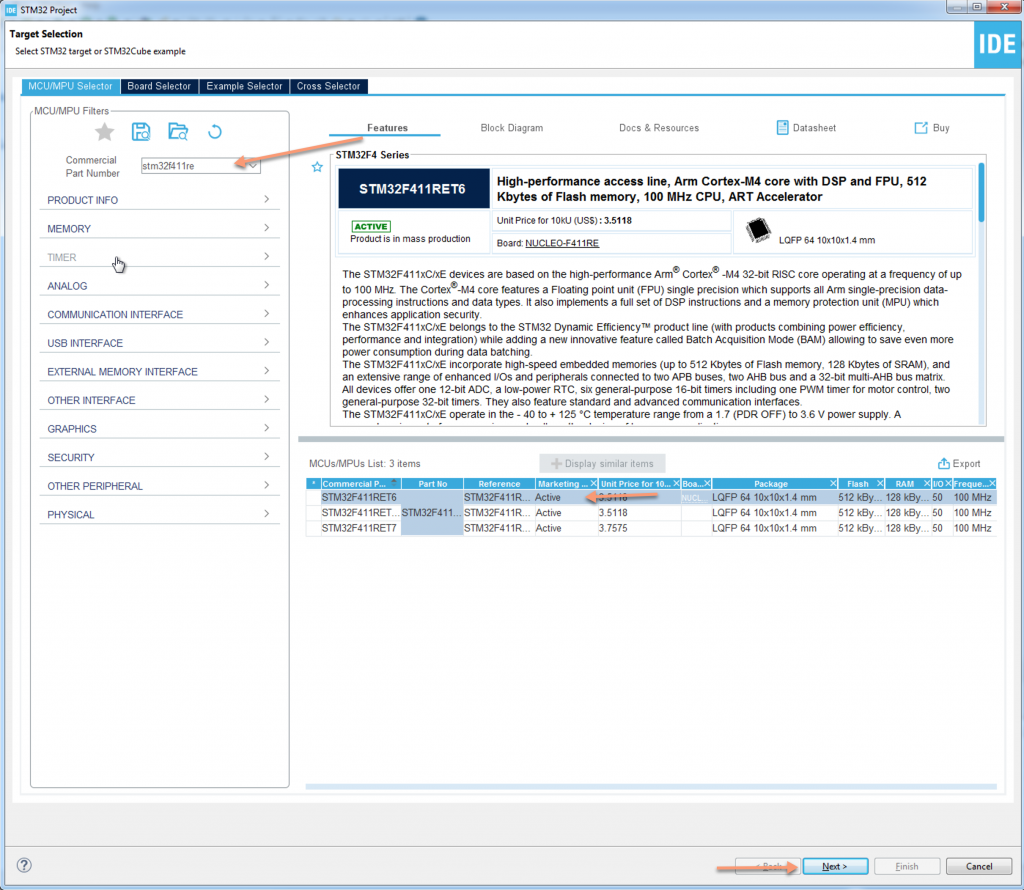
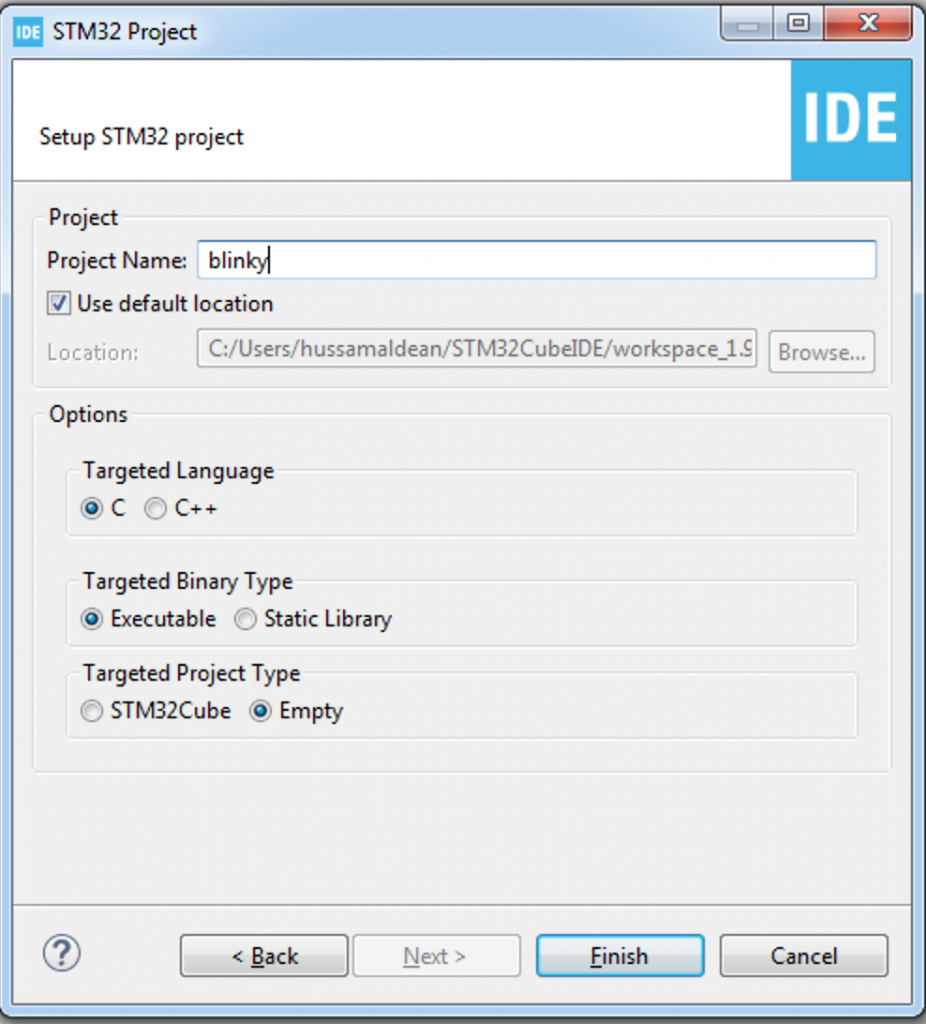
After selecting the correct MCU, press next and give a project name called blinky and make it is an empty project:
Then, the project shall be generated.
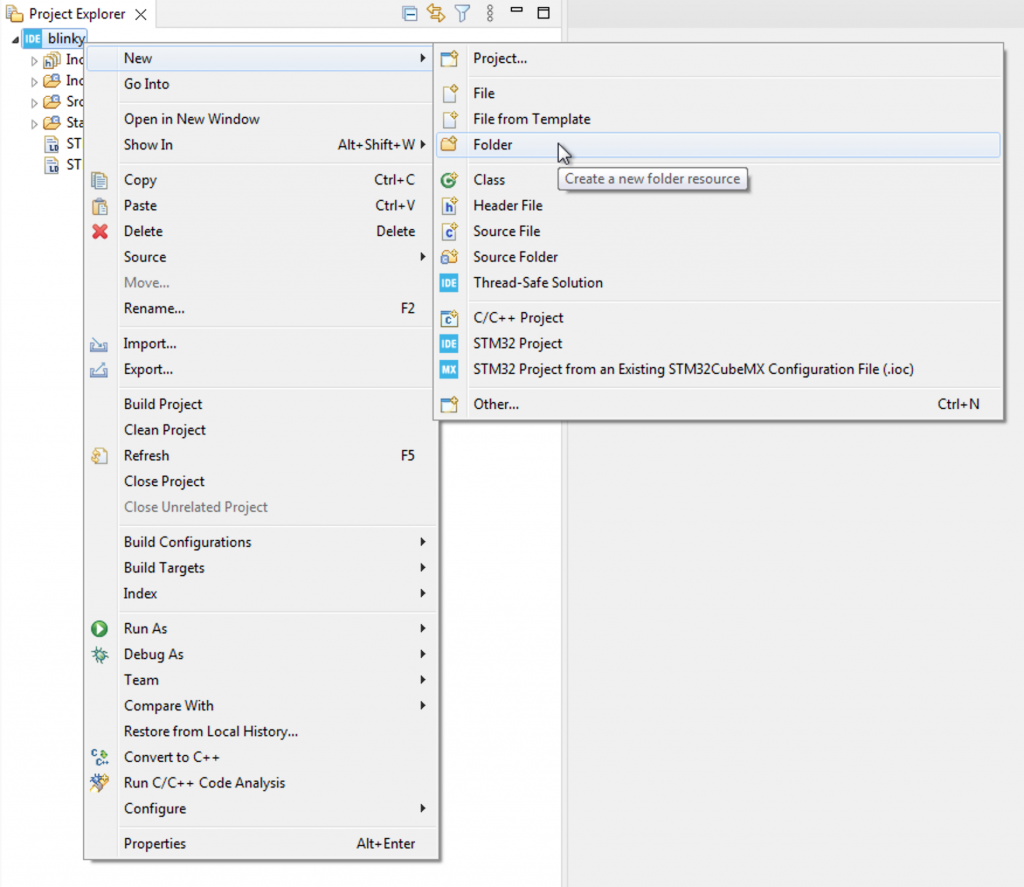
From the project explorer, right click on the project name, select new and select folder:
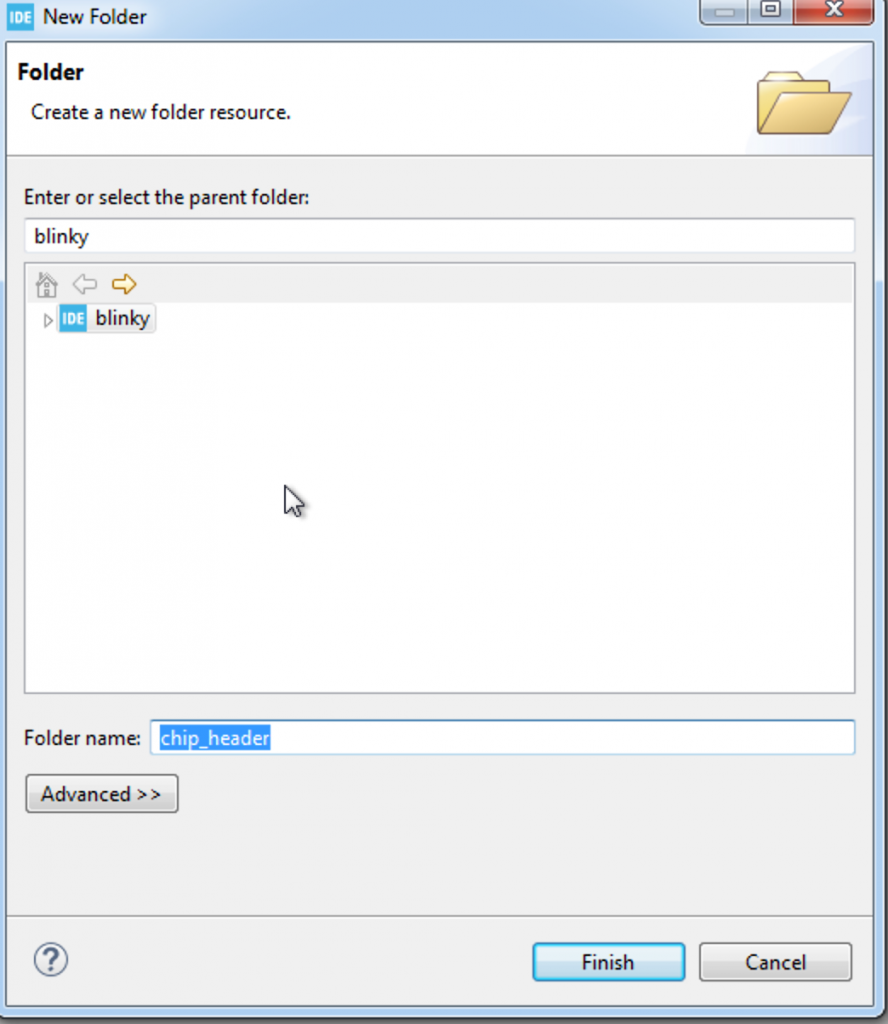
Name the folder as chip_header and click on finish:
Now, within the firmware folder, go to Drivers/CMSIS and simply drag and drop Device and Include folders to chip_header folder:

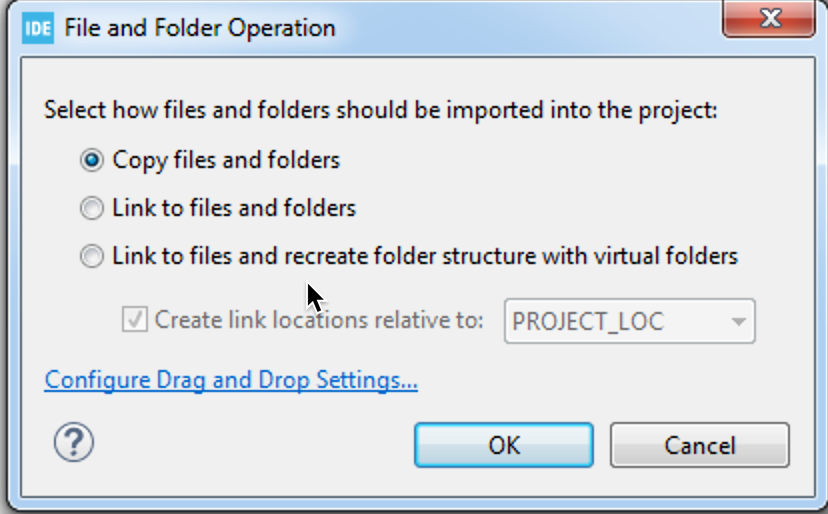
This window will pop-up:
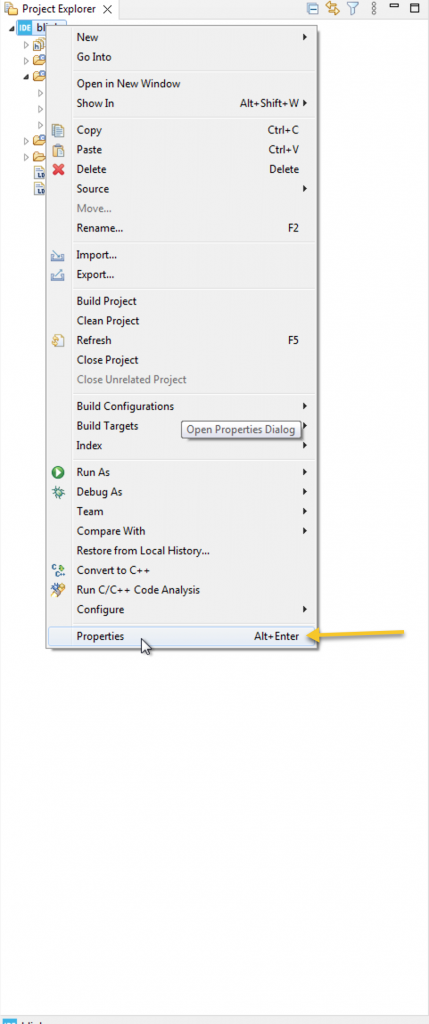
After copying the files, the path of those folder shall be added to the project. To do so, right click on the project name, and select properties:
Then, go to C/C++ General and select path and symbols:
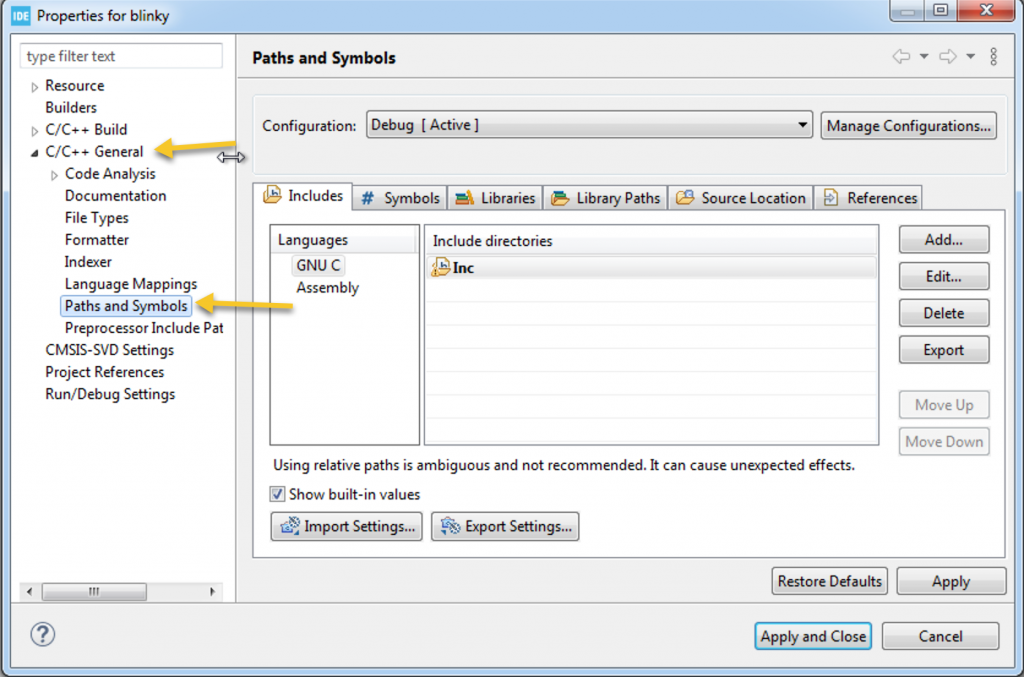
Remove everything within include directories and add as shown in the figure below:
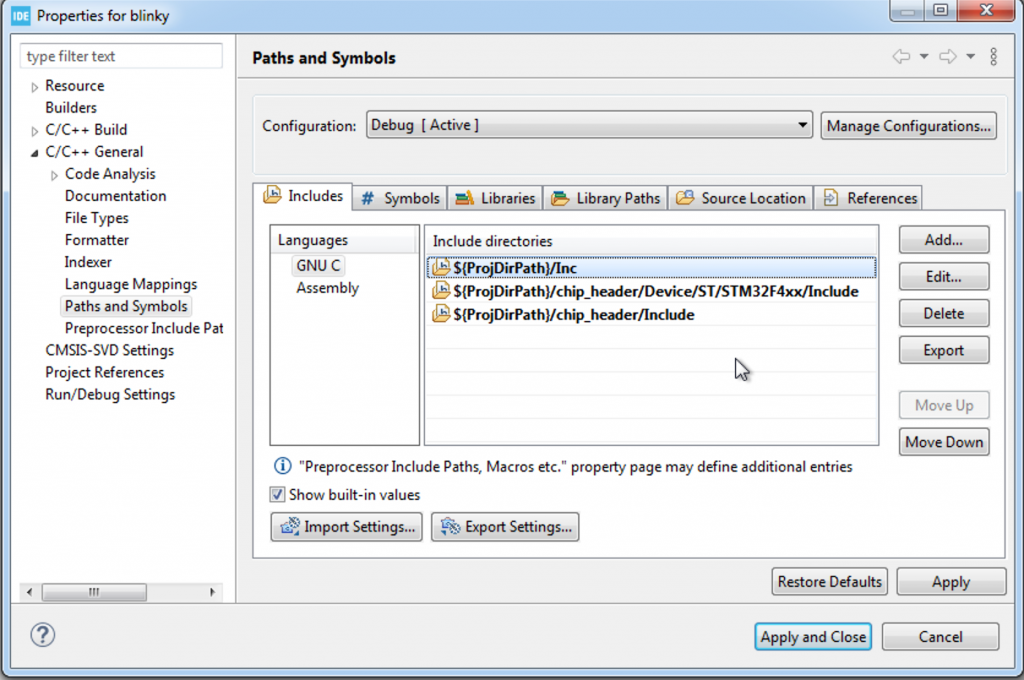
${ProjDirPath}/Inc
${ProjDirPath}/chip_header/Device/ST/STM32F4xx/Include
${ProjDirPath}/chip_header/Include
Now, head to next window which is Symbols and add the following:
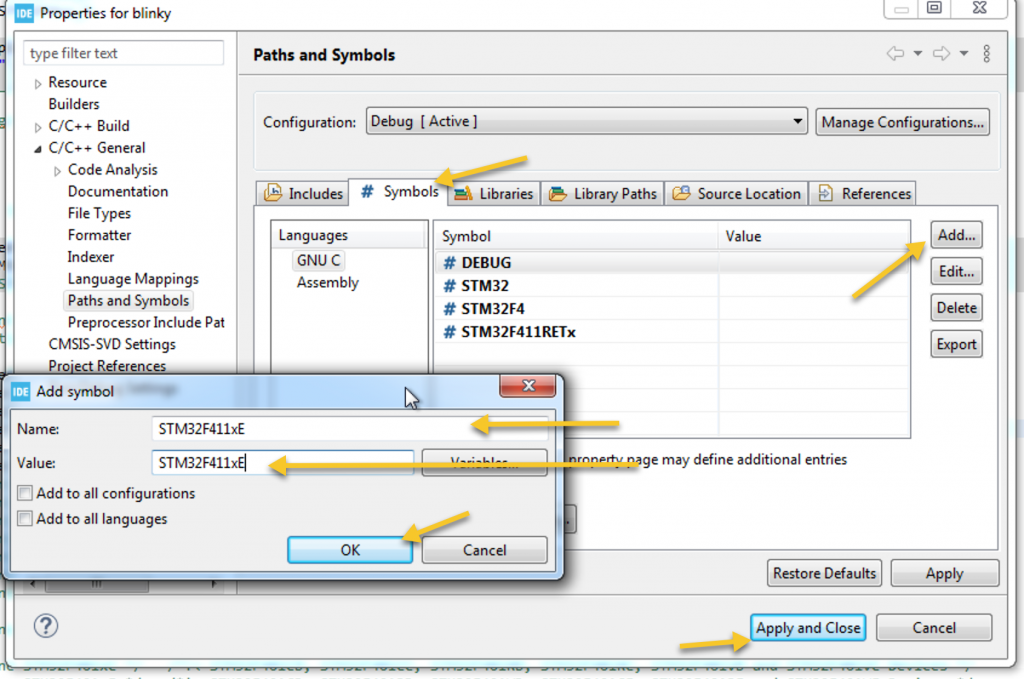
STM32F411xE
Now, STM32CubeIDE is ready for bare metal programing for STM32F411RE.
Enjoy this and happy coding 🙂
Add Comment