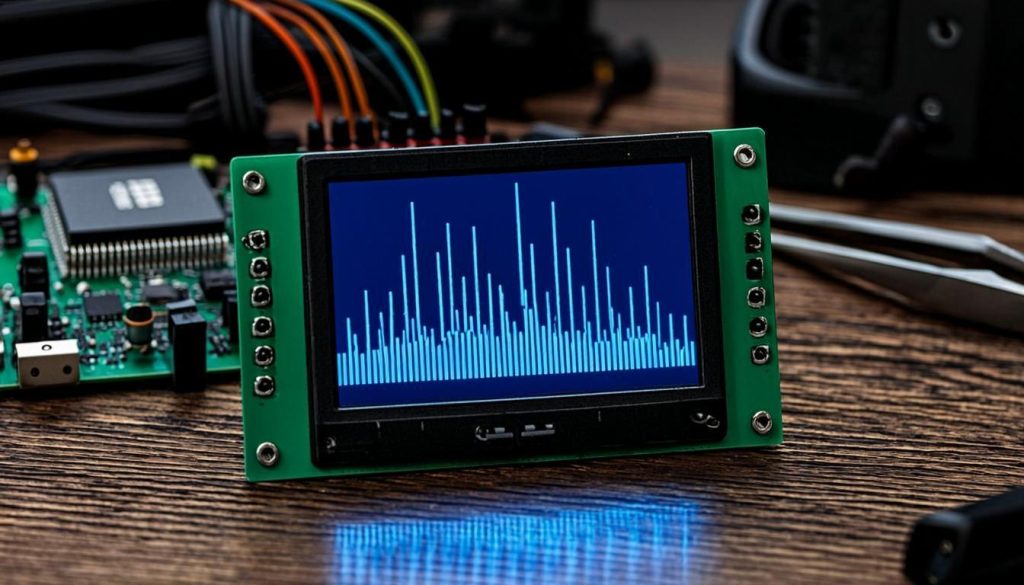
Adding fluid, dynamic animations to embedded displays doesn’t require a high-end GPU or a complex graphics framework. In this guide, you will learn how to use the U8g2 graphics library to build a zero-flicker, high-frame-rate audio visualizer on a standard 128×64 OLED using nothing but standard C math and smart buffer management.
In this guide, we shall cover the following:
- Introduction.
- Firmware Development.
- Results.
1. Introduction:
Adding dynamic, fluid animations to embedded displays often feels like a dark art reserved only for high-end microcontrollers running embedded Linux and pushing raw RGB data to bulky TFT screens. We have all been conditioned to believe that if you want an interface to feel “alive”—to have sweeping gauges, bouncing bars, or smooth transitions—you need a graphics processing unit, a dedicated frame buffer in external SDRAM, and a complex GUI framework like TouchGFX or LVGL.
But the truth is, you don’t need 65,000 colors or a massive parallel bus to create a visually stunning user experience. A classic, inexpensive $2 monochrome 128×64 OLED screen is more than capable of delivering high-frame-rate, fluid animations—provided you pair it with the right software architecture and a bit of mathematical creativity. Monochrome displays offer incredible contrast, perfectly crisp pixel edges, and lightning-fast refresh rates, making them a staple in everything from professional audio gear to custom mechanical keyboards and industrial instruments.
The secret to unlocking this potential on a tiny 1-bit display lies entirely in how you manage memory and draw to the screen. Sending data byte-by-byte directly to the display controller might seem intuitive, but it is a recipe for disastrous screen tearing and flickering. In this guide, we are going to prove that constraints breed creativity by building a high-tech, simulated Audio Spectrum Visualizer from scratch using the U8g2 graphics library.
We will walk step-by-step through the essential techniques for embedded animation. You will learn how to use a full-screen RAM frame buffer to achieve a zero-flicker “double-buffered” redraw, how to simulate complex physical properties like gravity and acceleration using standard C math, and how to structure a non-blocking main loop so your animations run at a buttery 30 frames per second without freezing your microcontroller. Whether you are building a synthesizer, a benchtop power supply, or a custom smart home remote, the principles in this guide will change the way you approach monochrome UI design. Let’s make those pixels move.
2. Firmware Development:
We shall use the OLED setup from this guide here.
Once you have setup the firmware, open main.c
Within the main.c, we start by including the following header files:
#include "stdio.h"
#include "math.h"
#include "stdlib.h"
These will allow us to get access to certain functions that needed later.
Next, define the following parameters:
#define NUM_BARS 16
#define MAX_BAR_HEIGHT 40
The UI shall have 16 bars and maximum hight of 40pixel.
In user code begin 0, declare the following function:
void render_audio_visualizer(void)
This function shall be called to render the animated UI.
Within the function:
Declare the following variables:
static uint32_t last_update = 0;
static float time_counter = 0.0f;

/* Persistent peak markers that slowly fall down */
static uint8_t peak_heights[NUM_BARS] = {0};
static float peak_fall_speed[NUM_BARS] = {0};
Next, get the current ticks as follows:
uint32_t now = HAL_GetTick();
Next, we shall update the UI each 33ms in none blocking mode as follows:
if (now - last_update > 33) {Store the current last_update to match now value and increment time_counter by 0.15 as follows:
last_update = now;
time_counter += 0.15f;
Next, clear the buffer:
u8g2_ClearBuffer(&myDisplay);
Next, draw the UI header:
/* 1. Draw UI Header */
u8g2_SetFont(&myDisplay, u8g2_font_5x7_tr);
u8g2_DrawStr(&myDisplay, 0, 7, "AUDIO SCAN");
Next, the sweeping needle that update the graphs:
/* Sweeping needle that triggers the bars */
uint8_t needle_x = (uint8_t)((sinf(time_counter * 0.5f) + 1.0f) * 60.0f);
u8g2_DrawLine(&myDisplay, needle_x, 2, needle_x + 4, 7);
u8g2_DrawLine(&myDisplay, needle_x, 2, needle_x - 4, 7);
u8g2_DrawVLine(&myDisplay, needle_x, 0, 8);
Right aligned dB value:
/* Right aligned dB text */
u8g2_DrawStr(&myDisplay, 100, 7, "-12.4dB");
Draw a separation line as follows:
u8g2_DrawHLine(&myDisplay, 0, 9, 128);
Next, draw the 16 spectrum bars:
 /* 2. Draw the 16 Spectrum Bars */
for (int i = 0; i < NUM_BARS; i++) {
  /* Simulate an audio curve (lower freqs have higher amplitude, falls off to right) */
  float base_amp = (1.0f - (float)i / NUM_BARS) * 0.6f + 0.1f;

  /* Create dynamic waveforms with slightly different sine frequencies */
  float wave1 = sinf(time_counter + i * 0.3f);
  float wave2 = sinf(time_counter * 1.3f + i * 0.1f);
  float combined_wave = (wave1 + wave2) / 2.0f; /* Range: -1.0 to 1.0 */

  uint8_t bar_val = (uint8_t)((combined_wave + 1.0f) * base_amp * (MAX_BAR_HEIGHT / 2.0f));

  /* Force trigger specific bars when the needle passes over them */
  if (abs(needle_x - (i * 8 + 4)) < 6) {
    bar_val = MAX_BAR_HEIGHT - (rand() % 10);
  }

  if (bar_val > MAX_BAR_HEIGHT) bar_val = MAX_BAR_HEIGHT;

  /* Update persistent peaks */
  if (bar_val > peak_heights[i]) {
    peak_heights[i] = bar_val;
    peak_fall_speed[i] = 0;
  } else {
    peak_fall_speed[i] += 0.2f; /* Gravity accelerating */
    peak_heights[i] -= (uint8_t)peak_fall_speed[i];
    if (peak_heights[i] > MAX_BAR_HEIGHT) peak_heights[i] = 0; /* Underflow check */
  }

  /* Draw the main bar (Solid) */
  uint8_t bar_x = i * 8;
  uint8_t bar_y = 10 + (MAX_BAR_HEIGHT - bar_val);
  u8g2_DrawBox(&myDisplay, bar_x + 1, bar_y, 6, bar_val);

  /* Draw the peak marker (line on top) */
  uint8_t peak_y = 10 + (MAX_BAR_HEIGHT - peak_heights[i]);
  u8g2_DrawHLine(&myDisplay, bar_x + 1, peak_y, 6);

  /* Draw a centered baseline shadow */
  uint8_t mid_y = 10 + (MAX_BAR_HEIGHT / 2);
  u8g2_DrawHLine(&myDisplay, bar_x + 1, mid_y, 6);
}
Next, draw the sub bass :
 /* 3. Draw the Sub-bass bouncing bar at the bottom */
float sub_wave = (sinf(time_counter * 0.8f) + 1.0f) / 2.0f; /* 0.0 to 1.0 */
uint8_t sub_h = (uint8_t)(sub_wave * 10.0f);
u8g2_DrawBox(&myDisplay, 0, 64 - sub_h, 128, sub_h);
Draw the moving tick:
/* 4. Draw moving tick marks over the sub bar */
for (int i = 0; i < 8; i++) {
  int tick_x = ((int)(time_counter * 10) + i * 20) % 140 - 10;
  u8g2_DrawVLine(&myDisplay, tick_x, 60, 4);
}
Finally, update the display:
u8g2_SendBuffer(&myDisplay);
Hence, the function as follows:
#define NUM_BARS 16
#define MAX_BAR_HEIGHT 40

void render_audio_visualizer(void)
{
    static uint32_t last_update = 0;
    static float time_counter = 0.0f;

    /* Persistent peak markers that slowly fall down */
    static uint8_t peak_heights[NUM_BARS] = {0};
    static float peak_fall_speed[NUM_BARS] = {0};

    uint32_t now = HAL_GetTick();

    /* Update ~30 frames per second (non-blocking) */
    if (now - last_update > 33) {


        u8g2_ClearBuffer(&myDisplay);

        /* 1. Draw UI Header */
        u8g2_SetFont(&myDisplay, u8g2_font_5x7_tr);
        u8g2_DrawStr(&myDisplay, 0, 7, "AUDIO SCAN");

        /* Sweeping needle that triggers the bars */
        uint8_t needle_x = (uint8_t)((sinf(time_counter * 0.5f) + 1.0f) * 60.0f);
        u8g2_DrawLine(&myDisplay, needle_x, 2, needle_x + 4, 7);
        u8g2_DrawLine(&myDisplay, needle_x, 2, needle_x - 4, 7);
        u8g2_DrawVLine(&myDisplay, needle_x, 0, 8);

        /* Right aligned dB text */
        u8g2_DrawStr(&myDisplay, 100, 7, "-12.4dB");

        u8g2_DrawHLine(&myDisplay, 0, 9, 128);

        /* 2. Draw the 16 Spectrum Bars */
        for (int i = 0; i < NUM_BARS; i++) {
            /* Simulate an audio curve (lower freqs have higher amplitude, falls off to right) */
            float base_amp = (1.0f - (float)i / NUM_BARS) * 0.6f + 0.1f;

            /* Create dynamic waveforms with slightly different sine frequencies */
            float wave1 = sinf(time_counter + i * 0.3f);
            float wave2 = sinf(time_counter * 1.3f + i * 0.1f);
            float combined_wave = (wave1 + wave2) / 2.0f; /* Range: -1.0 to 1.0 */

            uint8_t bar_val = (uint8_t)((combined_wave + 1.0f) * base_amp * (MAX_BAR_HEIGHT / 2.0f));

            /* Force trigger specific bars when the needle passes over them */
            if (abs(needle_x - (i * 8 + 4)) < 6) {
                bar_val = MAX_BAR_HEIGHT - (rand() % 10);
            }

            if (bar_val > MAX_BAR_HEIGHT) bar_val = MAX_BAR_HEIGHT;

            /* Update persistent peaks */
            if (bar_val > peak_heights[i]) {
                peak_heights[i] = bar_val;
                peak_fall_speed[i] = 0;
            } else {
                peak_fall_speed[i] += 0.2f; /* Gravity accelerating */
                peak_heights[i] -= (uint8_t)peak_fall_speed[i];
                if (peak_heights[i] > MAX_BAR_HEIGHT) peak_heights[i] = 0; /* Underflow check */
            }

            /* Draw the main bar (Solid) */
            uint8_t bar_x = i * 8;
            uint8_t bar_y = 10 + (MAX_BAR_HEIGHT - bar_val);
            u8g2_DrawBox(&myDisplay, bar_x + 1, bar_y, 6, bar_val);

            /* Draw the peak marker (line on top) */
            uint8_t peak_y = 10 + (MAX_BAR_HEIGHT - peak_heights[i]);
            u8g2_DrawHLine(&myDisplay, bar_x + 1, peak_y, 6);

            /* Draw a centered baseline shadow */
            uint8_t mid_y = 10 + (MAX_BAR_HEIGHT / 2);
            u8g2_DrawHLine(&myDisplay, bar_x + 1, mid_y, 6);
        }

        /* 3. Draw the Sub-bass bouncing bar at the bottom */
        float sub_wave = (sinf(time_counter * 0.8f) + 1.0f) / 2.0f; /* 0.0 to 1.0 */
        uint8_t sub_h = (uint8_t)(sub_wave * 10.0f);
        u8g2_DrawBox(&myDisplay, 0, 64 - sub_h, 128, sub_h);

        /* 4. Draw moving tick marks over the sub bar */
        for (int i = 0; i < 8; i++) {
            int tick_x = ((int)(time_counter * 10) + i * 20) % 140 - 10;
            u8g2_DrawVLine(&myDisplay, tick_x, 60, 4);
        }

        u8g2_SendBuffer(&myDisplay);
    }
}
Finally, in while 1 loop, in user code begin 3, call the function:
render_audio_visualizer();
hats all for the firmware. Save the project and run it on your MCU as follows:

You may download the project from here.
3. Results:
You should get something like this
Next, we shall use encoder and push button to create multiple page UI.
Stay tuned.
Happy coding 😉

Add Comment