

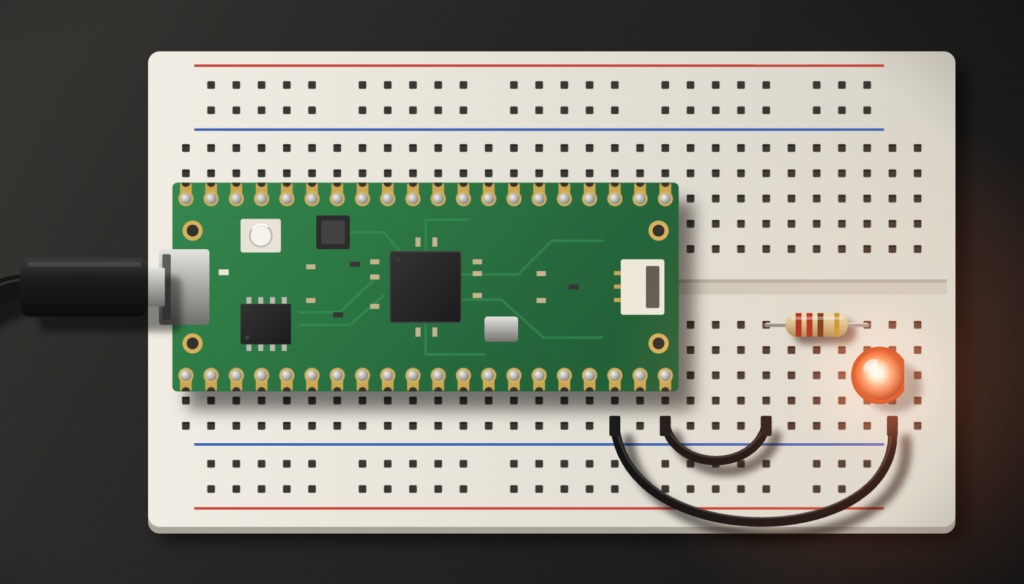
With your RP2350 toolchain verified in Part 1, it’s time to make the board actually do something — blink an LED. This guide walks through the GPIO output API, the build-and-flash loop in VS Code, and how to read the timing so you know your code, not luck, is driving the pin.
In this guide, we shall cover the following:
- Introduction.
- Firmware Development.
- Results.
1. Introduction:
In Part 1, you set up the RP2350 toolchain in VS Code and flashed a program to prove the environment works. Now it’s time to write something you can actually see. Blinking an LED is the “hello, world” of embedded development for good reason: it exercises the entire path from source code to a physical pin, and it gives you a repeatable build-flash-observe loop you’ll use for every project after this.
This guide assumes only what Part 1 established — a working Pico extension setup, a board you can flash, and a USB cable. We’ll start with what a GPIO pin actually is and how the RP2350 exposes it through the SDK, then write a minimal blink program, build it, flash it, and adjust the timing so the result is visibly correct. Along the way you’ll learn why the delay matters, why the pin must be configured as an output before you drive it, and how to tell a code problem apart from a wiring problem when the LED doesn’t light. By the end you’ll have a blinking LED and, more importantly, a mental model of the output path you’ll reuse for buttons, sensors, and every peripheral that follows.
2. Firmware Development:
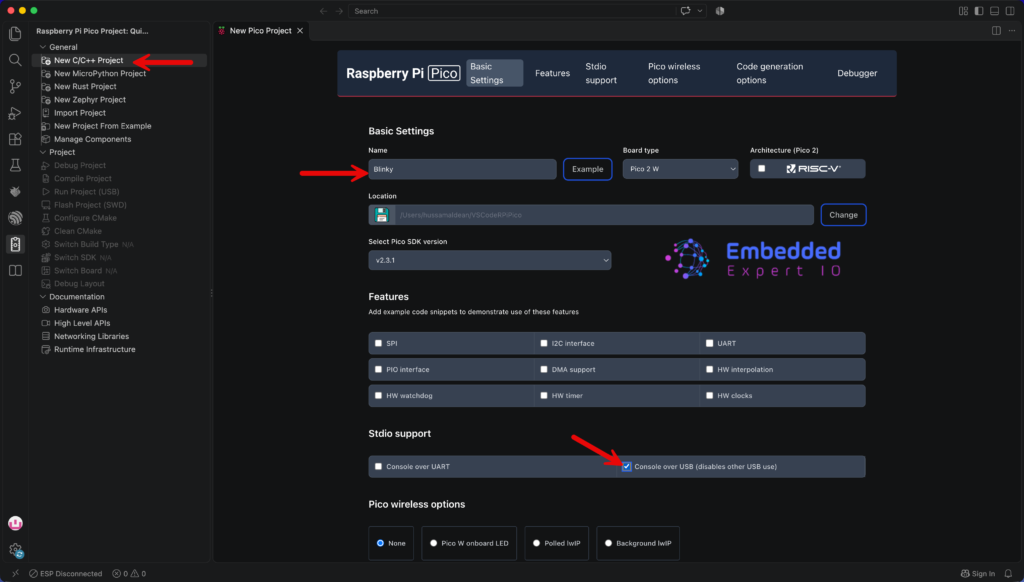
We start by creating new project as follows:
- Give the project a name (Blinky in this case)
- Enable console over USB.
- Click on Create
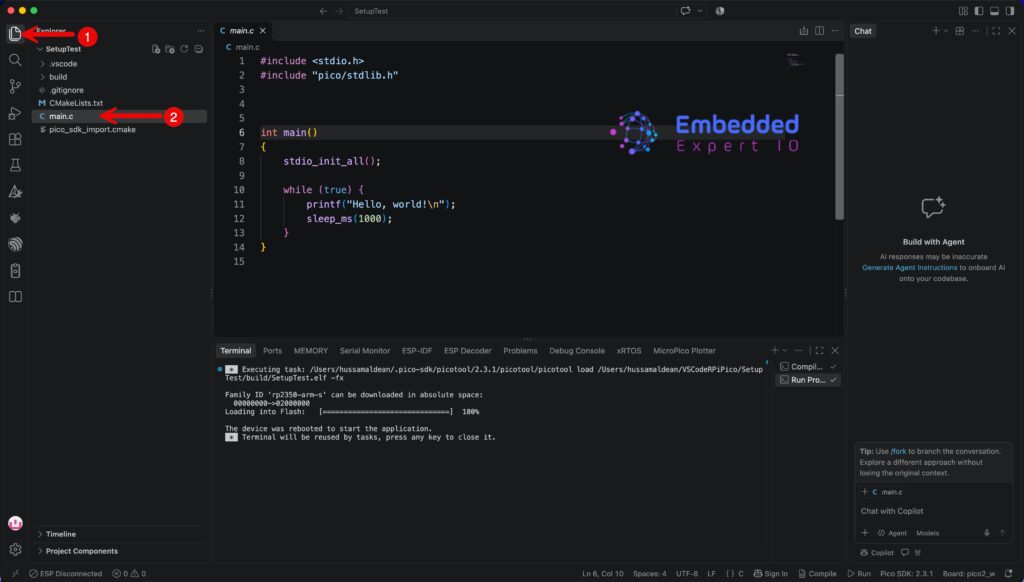
Once the project has been created, open main.c as follows:
Now, we have two variant of Pico 2, one with WiFi and the other without the WiFi. We shall cover both in this guide.
2.1 Pico 2 W Firmware:
In main.c include the wifi chip header file as follows:
#include "pico/cyw43_arch.h"
Next, in main function before the while loop, initialize the WiFi chip as follows:
if (cyw43_arch_init()) {
        return -1;
    }
Next, in while 1 loop, toggle the LED state as follows:
        cyw43_arch_gpio_put(CYW43_WL_GPIO_LED_PIN, 1);
        sleep_ms(500);

        // Turn LED off
        cyw43_arch_gpio_put(CYW43_WL_GPIO_LED_PIN, 0);
        sleep_ms(500);
Next, open CMakelists.txt
Add the following line to target_link_libraries as follows:
target_link_libraries(Blinky
        pico_stdlib
        pico_cyw43_arch_none
        )
Hence, the full code as follows:
#include <stdio.h>
#include "pico/stdlib.h"
#include "pico/cyw43_arch.h"


int main()
{
    stdio_init_all();
    // Initialize CYW43
    if (cyw43_arch_init()) {
        return -1;
    }

    while (true) {
// Turn LED on
        cyw43_arch_gpio_put(CYW43_WL_GPIO_LED_PIN, 1);
        sleep_ms(500);

        // Turn LED off
        cyw43_arch_gpio_put(CYW43_WL_GPIO_LED_PIN, 0);
        sleep_ms(500);
    }
}
Thats all for the Pico 2 W firmware.
3.3 Pico 2 Without WiFi:
For non WiFi variant, we start by defining the LED pin, which is connected to GPIO25:
const uint LED_PIN = 25;
Next, in main function, initial the pin and set it to output as follows:
    // Initialize GPIO
    gpio_init(LED_PIN);
    // Set pin direction to output
    gpio_set_dir(LED_PIN, GPIO_OUT);
In while 1 loop toggle the state of the LED:
        // Turn LED on
        gpio_put(LED_PIN, 1);
        sleep_ms(500); // Wait 500 milliseconds

        // Turn LED off
        gpio_put(LED_PIN, 0);
        sleep_ms(500);
Hence, the full code as follows:
#include "pico/stdlib.h"

// On standard Pico, onboard LED is connected to GPIO 25
const uint LED_PIN = 25;

int main() {
    // Initialize GPIO
    gpio_init(LED_PIN);
    // Set pin direction to output
    gpio_set_dir(LED_PIN, GPIO_OUT);

    while (true) {
        // Turn LED on
        gpio_put(LED_PIN, 1);
        sleep_ms(500); // Wait 500 milliseconds

        // Turn LED off
        gpio_put(LED_PIN, 0);
        sleep_ms(500);
    }

    return 0;
}
Thats all for the firmware.
3. Results:
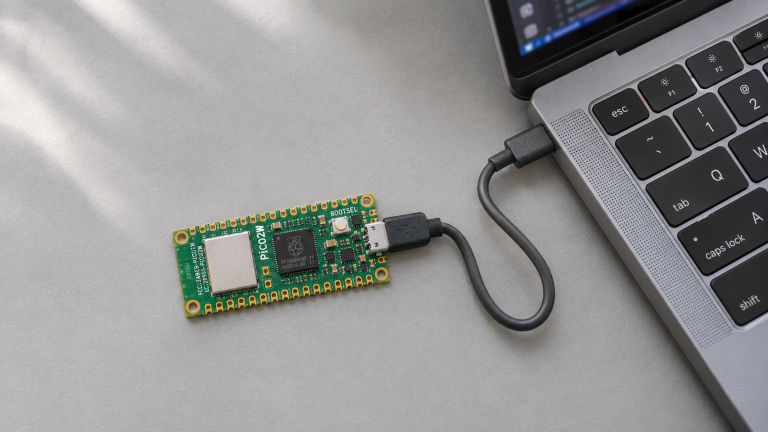
First, hold the boot select button on your Pico and connect your USB cable as follows:
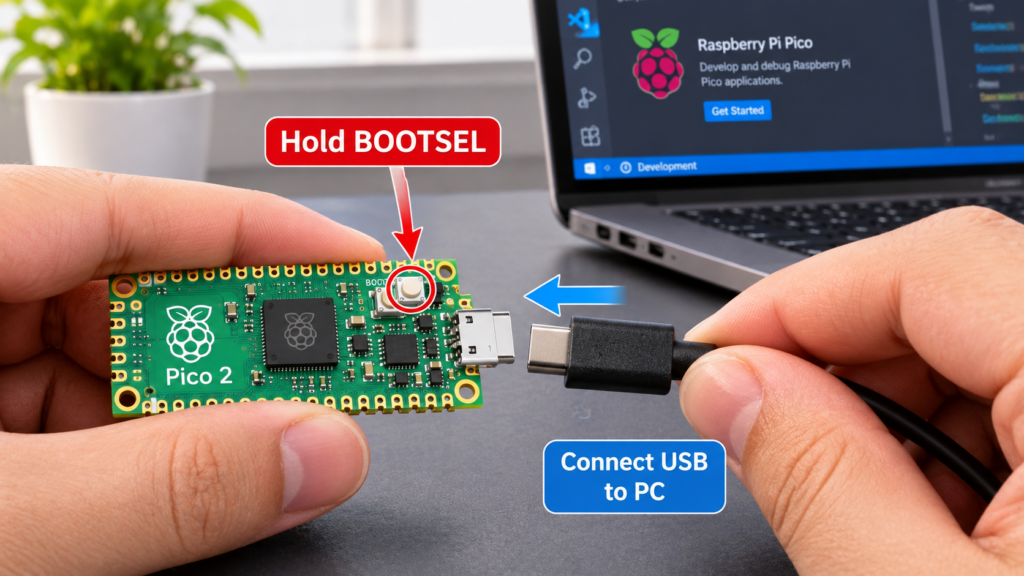
This will mount the flash as external storage.
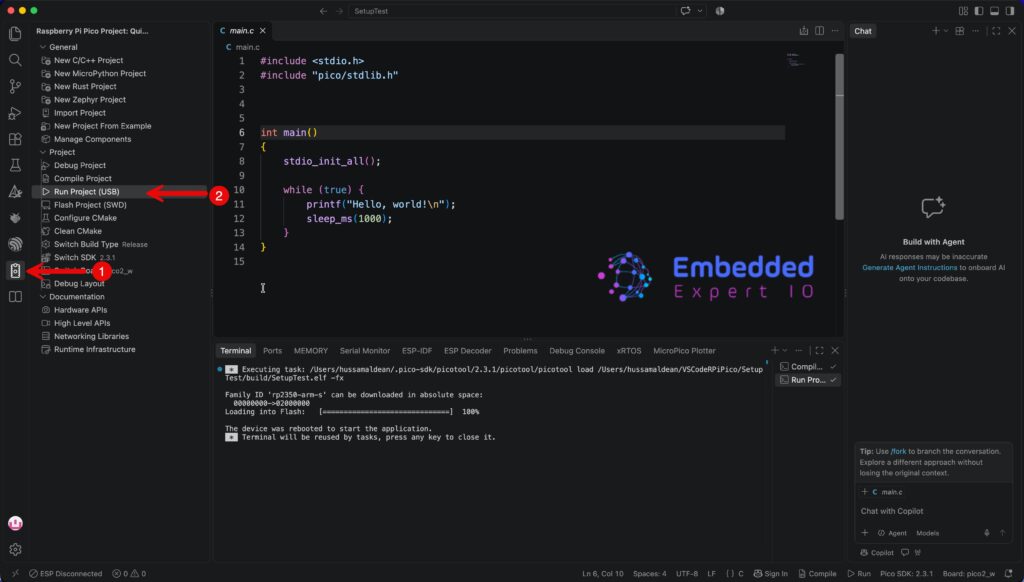
Next, from Raspberry Pi Pico extension, click on Run Project (USB) as follows:
You should get the following:

In next part, we shall configure a GPIO as input and control the LED state.
Stay tuned.
Happy coding 😉
Discussion